When I caught the kerb with the under body of the car it didn't occur to me just how low to the ground the 'A' Class bodywork is, and I've read of owners lowering their cars even further by various means. 4" of snow and I'm sure they will be driving sleighs!
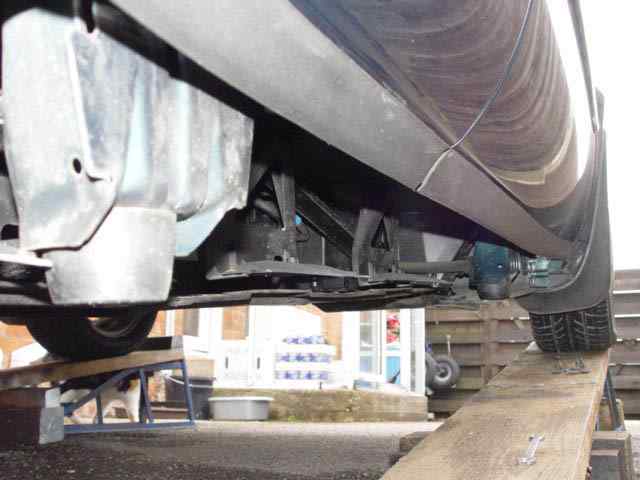
So having measured the gap between the front sub frame stubs at the front of the car, and the ground I was surprised to see that it is only about 14cm off the ground, hardly enough to clear the average sleeping policeman and goodness only knows we have plenty of them in the South Of England! When your four up remember the situation will be even worse. 'A' In the photo is the a standard house brick, so running over debris, like a piece of 4" x 2" is going to cause real damage to the under floor panels unless you are very fortunate.
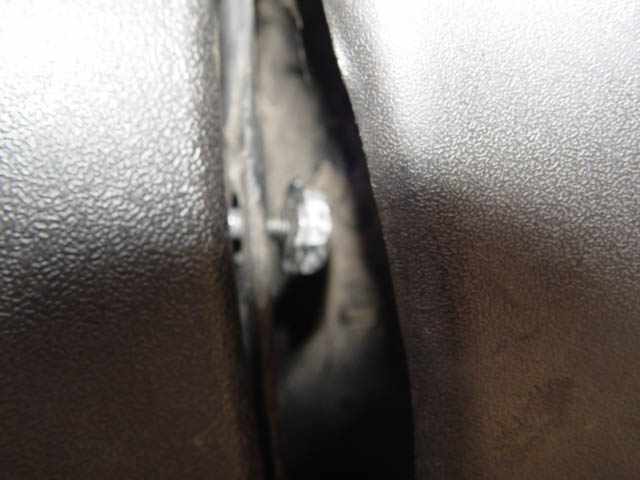
Yes you got it I have damaged the underside of the car! My own fault I just wasn't thinking straight and bang, followed by lots of new rattles as I drove along, one could have been forgiven for thinking it was worn drop link the noise was incredible, in fact all it was,(All it was) was a split in the off side lower sill, Revised Part Number O/S 168-610-02-08.Part Number N/S 168-619-01-38 cost £40.00, I assume plus VAT either way for the size if the item very reasonably priced, even if it is only plastic. So how about a repair? well we will need to take it off first and see just how bad the damage is.
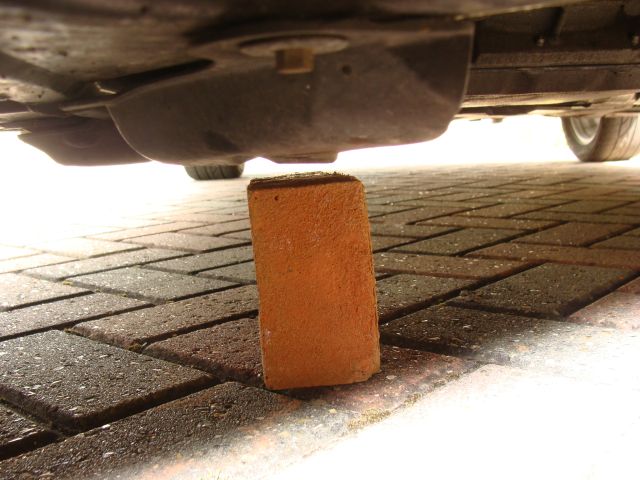 The lowest spot on the underside is the pastic sheilding below the front sub frame under the off/side which is only 118mm (4&5/8 of an inch.")clear of the ground on my A160 Petrol car with the original/standard suspension.
Bearing in mind that the maximum legal height for a (speed Hump) 'sleeping policeman' is 80mm that does not leave a lot of room, also bear in mind that the measurements were taken with out the possible 4 adults and suitcases in the car which clearly indicates that you need to treat these Hazards with respect.
How the law allows local authorities to install these on roads that have a legal speed of 30 MPH with out adequate warning of their presence beats me but they do, so take care as these will damage your car and can damage the steering gear and tyres.
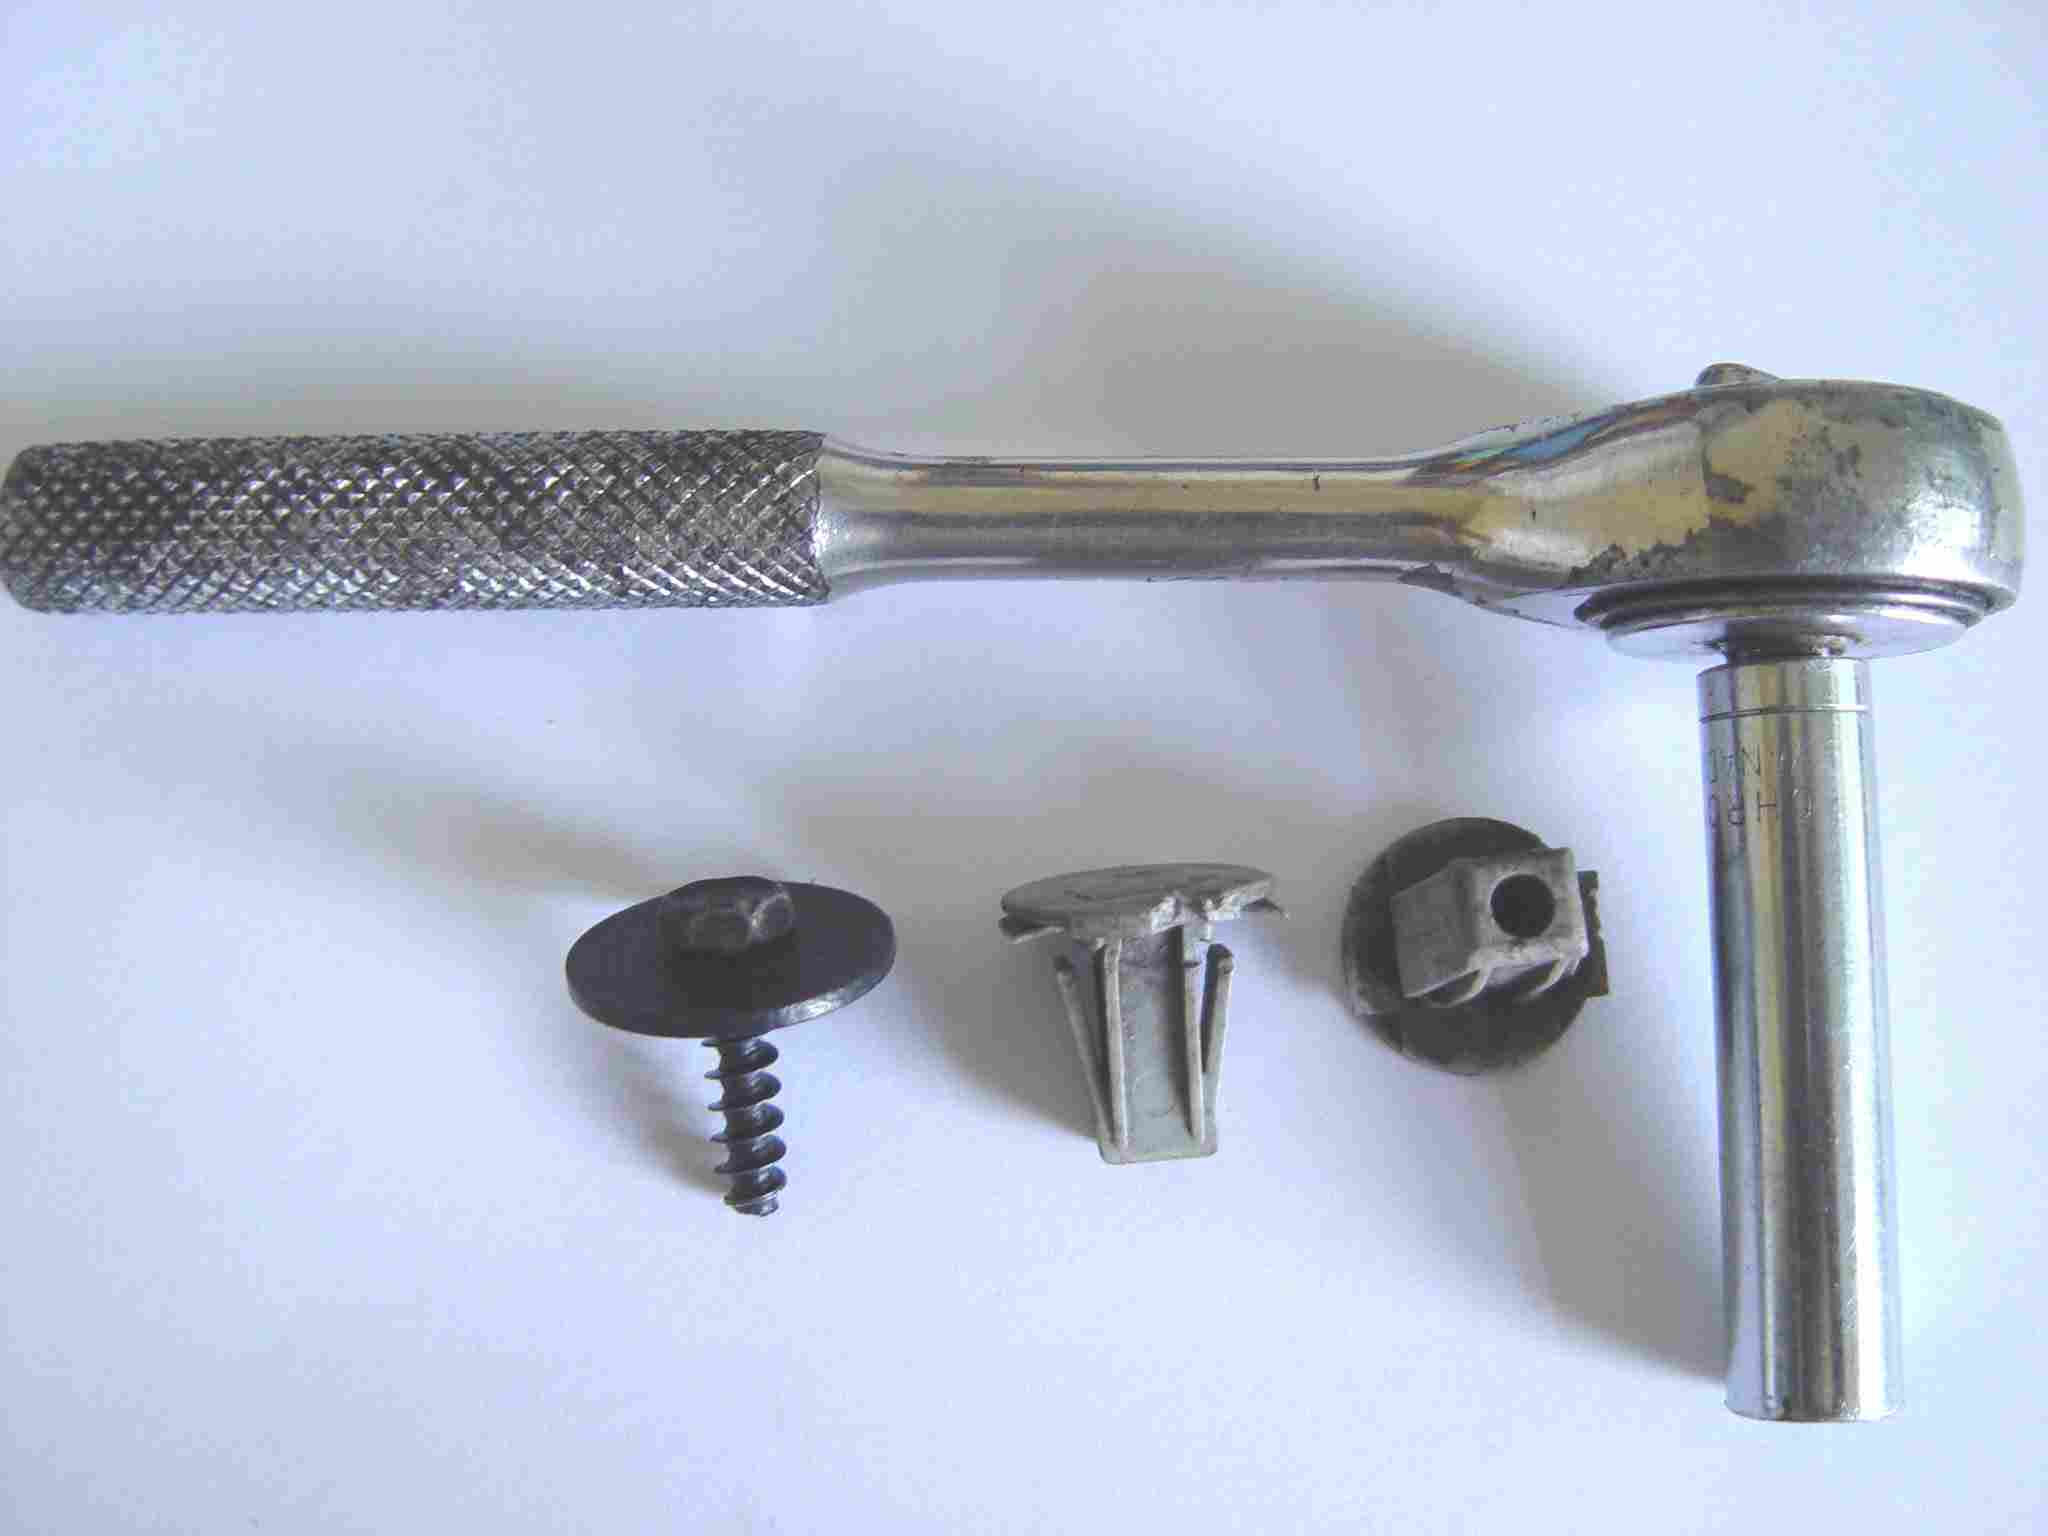
Removing the side sill is pretty straight forward, there are three different types of fixings securing the sill, The stud & pin type of fixing as used on other parts of the car, Withdraw the pin using wide flat bladed screwdrivers and then remove the stud body.
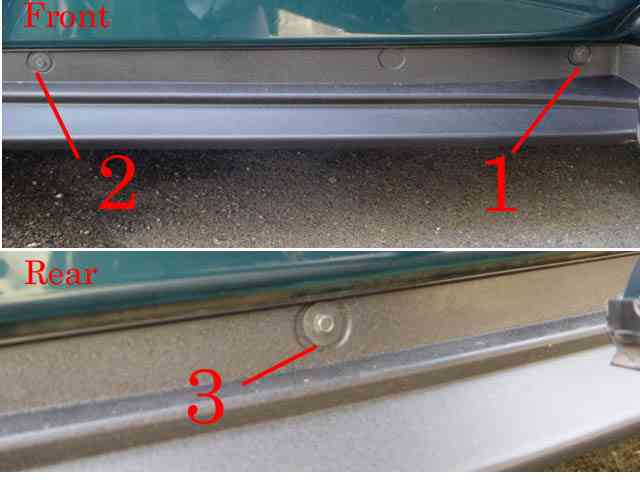
 there in two of these units in the rear wheel arch. it is possible to remove them without taking the wheel off.
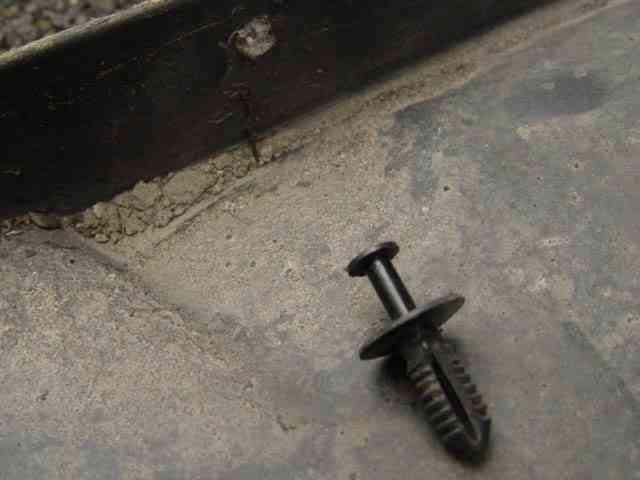
 At the front just inside the wheel arch tucked behind the mud flaps if fitted is a screw bolt this also has to be removed
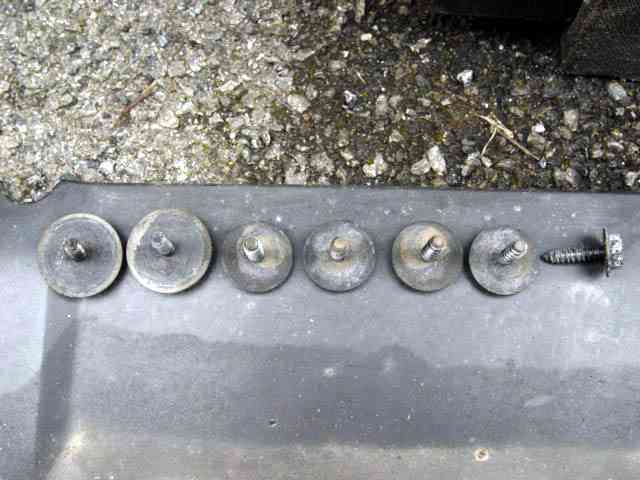 Then we have the normal screws that secure the floor pans to the underside of the body work, all of these which run along the side of the damaged panel have to be removed.
Having removed all the screws from the underside as well as front and rear fastenings.
 Now open the two doors, one further screw will be found on the rear door slam and two on the front door slam.
At this point the panel will need to be supported to prevent further damage. When these last three screws the panel can be slid from beneath the under floor panels, Remember the side panel will need to be replaced under these panels when being re-installed.
Having removed the sill the area of damage can be inspected and assessment as to whether a repair is possible. If doing the job yourself and you have the necessary tools then the cost is minimal, although you do need to take your time.
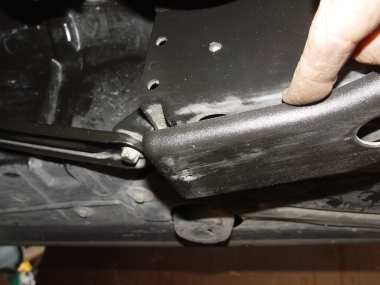
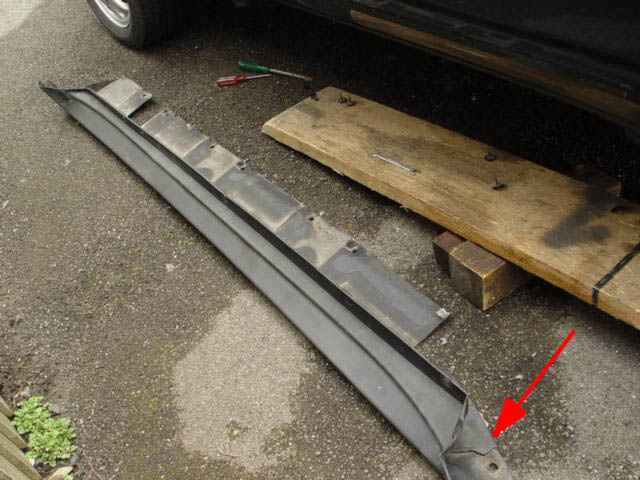
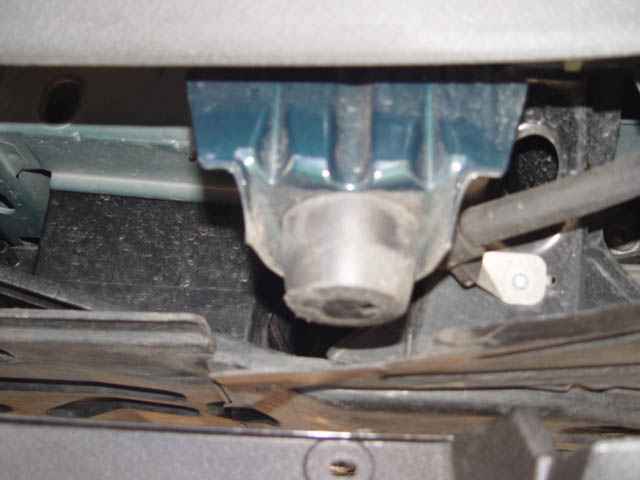 Now the sill is removed it becomes very obvious why it is so easily damaged and why it is vitally important to use the jacking points for raising the car.
Not also the sill support brackets B

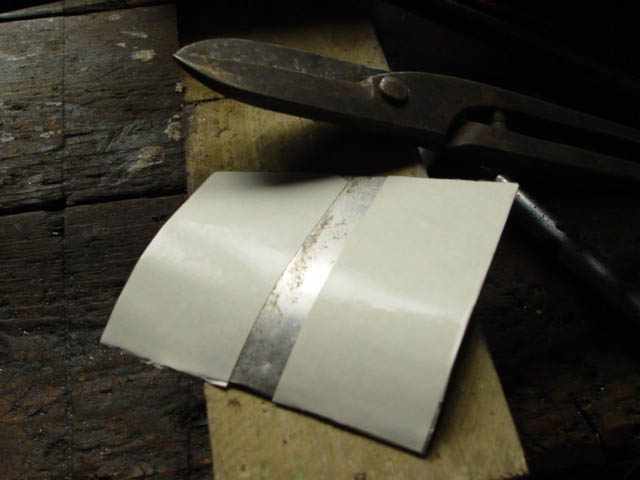 If Repairing. Our first job is to find a piece of aluminium plate about 1/6" thick any thicker and you will have a job to shape it to the profile of the sill.
When you have shaped and trimmed the plate ensuring that is a good snug fit apply double sided adhesive tape to the surface which goes to the inside, this will assist in holding the plate in the correct position while you drill holes for riveting. (Make sure all surfaces are clean before attempting to apply the tape)
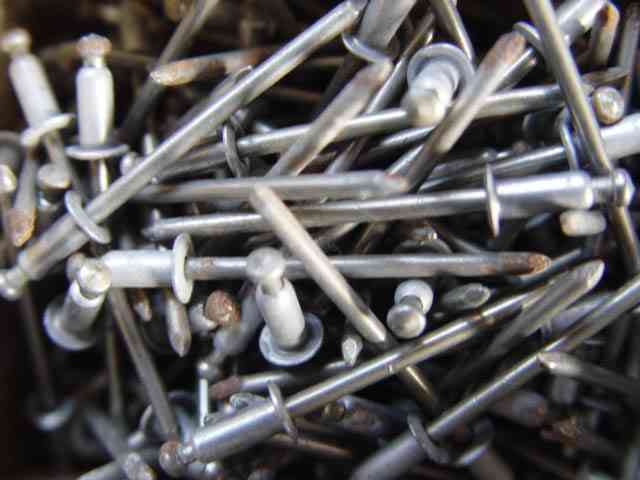
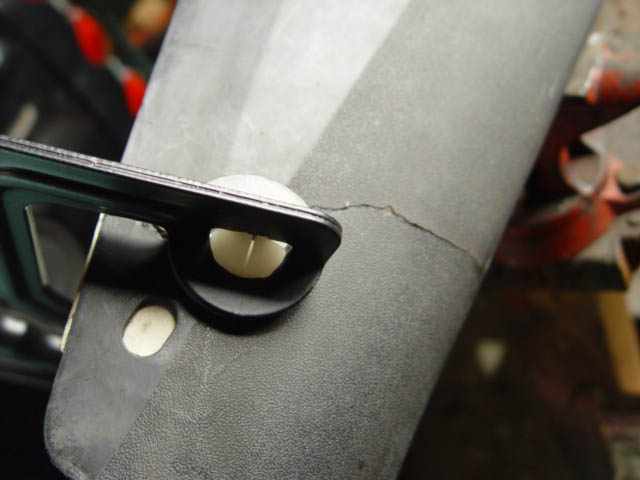 Place the plate in position and clamp. Using a 4mm drill, drill from the metal side ensuring all hole are clean. Apply 4mm X 1cm rivets applying the rivet from the plastic sill side. This is important or the rivet will cut/tear the plastic and will not firm. hold.
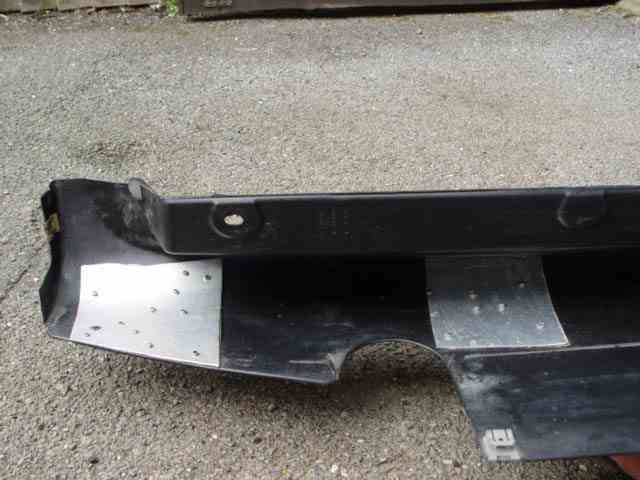
Once the plates are riveted the sill should be as good as new, 90% of the work carried out on the sill will be hidden behind the sill, and the completed job in this case will be out of sight. Touch up the rivet heads with a bit of matt black paint and you will hardly see the repair and you will again have saved £££££££££.
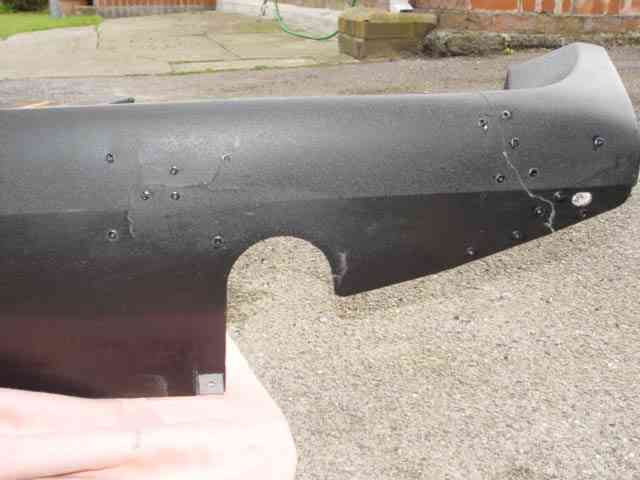
If you wanted to do a better job then you could fill the split caused by the tear/damage, but getting filler on the plastic would in my opinion cause more damage to the appearance of the sill so I didn't bother.
Bear in mind that the section you can at present in the photo will be well under the side of the car when fitted back on the car.
In position, in one piece and all the rattles gone, Now the jobs not quite finished to tart it up using detergent and water and a nail brush thoroughly clean the sill's then use a plastic treatment like "Armorall" a milky like fluid which really does make your plastic look like new stops looking pale and lifeless. Job Done
So if you like me have that odd accident or hear rattles of the expensive kind, before you jump to conclusions and check your drop links or pull your wheels off looking for defects or take the car to the garage check for sill damage, something easy to do when parking or driving with the inconsiderate local authorities and high curbs which foul the underside of even the average spoiler and side sill causing untold and expensive damage
Despite the repair being successful some months later due to noises coming from what appeared to be that area of the car have decided to replace it with a new sill, if only to eliminate it from the possible causes.
In the course of fitting the New unit which had to be ordered by my MB branch, several points came to light which I had not previously noticed or taken into account.
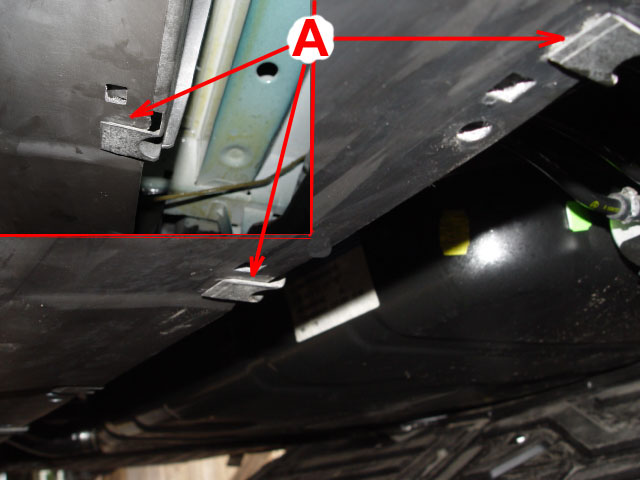
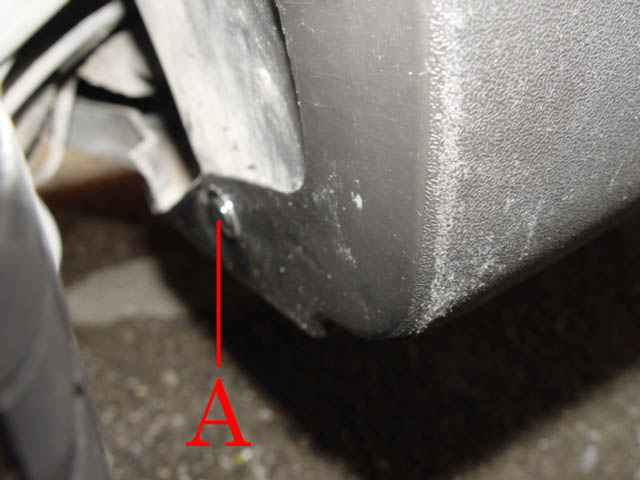
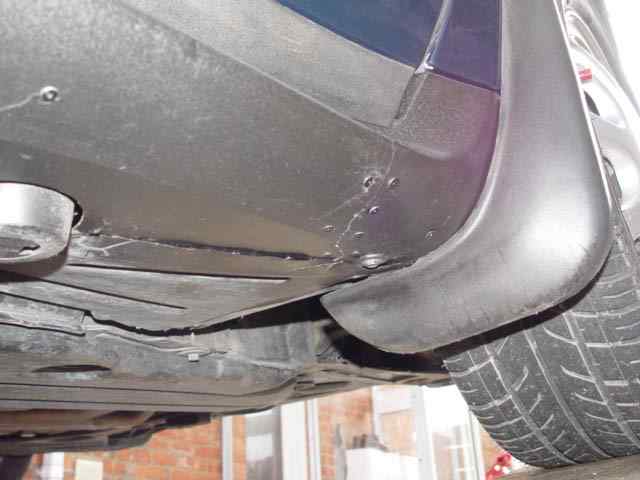
For instance when you replace the side sill, be it repaired or new; as you place the sill back onto the car you will find three plastic brackets secured to the metal bodywork of the car. On the bottom edge of each of these you will find two right angled toes, marked A on the photo, These toes must be fitted so that they support the sill. When correctly fitted it will be noticed these are pre-formed along with a lug on one of each of the toes of the bracket, these toes support the bracket and the lug engages into a preformed hole in the sill, this is situated along side the securing toes of each bracket. Should you fail to site these features correctly the sill will rattle.
Having ensured they are correctly positioned support, fit the three screws on the facing edge of the door frames, front and rear doors,
1,2 and 3
then replace the securing fittings front and rear of the sill. If you have mud flaps remember the bolt which fits behind the flap. Then re-position the under floor panels and secure.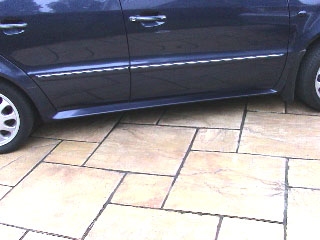

Another job that can be undertaken which certainly improves the look of the car is to colour code/paint the side sills as john has done, I asked John what procedure he followed?
The first task, was to rub the sills and bits on the base of the doors, to remove the dimpled effect and create a smooth surface. The plastic primer was sprayed on first, and allowed to dry. After 24 hours, I sprayed 3 coats of colour, followed by 3 coats of Clear Lacquer. The primer and lacquer were bought from Halfords, and the colour, from Mitchell's in Burgess Hill in west Susses UK ,
The primer was 300 ml; lacquer 500 ml; and colour, 300 ml. Certainly used all of the primer and colour, but the lacquer was not new, so do not know ho much was used.(Halfords offer aerosols in both 300 ml and (for bit more,) 500 ml.)
The edges under the doors are a bit tricky, in that they are rubber, and flex a bit. Quite difficult and time consuming to get a smooth finish. Would possibly suggest that Bumper Paint, might be a better alternative, to the Plastic Primer. But, as I said, Halfords now advertise that they can make up any colour. Thanks John.
I truly think it looks great and is worth considering, it would almost certainly make them easier to keep clean as the black plastic tends to go grey unless continuously treated with special products such as Auto-Glym, Bumper Care. However if you do consider doing this yourself you are best advised to remove the sills and only undertake to job when the weather is warm, remember also that you will need to use an undercoat suitable for plastic coating, as john did, available from such outlets as Halfords this keys to the plastic and ensures your top-coat does not chip & peel away after a few months.
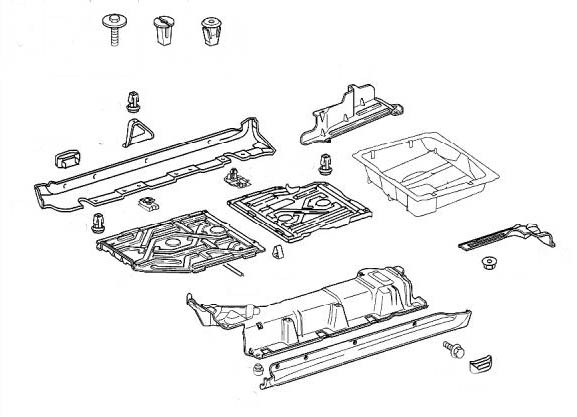
Removing the under-floor plastic pans.
The plastic pans vary on different models there is for instance a full pan under the diesel models , However on the petrol model 2002 there is only a small pan which protects the road grim from fouling the alternator ,air conditioning compressor. Note that with out a vehicle lift these cannot be completely removed as they have to be dropped to right angles before they can be released from the retaining hinges. They can however be lowered to do some maintenance. Each panel over-laps the other from the front, and have to be replaced in the reverse order to lowering.
In addition to the pans there is a strip on the near side which protects the sub frame, while under car recently I found that this was loose and appeared completely insecure at the back end I drilled the plastic and metal sub frame and secured it with a screw and washer . One less rattle!
The panels are secured by screws with 8mm bolt head these screw into plastic fixed speed nuts which are pre-engaged into squares cut into the metal chassis, these are locked in position by the two engaging flaps.
If in the process of fitting these you should over-tighten then they can be easily replaced and only cost a few pence each, failure to tighten these sufficiently and the pans will drum as you drive along.
Having placed my panels back into position for screwing I apply a flat board on a trolley jack to hold them firmly in position while I apply the screw Part Number 168 990 136 into the respective holes. This ensure the panels are tightly fitted.
 If panels for any reason become split they are best replaced and they are very thin, and are not easily repairable.
For further information on the sub structure and fitting use this link. Sub structure fittings and detail.
Next.
Back to Index,
Purchase DVD.
Please Make a Donation.