Component Parts & Assembly
Services to Rear of Car & Boot Lid.
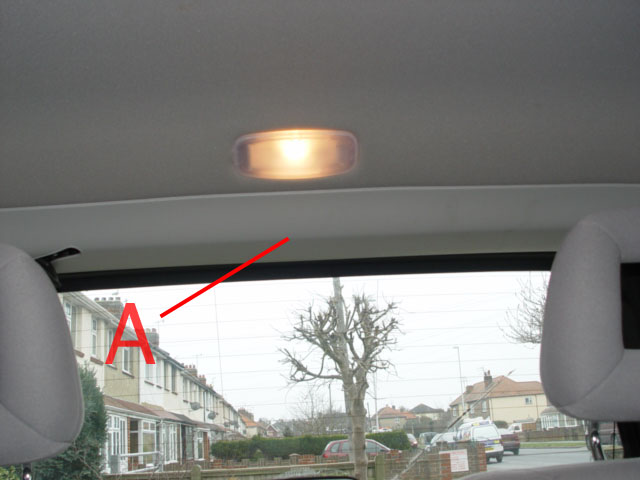
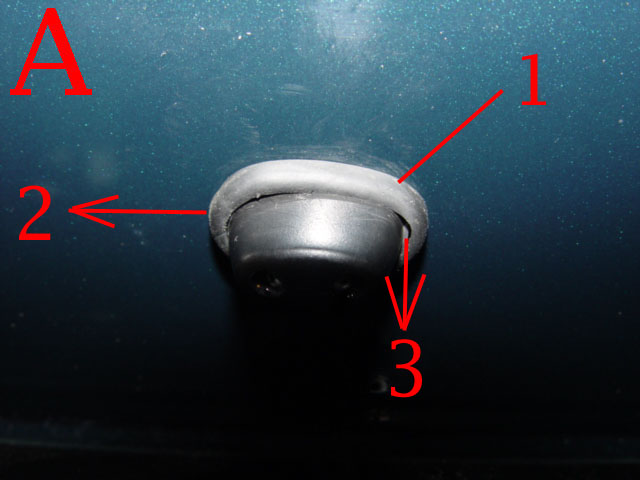
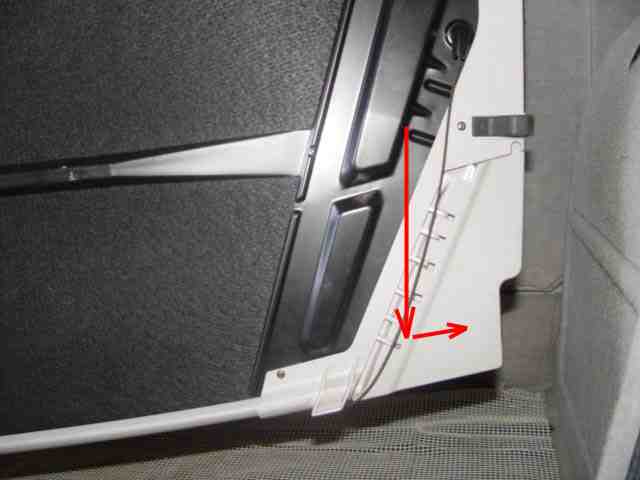
If there is a need to access the services serving the boot lid(5th Door) then panel
A
will need to be removed.
This is best done using plastic tools which are unlikely to damage the plastic moulding. Ease the plastic panel away evenly and without applying undue force the clips will then give way allowing you to fully remove the panel.
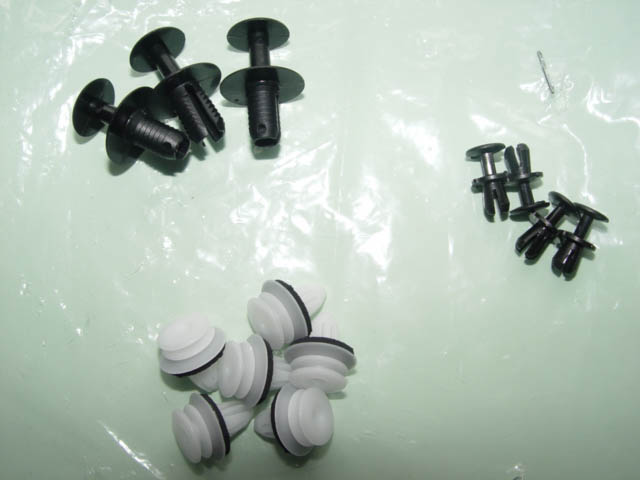
Remember if you are going to work on the inner boot cover or door linnings you will need spare studs as you are almost bound to break one or two, studs are also required for the boot lock surround on the base of the 5th door. the 4 small studs shown are the ones I use to secure the boot inner linning firmly.
Part No's large black studs MA201 990 02 92 9051 3307 rivet, Small black studs MA 201 990 01 92 3303 rivet, White clips/studs MA000 991 01 98. Note that the white pop studs purchased from other outlets do not hold the panels firmly, albeit they are cheaper!
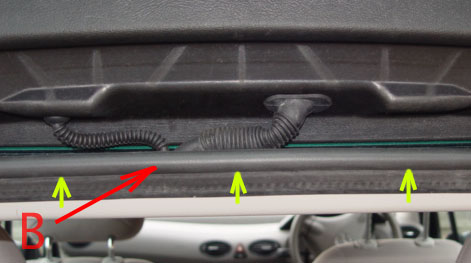
However the first job is to ease the rubber boot seal
B
up, so as to release the back edge of the moulding.
The moulding is held in place by the white plastic clips as used on interior door panels and boot lining. When next at MB or a good body shop it is worth purchasing a few of these as spared as they can break or flatten which then needs them to be replaced.
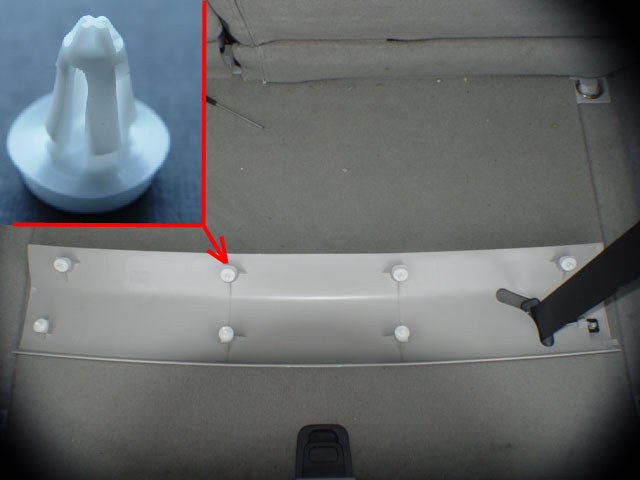
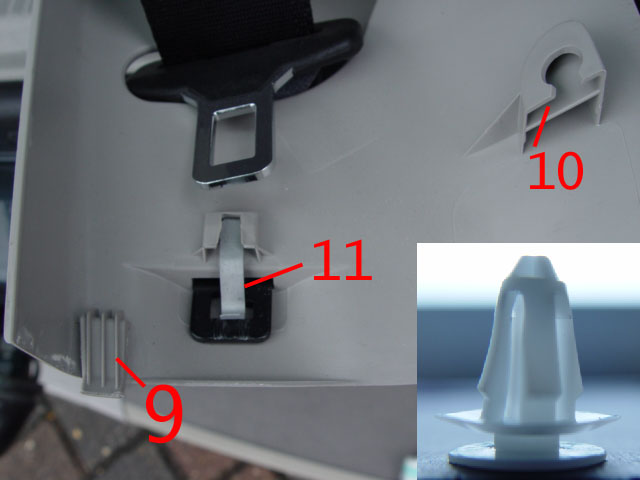
To remove the panel, having eased the rear boot seal, working from inside the car and using suitable tools ease the elongated panel down from the roof lining. when at an angle of about 45% ease the panel towards the nearside of the car, this will release the fixed clip 9
situated on the O/Side end of the panel. Note the space left into which the white clip slides
10
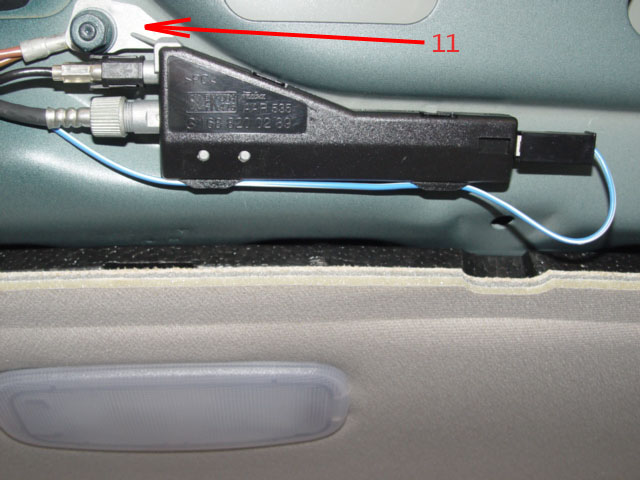
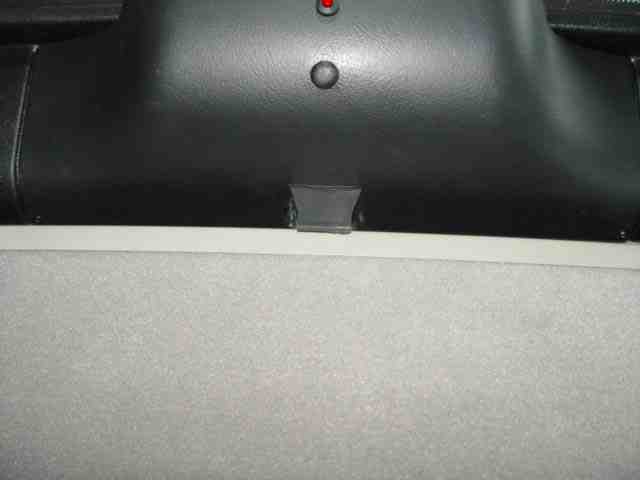
also the metal clip which holds the central rear seat belt male coupling when not in use 11
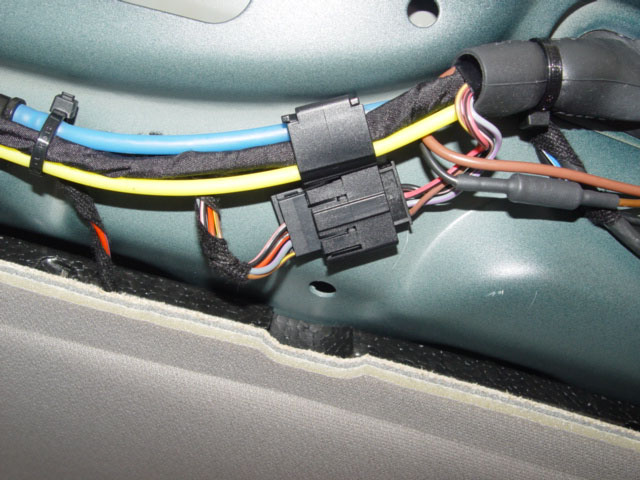
Having removed the panel all is revealed, Very neat and compact.
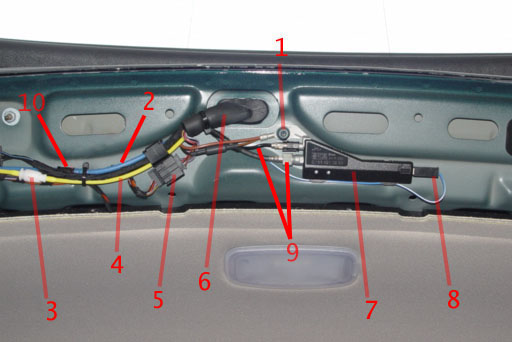
*
1
Earth contact *
2
Rear washer hose *
3
Vacuum tube connector *
4
Vacuum tube to boot lock. *
5
Electrical contact block lights *
6
Access services to boot lid *
7
Radio aerial booster *
8
Power lead to booster. *
9
Aerial connections *
10
Rear washer tube connection
This contraption is an electrical powered aerial booster for the car radio. Note the earthing plate, 11
this is needed to earth the various services owing to the fact that the boot door is moulded from plastic. The earth is therefore carried in the loom from an earthing point on the body of the car. If you have problems with lighting or your radio it is well worth while check this point one to ensure it is clean and two for tightness.
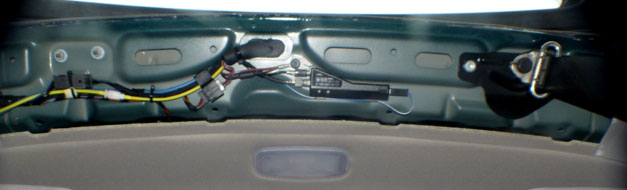
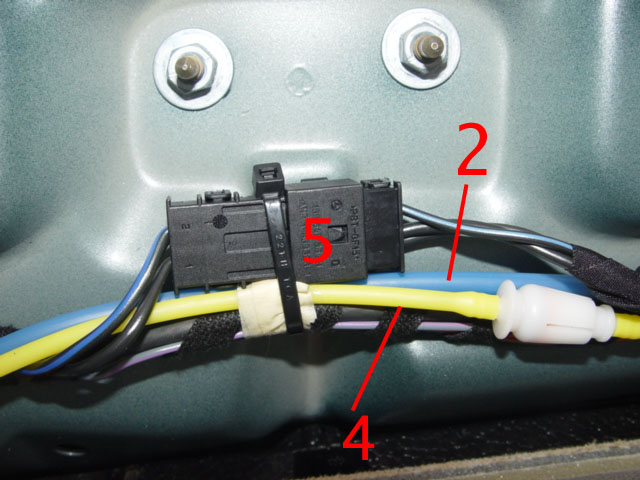
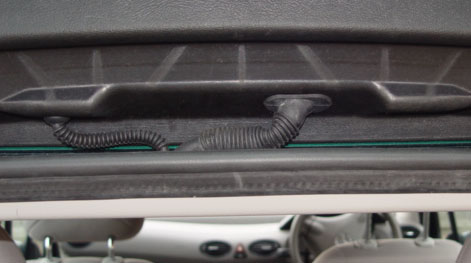
This photo shows the point at which the required services leave the car, entering the two gaiters and make there way into the body work of the 5th door to the boot.
5
Supplies power for:- Two rear number plate lights. * High level stop
light, * Power feed to aerial booster Heater element within the rear window * 4
Shows the joint within the vacuum tube servicing the rear boot lock. *
2
Is the rear washer hose which is feed from the main reservoir and single pump on the N/S front engine compartment.
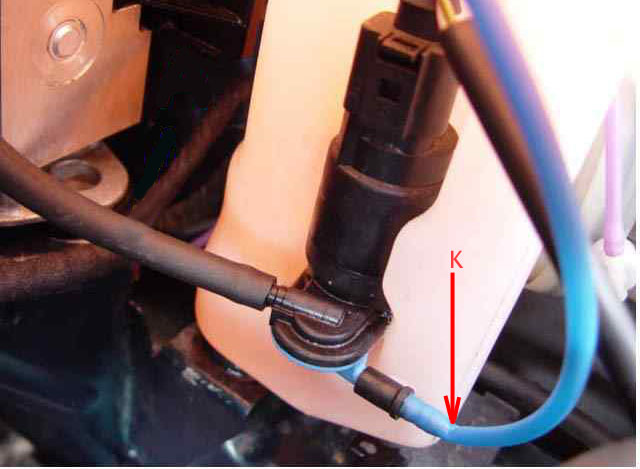
Remember if working on the blue, rear washer hose it runs the full length of the car so take care if cutting back or working on it.
Note also that this stiff tube tend to kink at point
K
which can effectively cut off the screen wash fluid to the rear of the car.
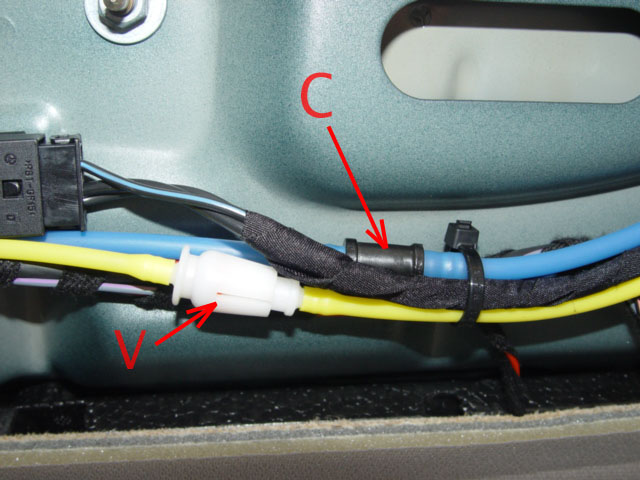
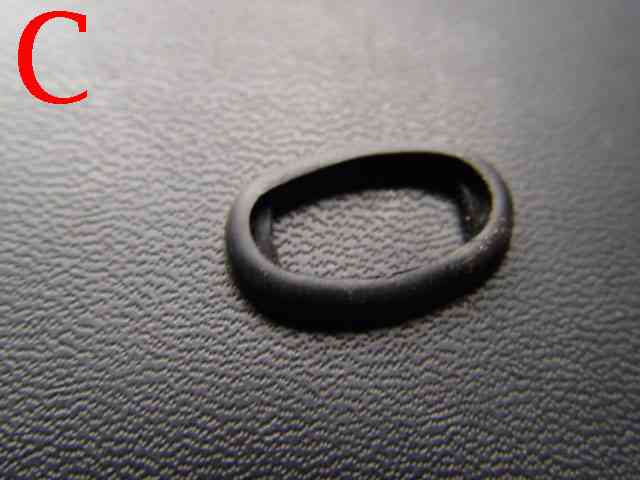
In this photo shows the rear washer hose connector
C
This item has been the cause of many a wet boot, due to it leaking, When you operate your rear washer do check that water discharges from the nozzle. If the front screen washers work but not the rear then you may need to check why? And this would be my first port of call! This is the only vacuum tube
V
going to the boot lock so if your boot lock fails to operate correctly you my need to check this joint for leaks.
Removal of Rear Washer Jet
Should it be necessary to remove the rear washer jet* This is easiest done by removing the small oval gasket which surrounds the jet body
. C * Then gently push the jet sideways, towards the near side of the car the jet will move about 3/16"
A
now ease the right hand end of the jet down and out of the spoiler. Tools are not required.
(The procedure is the same as for removing the repeaters indicators lamps in the wings)
I cannot advise you further, accept to say that the tubing is very stiff and that this will not make it easy getting the jet completely from the spoiler.* However if the tube has come off the jet you will find that threading a curtain spring wire through the hose from the rear joint end will assist you in locating the hose end * If cutting back the tubing, remove only the minimum amount or you will need to replace the tube due to restricted length.
* Warm the tube ends in hot water to make it supple before attempting to fit it to the jet and hose joint, also ensure the tubing within two to three inches if the jet is warmed and supple when attempting to replace it into the spoiler. A Heat gun could be used for this purpose provided great care is taken to ensure paintwork and pipe are not damaged.
*Replace the jet inserting the left hand side first followed by the right, re-fit the gasket which locates on a small raised shoulder.
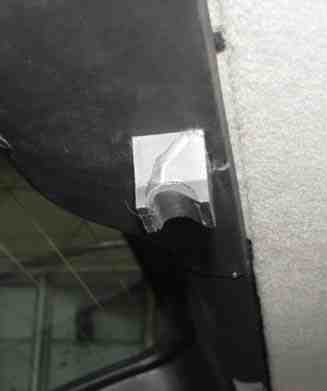
These two flexible rubber gaiters carry the services into the 5th door Boot lid, take care not to split them if removing or working near them , they cannot be replaced without feeding all the services through first!
Remember to fit the N/S end of the panel into position before pressing the rest of the panel and clips home. the panel is a snug fit when fitted correctly.
Link to Rear wiper motor and assembly. information If your removing the parcel shelf when the seats are out there is obviously no problem how ever this is not always the case, and it can be done without even asking your passengers to disembark.
Removing the parcel shelf can be quite eventful unless you follow a few
simple procedures. In the first instance one would be ill advised to carry very
much on the shelf or damage will certainly be inflicted on the shelf itself,
even though there is a metal bar beneath, it isn't in my opinion designed to carry
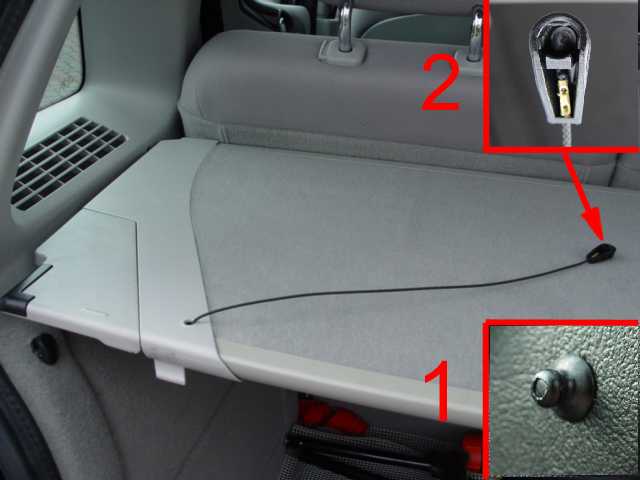
much weight, and a buckled /damaged shelf will be even harder to remove and re-fit. 2
The first action if the
shelf is to be removed is to release the supporting cords which simply unclip
by pulling them of the studs
1
attached to the
rear door frame.
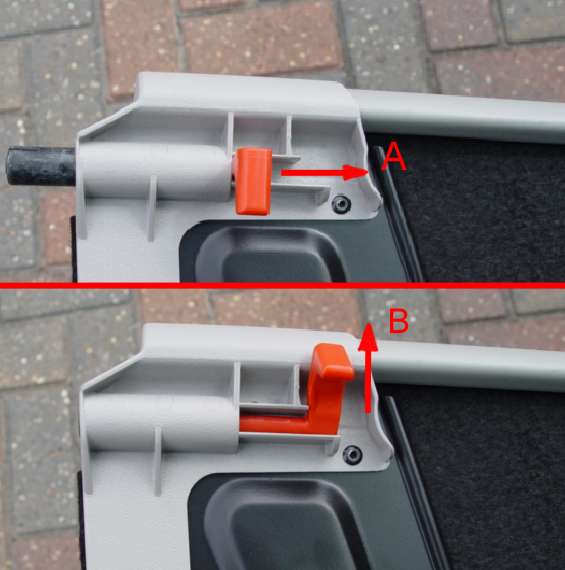
Placing your hand beneath the parcel shelf O/S
release and withdraw the location lug
A
from
its housing these lugs, one either side can be withdrawn by simply easing the
plunger against the spring tension towards the middle of the boot. there is only need to withdraw one plunger the O/S this can then be locked back by moving the lever Forwards, towards the back of the seat. B
locking the plunger back makes it easier to remove
the shelf.
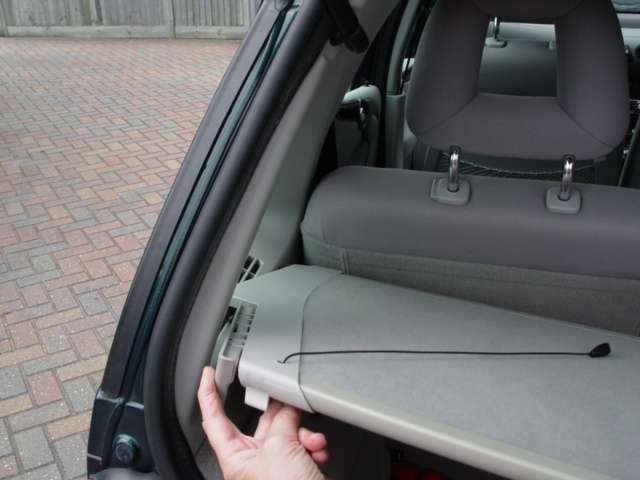
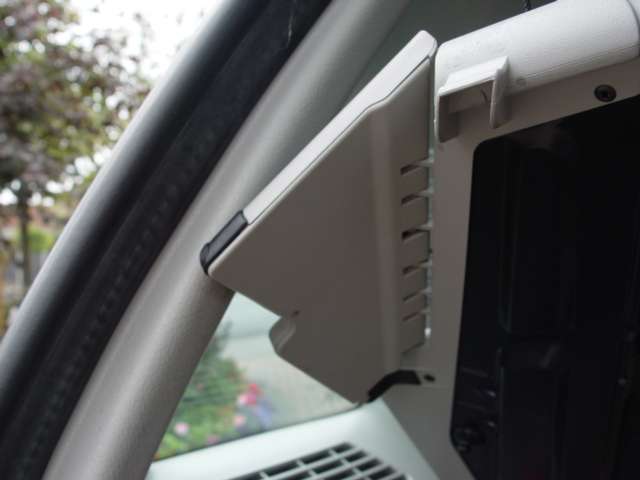
Fold back and retain the N/S hinged corner
section of the shelf, this will allow you to turn the shelf horizontally to an angle of 45%
to the back seat, keeping the shelf horizontal, as you move the shelf the N/S lug
will come free. Slightly raise the shelf allowing the shoulder of the shelf on
the N/S to enter the recess of the quarter light N/S, this will allow you to
manoeuvre the O/S end of the shelf out of the boot first.
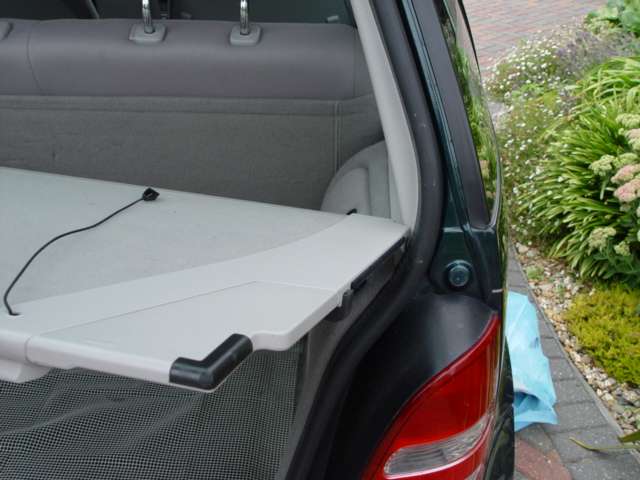
Replace the shelf in
reverse order, remembering to place the shoulder back into the window recess get the shelf into the boot and square before locating the N/S lug which is still projecting, and lowering the shelf into the housed position, re-fit O/S plunger.
before attempting to lower into position.
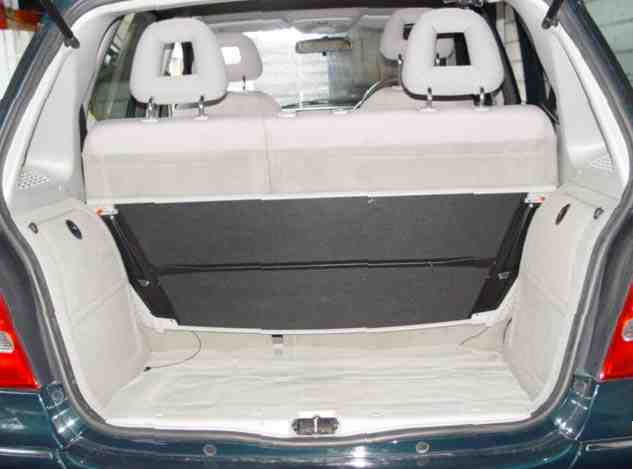
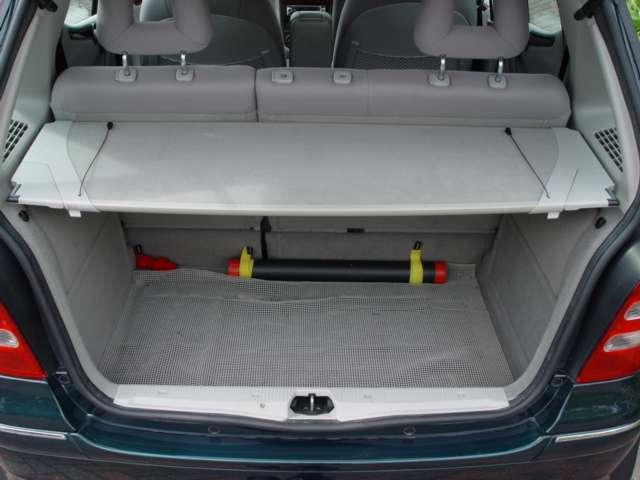
No problems plenty of room!
If you know how?
Another feature of the parcel shelf brought to my attention by another www. baby-benz.com member is the stowage for the parcel shelf when not required or it is just in the way of goods being transported. Remove it completely from the car, Turn it upside down, and now turn it round horizontally,
The hinged corners are now towards the ground. It will now fit snugly down behind the rear seats, backrests. The only thing you do have to remember is to move the backrests of the rear seats forward to the upright position. Or alternatively move both the double and single seats forward to allow clearance between the stowed shelf and the back rests.
The lugs lock behind the half round wire support
A
and there are even dummy pegs
B to which to attach the support cord when not in use. If you have noisy shelf this my overcome your problem, without leaving the shelf in the garage where it invariably becomes damaged or dirty!
Another way of cutting down on the noise from this area is to put in an extra support for the parcel shelf, fitted to the rear door it comes into firm contact with the back edge of the shelf when the boot is closed. A shaped block that just happened to fit the profile of the shelf and was waiting for job in the garage.
It is worth
noting that the fabric covering the internal areas of the boot is compatible
with Velcro (hook & loop)fasteners, small items can be anchored using Velcro, Any Velcro strip, Hooks section can be used and they remain secure.
Ideal for my telescopic fly rod and case. The none slip material on
the floor of the boot saves a lot of wear on the
carpet as well as stopping things from shifting around.
If for any reason you move the shelf right up, but still in its location, for that
piece of difficult luggage for instance, the shelf will lock behind the rear
quarter-light frame, the boot will fully close with the shelf in this position,
although side mirrors will have to be used for reversing and observing traffic
to your rear. It is worth noting that the 3rd seat belt can still be used even
if the shelf is near upright. To lower the shelf simply push the shelf up towards the roof,& fold
in the two hinged corners and lower. The shelf should raise and
lower under it is own weight and should not need to be assisted, observing this
rule will ensure that it does not get damaged.
it is now becomes
clear why we should not pile up the parcel shelf there is just one bar across
the underside.
Take care not to
damage your hinged corners, if it is anything like the other spares on the car
the parcel shelf complete will be expensive, you can of course leave the shelf in the fully up position, the boot will fully close for that difficult piece of luggage. window?
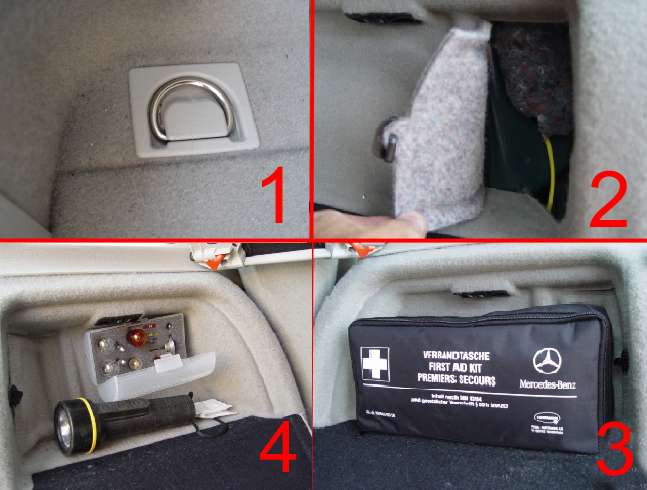
*1
At the four corners of
the boot space there are fixed 'D' rings provided for fixing the load that you do not
want smashing about in your boot space.
*2
The hatch on the O/S through which you gain access to bulbs and the emergency fuel flap locking mechanism. For more detail, use this link, Fuel Filler. Vacuum Pump. Remove the piece of coloured felt, just visible, and it will allow you to follow the yellow tube that goes to the emergency fuel flap locking mechanism.,
*3
O/S. First aid kit stowage area.
*4
N/S. A storage area Ideal for a lamp and bulb kit as well as other small items, as well as an access hatch to the rear bulbs.
However before putting your hands inside either if these bulb hatches or seeking out the fuel flap release, my hand came out cut and scratched following my attempt to locate either. want smashing about in your boot space. 2 The hatch on the O/S through which you gain access to bulbs and the emergency fuel flap locking mechanism. For more detail, use this link, Fuel Filler. Vacuum Pump. Remove the piece of coloured felt, just visible, and it will allow you to follow the yellow tube that goes to the emergency fuel flap locking mechanism., 3 O/S. First aid kit stowage area. 4 N/S. A storage area Ideal for a lamp and bulb kit as well as other small items, as well as an access hatch to the rear bulbs. However before putting your hands inside either if these bulb hatches or seeking out the fuel flap release, my hand came out cut and scratched following my attempt to locate either. The spare 'A' Class bulb kit in container, along with portable lighting, were purchased from Hal fords www.halfords.co.uk However be aware that Indictor repeaters for the wings, as well as festoons for interior lights weren't in the kit. The spare 'A' Class bulb kit in container, along with portable lighting, were purchased from Halfords www.halfords.co.uk However be aware that Indictor repeaters for the wings, as well as festoons for interior lights weren't in the kit.
Also available in the boot the two cargo net hooks one either side, to which the cargo net (optional extra) can be attached


 The hinged corners are now towards the ground. It will now fit snugly down behind the rear seats, backrests. The only thing you do have to remember is to move the backrests of the rear seats forward to the upright position. Or alternatively move both the double and single seats forward to allow clearance between the stowed shelf and the back rests.
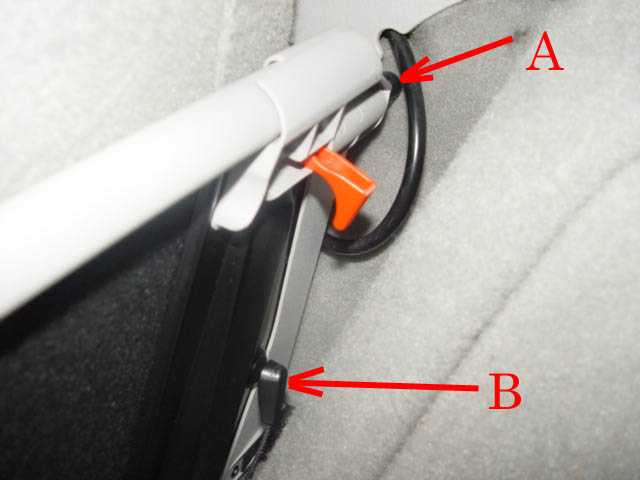


 *1
At the four corners of
the boot space there are fixed 'D' rings provided for fixing the load that you do not
want smashing about in your boot space.
*1
At the four corners of
the boot space there are fixed 'D' rings provided for fixing the load that you do not
want smashing about in your boot space.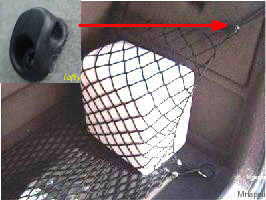 Also available in the boot the two cargo net hooks one either side, to which the cargo net (optional extra) can be attached