 Warning Hydraulic fluid should not be allowed to come into direct contact with skin, eye protection must be worn at all times when using hydraulic fluid. If exposure does take place immediately flood the contaminated area of skin with copious supplies of cold water, remove any contaminated clothing.
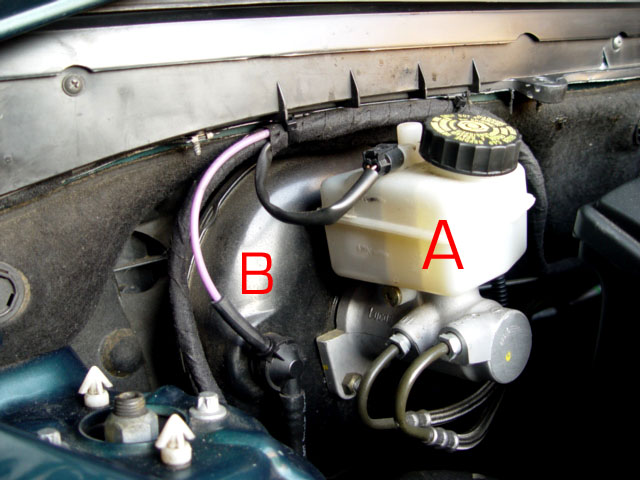
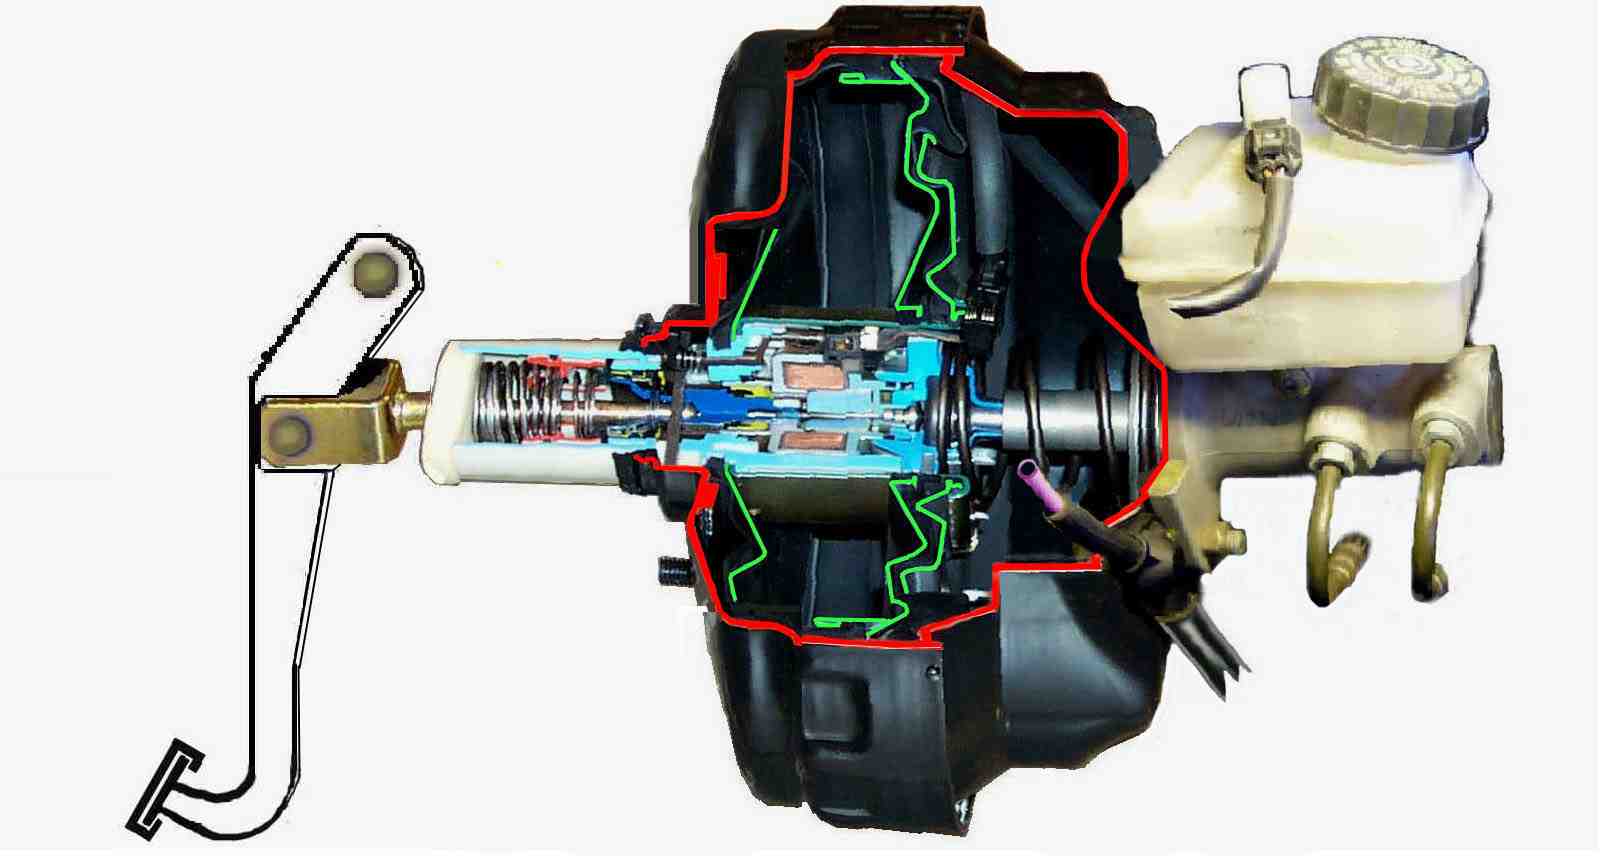

 using negative pressures (Vacuum, pressure below that of atmosphere) on one side if the internal diaphragm,
2
which is achieved by the connection of a tube to the induction side of the engine
3
and atmospheric pressure (pressure above that of atmosphere (14.5 bars 14.7 psi) at sea level on the other side.
using negative pressures (Vacuum, pressure below that of atmosphere) on one side if the internal diaphragm,
2
which is achieved by the connection of a tube to the induction side of the engine
3
and atmospheric pressure (pressure above that of atmosphere (14.5 bars 14.7 psi) at sea level on the other side.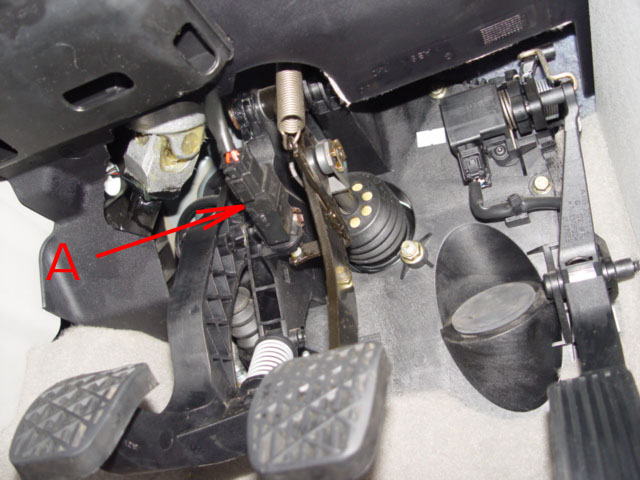
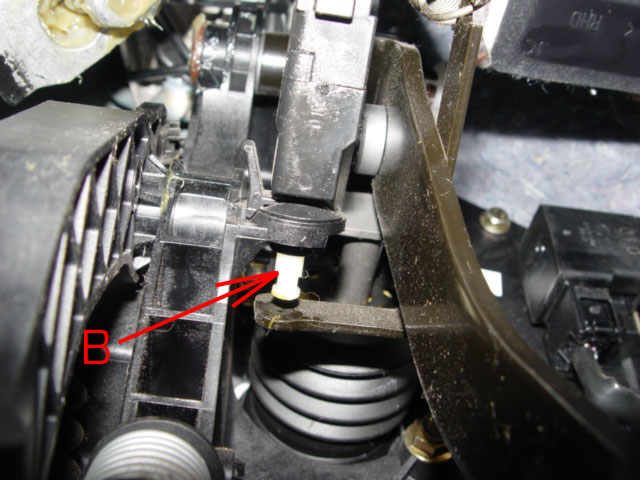

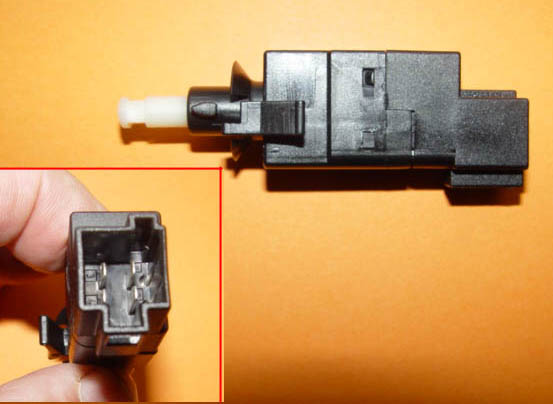
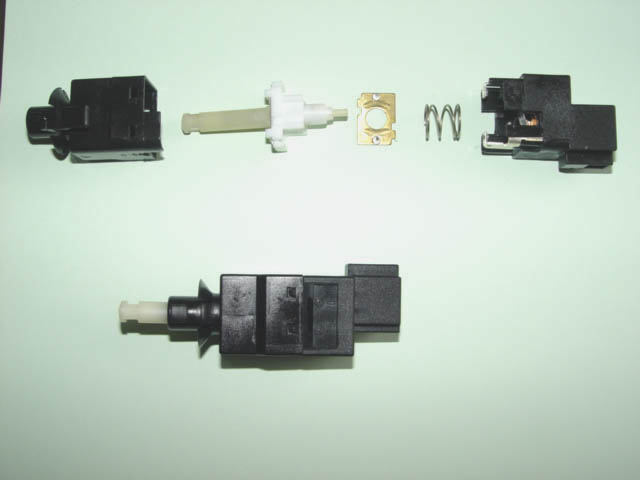
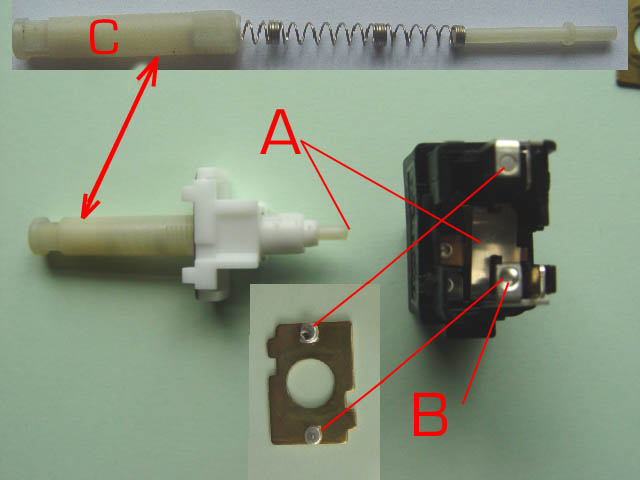
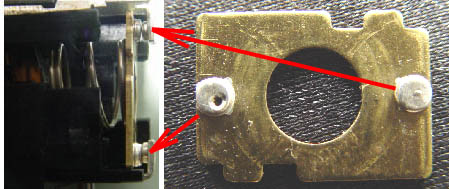 On inspecting the contacts in my switch the main contacts were in a very poor condition, For those readers familiar with the old ignition points problems , this was an identical problem, one contact had a hole burnt into the contact the other a point, In my opinion neither would have been making good contact when the brake peddle was pressed.
 Yes very basic information, and yet we can prolong the life of the rachet on the handbrake lever by simply depressing the knob on the end of the brake when we engage the brake rather than hearing the
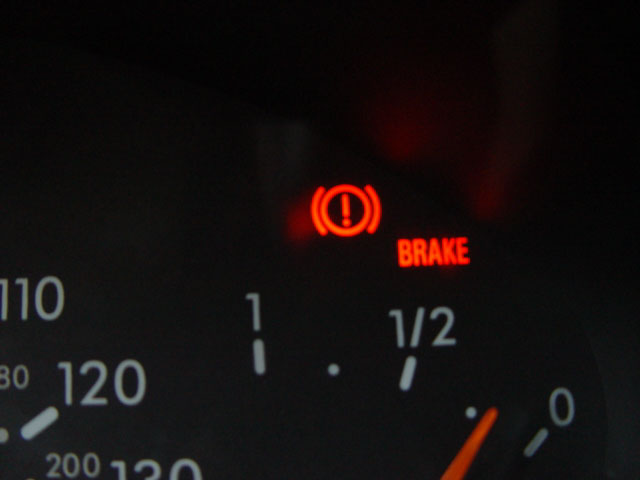 Another point worth noting is that if the hand brake is
not fully released
then on this car you will get an audible warning as well as the brake light remaining illuminated on the instrument cluster display.
Another point worth noting is that if the hand brake is
not fully released
then on this car you will get an audible warning as well as the brake light remaining illuminated on the instrument cluster display.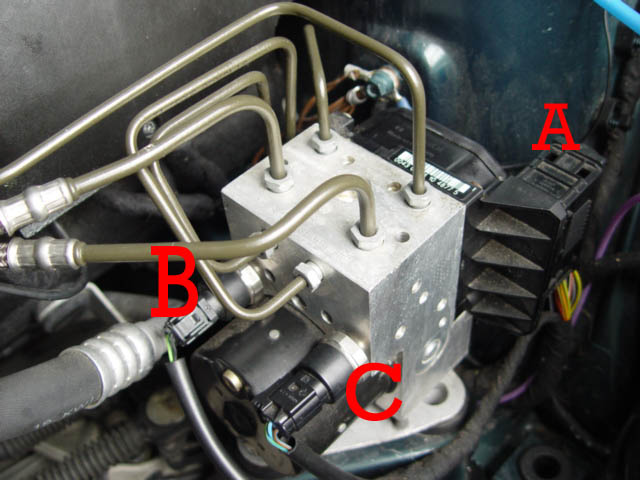
This ABS/ESP unit is located beneath the screen wash reservoir, there is little the DIY enthusiast can do with this unit but if its failure is associated with sudden and accounted for loss of screen wash fluid then check to see if the container has developed a leak and as a consequence contaminated the various electrical connections or blown a fuse that protects the BOSH electrical motor the powers this unit. It is remote but it is also possible!
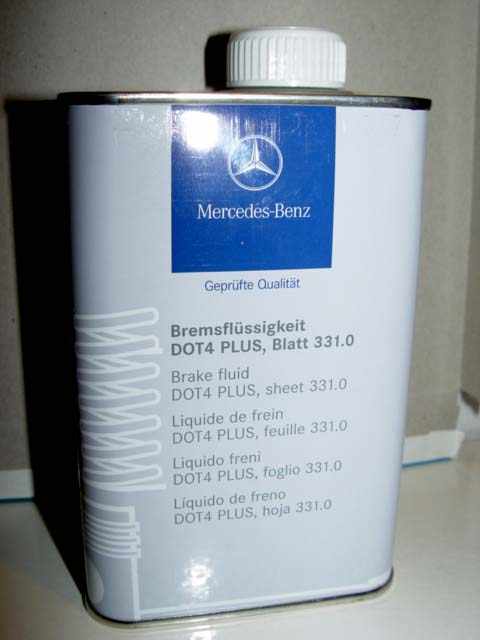
The ABS/ESP system is and integral part of the brakes, and includes the ABS. The fluid in the system simply uses the brake fluid which is DOT 4 plus, Mercedes part number, 000 989 08 07 10.
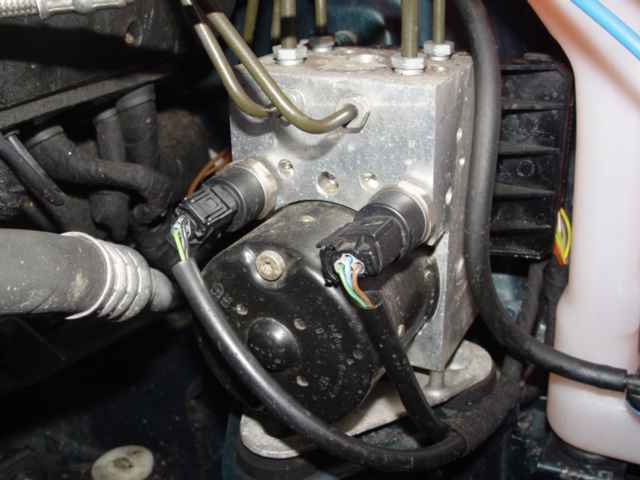
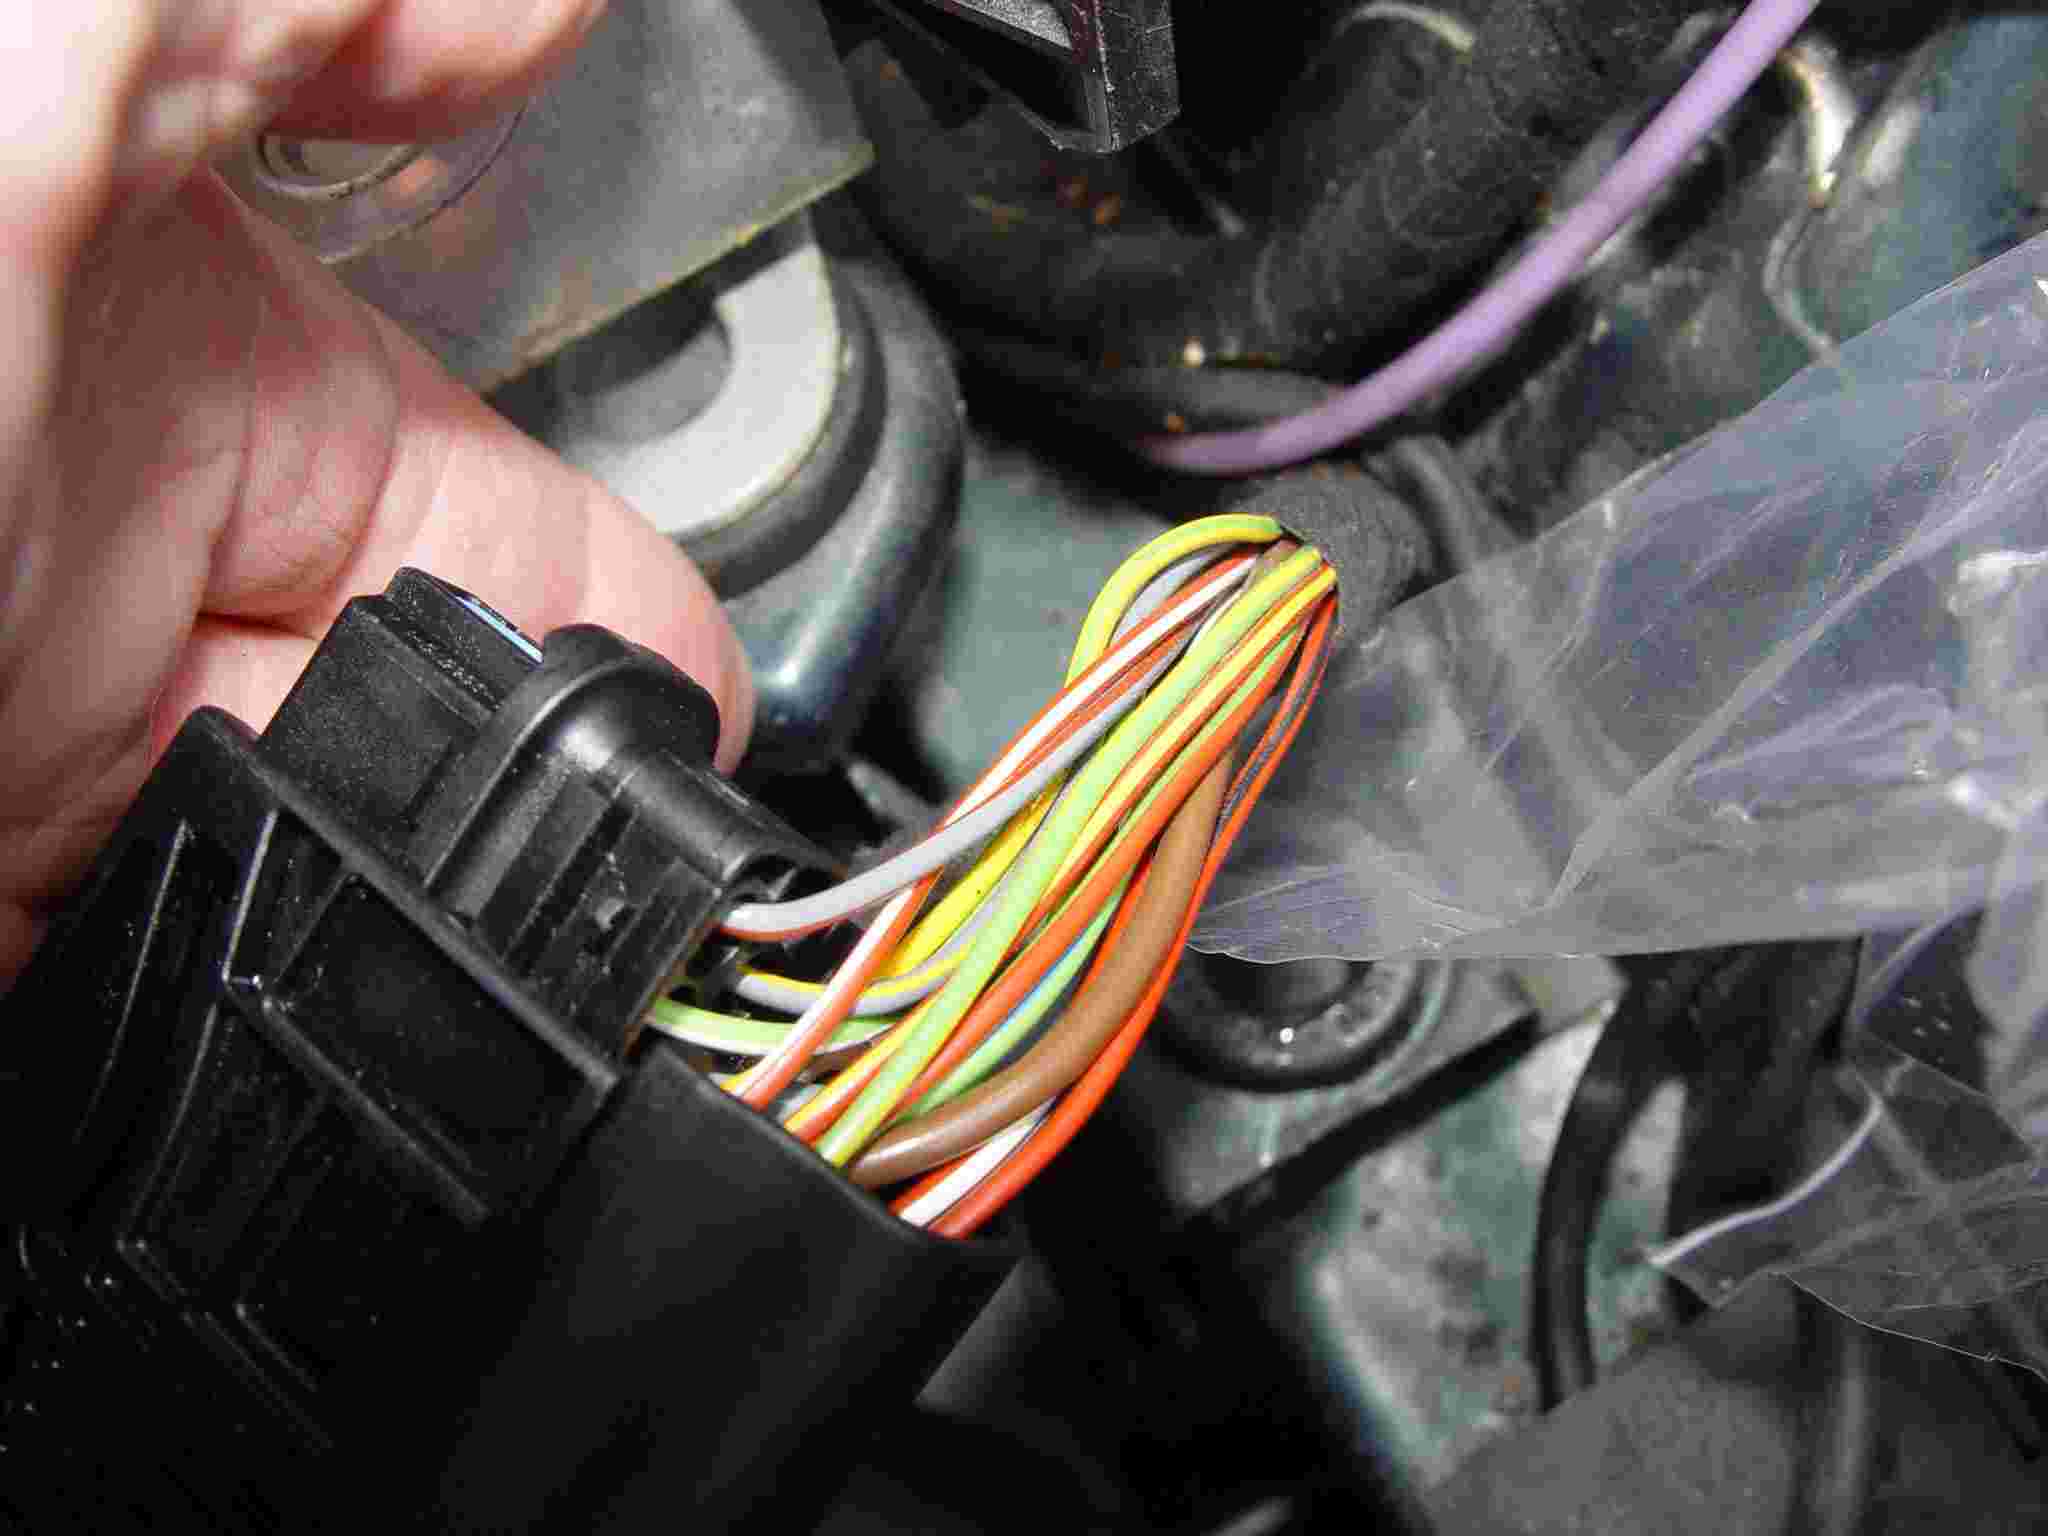
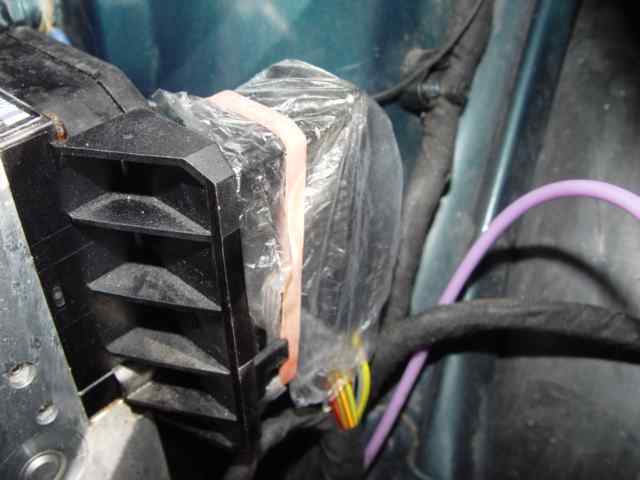
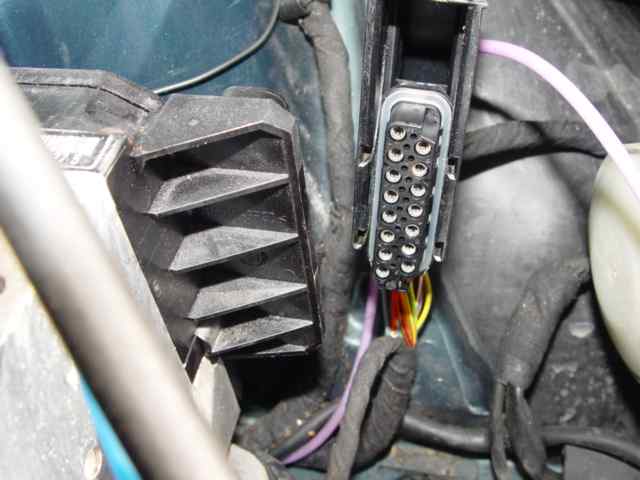
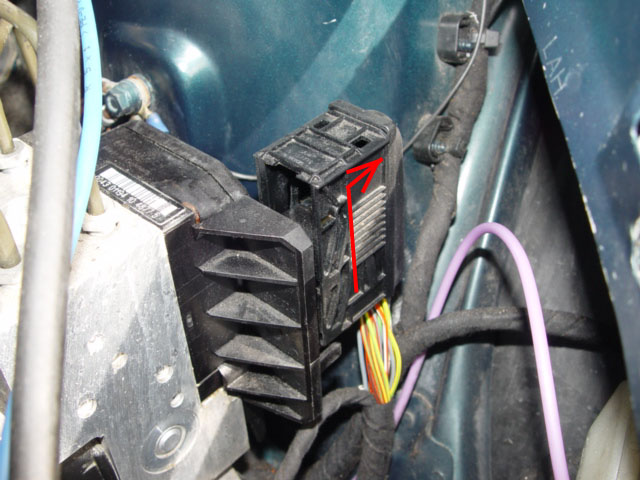
When filling your screen wash reservoir take care not to flood the ESP/ABS unit and motor, quite easily done as the unit is directly under the reservoir. On the back of the ESP/ABS unit there is a large connector similar to the one on the ECU. This is a multi pin connector that is particularly venerable to water damage from overfilling the screen wash reservoir, which could well cause severe problems in the long term due to the corrosive properties of the screen wash additive.
I have protected the plug connection with a polythene bag held in position by an elastic band , One again a question of prevention is better than cure.
see below.
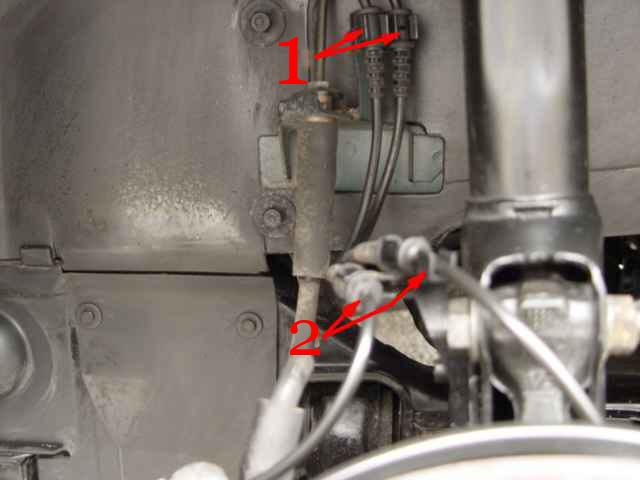
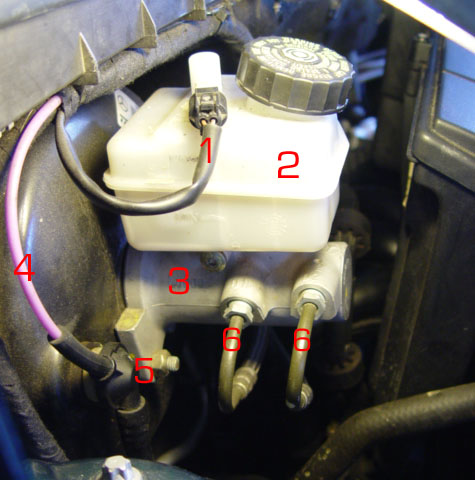
When working on your car, within the wheel arches, take care to ensure you do not damage the wire runs to the ESP & and low pad sensors, if removing these from their clips
1 and 2 ensure they are replaced before completing the job.
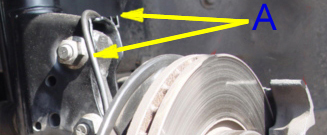 A
AIt is worth noting that after taking the photograph above it was noted by looking at the picture that the wiring going to the ABS detector head was in fact dislodged from it clip, I was able to replace it without taking the wheel back off.
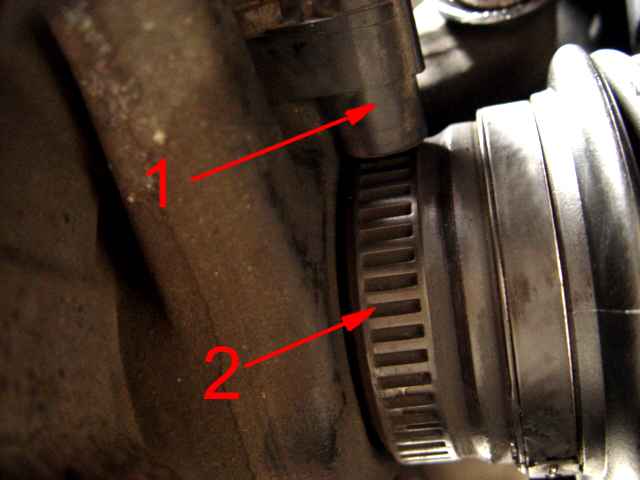
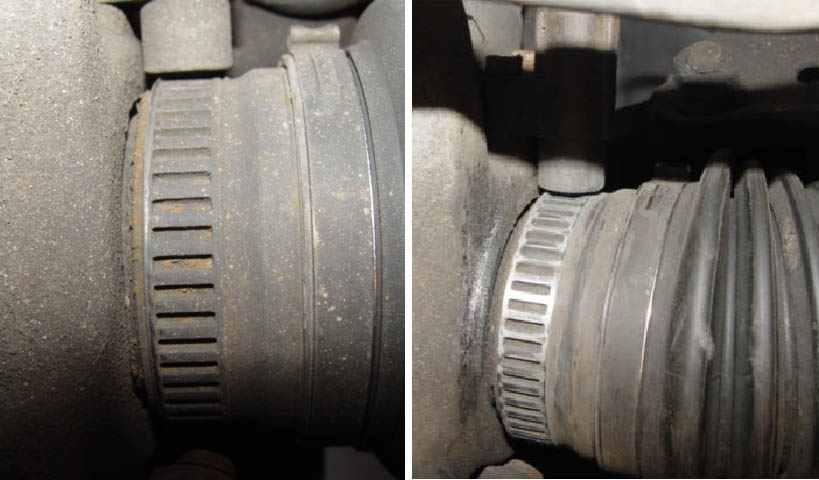
This feature seen on the drive shaft hub end, is part of the ABS(Active Breaking System) and is there to enable the detection head which is fitted just above it 1 the monitor the speed and motion of the wheels. In the event of wheel spin the breaking system will act on that wheel to correct the spin.
There appears to be no maintenance that the D.I.Y owner can do accept to keep the jubilee clip like feature which is of course the transmitter which is continuous around the shaft, clean. An old tooth brush is as far as I would go for fear of damaging the mechanism. Further information received from Nick enlightens us further as to the roll of the unit.
This is hard wired to the ESP control unit as are all 4 wheel speed sensors. The ESP control uses this information to control the "anti-lock brakes" and the "traction control" operations, albeit from one control unit. The control unit monitors the wheel speeds constantly The ESP control unit sends the wheel speed data (amongst others) digitally around the rest of the vehicle for the use of other control units. For example; the instrument cluster uses the speed signal to display the speed and the central locking uses the speed signal to operate drive-away locking (when enabled), the cruise control uses the speed signal to ensure the car maintains a constant speed when going up or down a hill;
Another issue I've had with my B Class which I assume may manifest itself on the A Class as well is replacing Drive shaft gaiters, Boots, bellows which ever you choose to call them!
Note that there have been a number of ESP/ABS problems caused by the detector ring item 2 above on the drive shaft coming loose as well as breaking, from the point that the ring moves or breaks the ESP/ABS lamp will show , this will cause your car to fail to MOT so check you drive shafts for rusting which can be the cause of the problem, spray with duck oil or 3 in 1 oil anything to prevent the rusting and the problems that result.
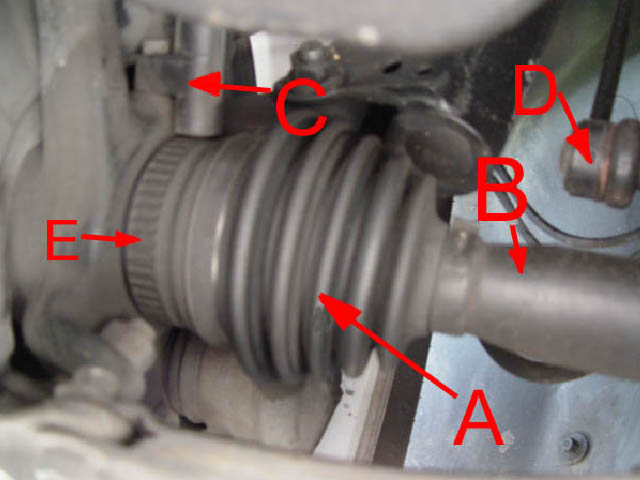
A Bellows/Gaiter. Protecting the moving parts of the UJ and roller bearings etc, should be inspected prior the MOT for splits which can cause the car to fail.
B Drive shaft. A very substantial unit, I have not heard of any problems with these units.
C Detector head, ESP/ABS Speedo/Central locking (while in motion) Traction control, A multi functional hard wired detector monitoring all of the aforementioned features on this car. Relays information back to the EMU, picking up its signal from the transmitter. E
D Drop link. Part of the vehicle stability feature. Vulnerable to wear.
E Transmitter.
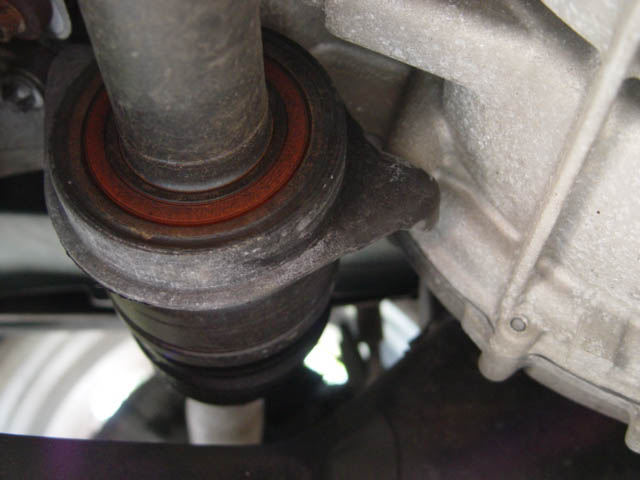 This intermediate bearing in positioned approx half way along the length of the O/S drive shaft. I am unsure at this point as to whether the drive shaft splits at that point or is merely supported. The red seal that can be seen is an oil seal integral of the intermediate bearing housing, which should be free of any sign of leaks.
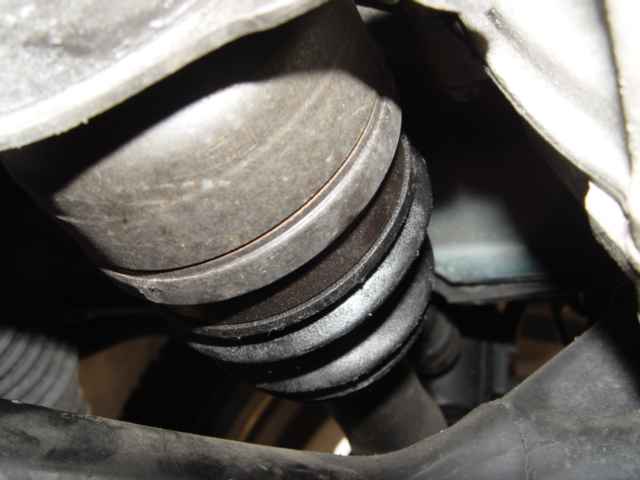
Having taken a much closer look at the O/S drive shaft I am now convinced that the shaft is split, the outside shaft going from the stub axle (wheel end) to the intermediated bearing & housing, the inner shaft acting as a lay shaft, from the intermediate housing to the gearbox. If I am correct the the outer shaft will have a bellows & Universal Joint (UJ) at either end, the outer end will have the stub axle attached. However with no point of reference for this type of information I could be wrong, so If you have any different views or have changed the O/S drive shaft I would appreciate an email from you and will of course credit you with any information supplied.
Thanks Nick Of MB Chichester West Sussex, for some of the technical information contained on this page, your help is appreciated.
Learn more about Braking Systems, including ESP, examples of various associated braking components with demo.(Click on the heading below the various components for demo),
Oh well none of us are exempt for the odd problem, I have had to follow my own advise today 17/06/07. Got he car out on Thursday and the spotted that my ESP/BAS light was lit while I was driving along. Electronic Stability Programme and Brake Assist System> I stopped the car switched off the ignition, re started the car, no lights so was it just a blip? No same thing happened on Friday and Saturday Stop the car re start no lights. Never the less there had to be a cause as this is not normal?
 So today I have removed the multi pin plug on the back of the ESP (mypage 18) unit and sprayed the contacts with 'Electolube' (Electrical contact cleaner) and also checked the wires in the wheel arches for damage and progressed on down to clean the sender units on the drive shafts.
There I think I found the problem lodged in on of the grooves in the sender unit ring was a piece of debris, I think stone chip that was blocking the groove almost completely.
I removed that and cleaned the sensors both sides as well and doing a bit of other cleaning and applying duck oil and No lights on two further trips, so with everything crossed I hoping I found the problem.
Thinking about it it is logical that it could have been the cause because the detectors would have been receiving different signals as the wheels turned. bearing in mind that it is the grooves that the detector acts on. I will keep you informed but hope I have cured the problem.
So today I have removed the multi pin plug on the back of the ESP (mypage 18) unit and sprayed the contacts with 'Electolube' (Electrical contact cleaner) and also checked the wires in the wheel arches for damage and progressed on down to clean the sender units on the drive shafts.
There I think I found the problem lodged in on of the grooves in the sender unit ring was a piece of debris, I think stone chip that was blocking the groove almost completely.
I removed that and cleaned the sensors both sides as well and doing a bit of other cleaning and applying duck oil and No lights on two further trips, so with everything crossed I hoping I found the problem.
Thinking about it it is logical that it could have been the cause because the detectors would have been receiving different signals as the wheels turned. bearing in mind that it is the grooves that the detector acts on. I will keep you informed but hope I have cured the problem. Having cleaned the front sender units I decided the following day to check the rears, The off side unit was completely rusty so much so that you could barely see the grooves in the casting.
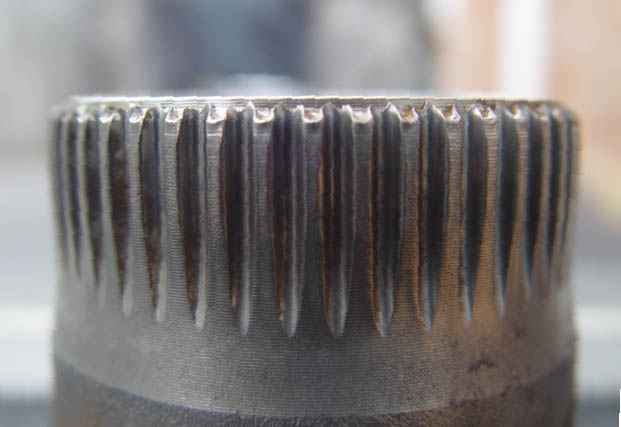 However cleaned up with an electric drill fitted with a brass wire brush it came up like new I lightly coated it with duck oil before returning it to the hub, The near side unit was in sparking new condition so no cleaning was required.
The procedure for removing and checking the hubs on which the sender is cast is as for replacing rear brake shoes or Trailing arm bushes. In my opinion either of the problems located , the stone chip in the front near side or the severally rusted unit on the rear could have been responsible for the false signal given by the car, with both of these located and corrected it will be interesting to see if there is a reoccurrence of the problem. Chances of a garage finding the cause? Well Sir we will have to put it on the diagnostics and we want the car for half a day!!?? And the chance of the car being returned without the fitting without new units and £££££££ for labour NIL. So if you have problems do not write the car off take a look round it really does pay dividends.
Other components liable to cause the ESP/ABS warning light to show are worn trailing arm bushes which affect the alignment of the rear wheels and worn steering column. Both of these items need to be checked if you have a problem with these warning light remaining on when driving your car. But do not forget the brake switch which is cheap to replace and is less of a problem to inspect and fit than the other two items mentioned.
ESP/ABS light fails to go out
Other consideration, if you have checked the other less complicated a costly items then check to ensure the the tyres are the same size, If one wheel effectively turns faster than the other 3 the ESP/ABS will pick it up and alert you on the dash
The other main thing to check is tracking, bearings & bushes the later being on the trailing arms, if these bushes are worn allowing the wheels to slightly wonder from side to side as the car is driven, this will cause problems with the ESP/ABS warning lamps staying lit as it effects the tracking of the rear wheel's
This e-mail from a fellow owner clearly indicates the sophistication of the 'A' Class ESP/ABS and it appears is even more complex in the earlier models:-
Quote
Lofty
Just to let you know that I have finally got my BAS/ESP light problem solved - unfortunately it was not a cheap process so if anyone else can learn from my misfortune and save themselves some cash then so much the better.
So to recap, my particular BAS/ESP problem showed itself it quite particular ways. I think there are many causes of this light and if the way it shows itself is different to mine then the solution is probably different to mine.
- It is intermittent (Ie sometimes first brake press of journey sometimes not at all) - It can happen while the car is stationary (Ie handbrake on but engine running) - It only happens when you first touch the brake pedal (Ie it might come on when you first start braking on a hill/slip road, never half way through) - if you detach the brake pedal switch it can still happen
So it went to Mercedes who put it on the computer and worked out it was the brake servo pressure switch. Unfortunately on my particular model (Y reg A160) you cannot change just the switch but have to replace the whole servo - ouch !!!
In conclusion if you see the BAS/ESP light under exactly the same circumstances as me then I am sure there are cheaper ways of changing a pressure switch than have Mercedes change the whole servo.
Please feel free to add this information to your excellent site. Thanks,
Unquote.
Next.
Back to Index,
Purchase DVD.
Please Make a Donation.