The braking system and manual clutch cylinder on this car are served by one reservoir situated on the off side bulkhead area of the engine bay.
Keep the fluid level within the upper and lower level marks at all times.
A sudden loss of fluid or warning of low fluid level in the instrument cluster should always be followed by a full investigation /inspection of wheel cylinders and brake pipes both flexible and metal.
Where leaks are found on calliper pistons these seals can be replaced using mercedes-Benz parts, where there are signs of rusting on the either the piston or the cylinder (caused by water /moisture in the fluid) the calliper is best replaced.
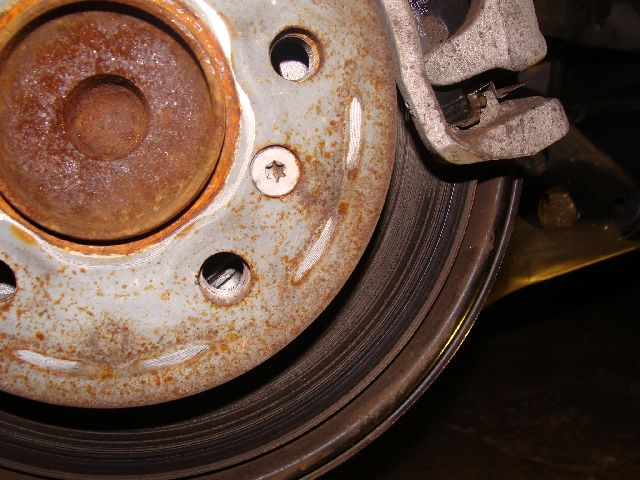
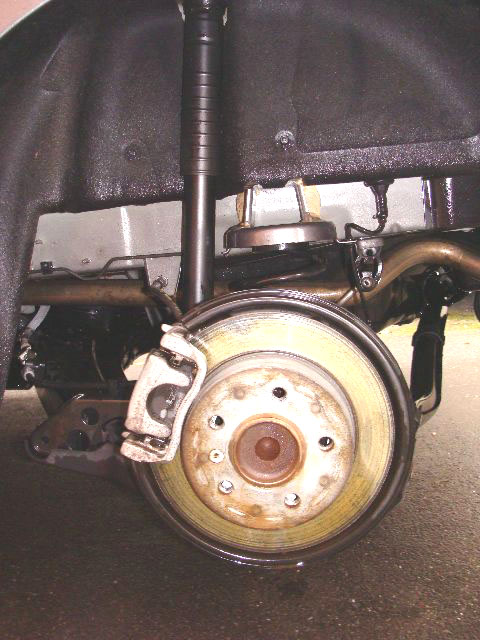
Although my car is only a A150 Classic SE it has come complete with discs all round, I must say they are a great improvement on the W168 A160, Front discs Rear drums. Needless to say they are still made of Carbon steel which is why they have gone a rusty colour within minutes of being washed .
These quickly return to polished steel once the brakes are used.
Although the main braking is done by the disc there is still a brake drum which is integral of the disc which facilitates braking for the handbrake mechanism.
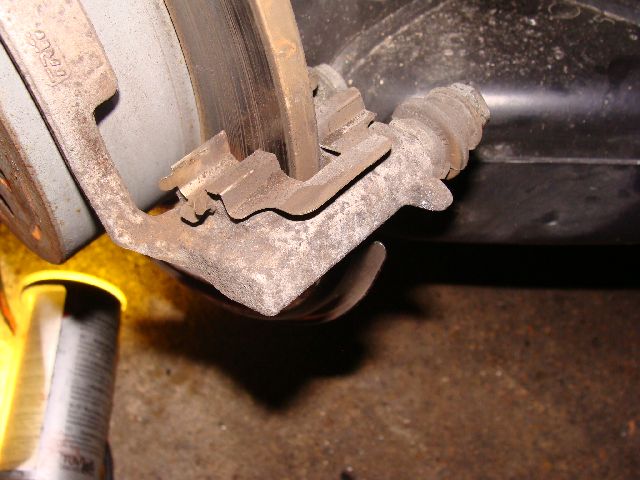
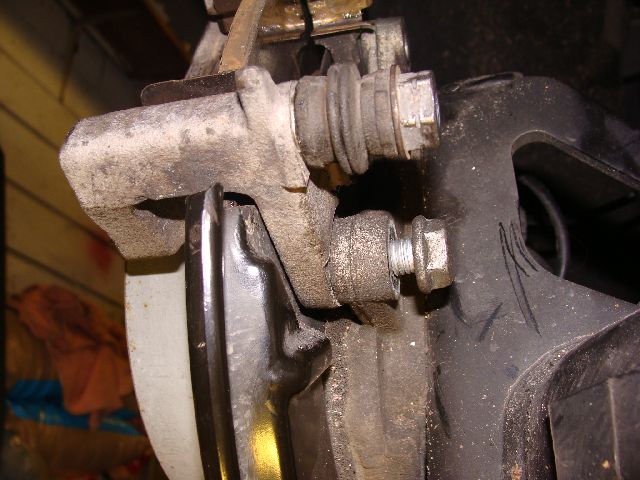
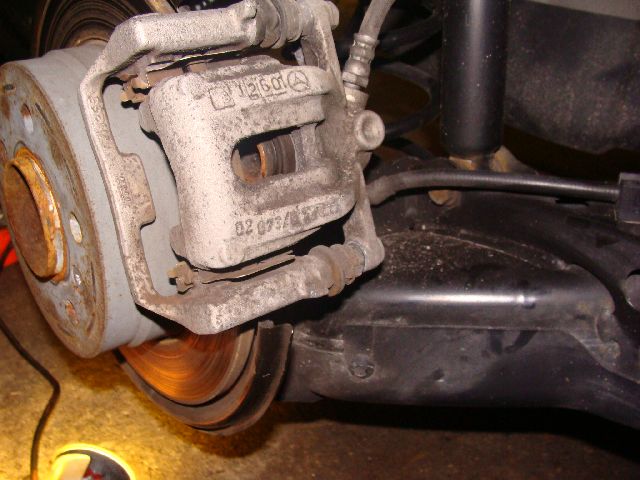
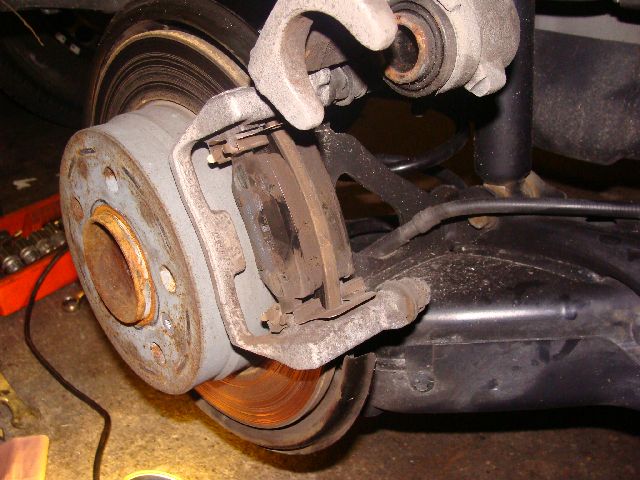
The construction of the calliper is almost identical to the front callipers Note. the calliper pads play no part in the handbrake system on the car . In this photo I have already removed the brake pads
If you remove the 13mm bottom bolt in the lower calliper guide pin you will be able to lift the middle section up, ( You will need to hold the head on the guide pin with a 15mm open ended spanner or the pin will revolve, ease the sliding section of the calliper slightly towards the centre of the car then fully raise, slightly the ease back towards you and the swinging section will remain raised while you work on the other section. Ease the sliding section of the calliper slightly towards the centre of the car then fully raise, slightly the ease back towards you and the swinging section will remain raised while you work on the other section. Take care not to pinch you fingers while working on brakes.
Once lifted you can remove the pads and also the lower guide pin which should be cleaned and lightly re-greased before being replaced
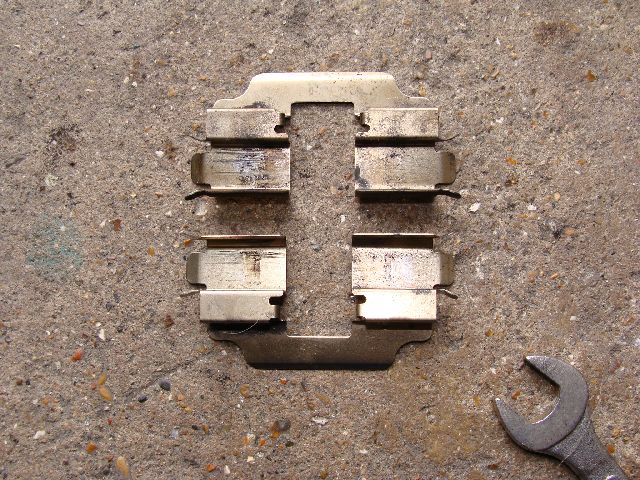
At this point I remove the pad clips and clean using a solvent this removes all the carbon and accumulated dust on the clips dry with a clean cloth and lightly grease the seating on which the toes of the pads are supported. This will ensure the pads can adjust easily as they adjust to wear.
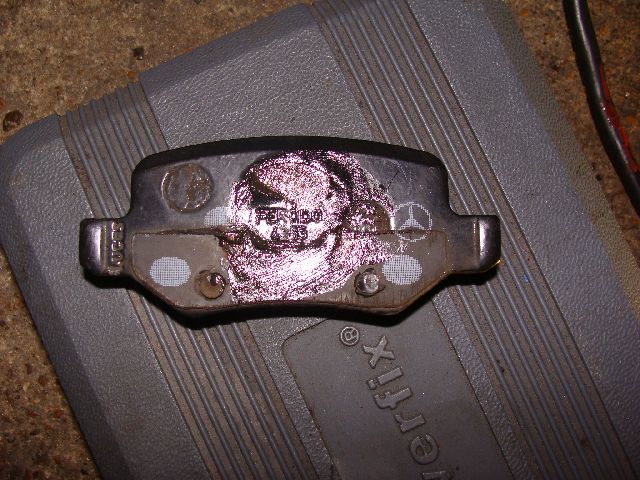
Two top tips to make you brakes work smoother:- 1. Lightly grease the back surface of the pad that comes into contact with the rim of the Piston of the calliper.
2. Ensure that the shoulders of the pad that slide in the pad clips are free of paint and rust. I use a fine file just to remove the layer of paint, you will find this is not done when the car is manufactured, as a result your pads may not back off from the brake disc as they should, leading to excess rubbing of the pads on the brake Disc.
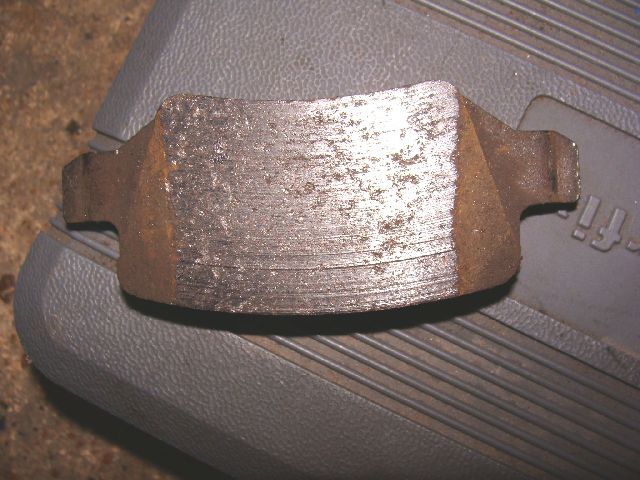
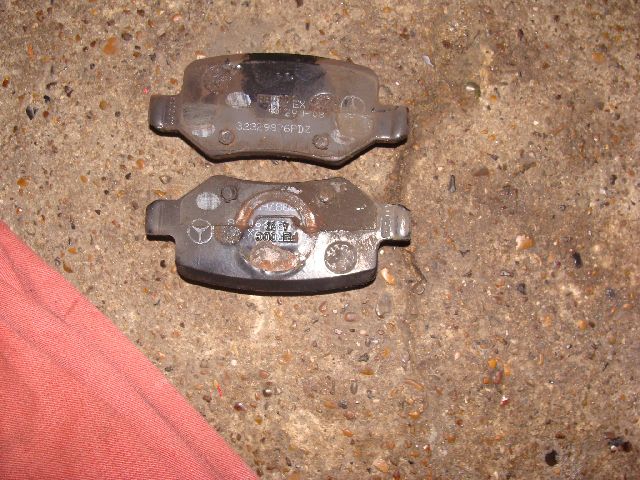
Having removed and cleaned the pads with a clean cloth it is easy to replace them to their original positions as the rear pad will be marked where the piston applies pressure as the brakes are used.
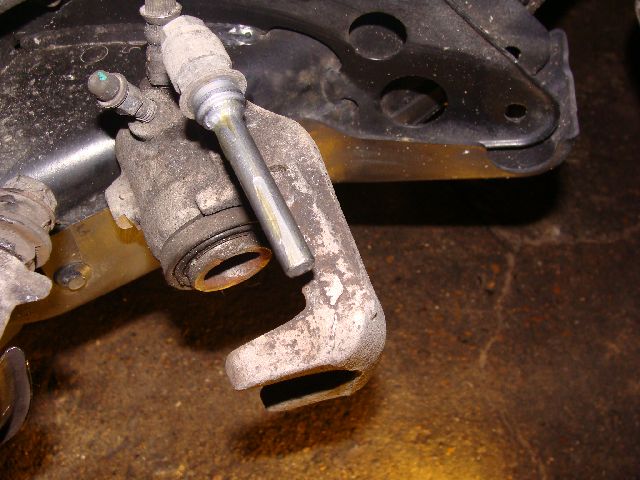
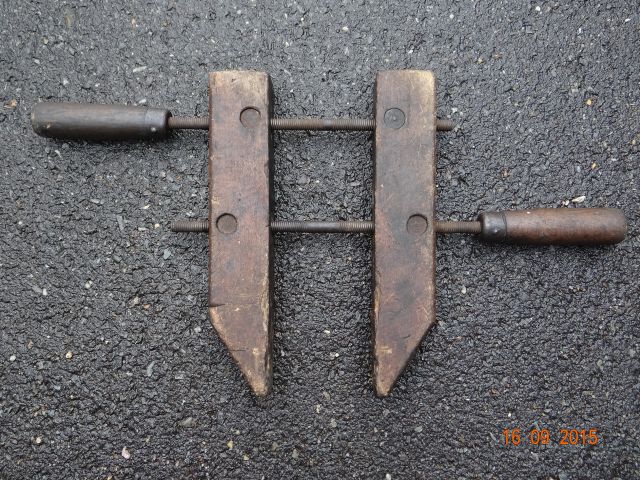
If the need arises you may need to push the piston back towards the cylinder of the calliper, this can normally only be done using a clamp or compressing tool. It is not unusual if the the piston moves slightly from the cylinder while you are working on brakes, you may therefore need to return the piston using a compressing tool I myself use and old wooden clamp.
Opening the bleed vale on the calliper will make the job easier but is should not be necessary.
There should be no problem with contaminated brake fluid providing the schedule for brake fluid change has been followed. Ie. every two years.
Brake fluid is hydrostatic naturally attracts water, in view of this store any brake fluid in sealed containers.
The lower guide complete with its gaiter can now be eased from the moving section of the calliper, this can then be cleaned and lightly re-greased, 'copper slip' is the best grease when working on brake parts, or use a good quality GP grease. Keep application to a minimum. If purchasing new pads from Mercedes-Benz Parts they will come with new clips.
I was surprised to see that the pads in my car which I have every reason to believe are the original factory installed pads (Cars done 10,000 miles ) have the outside edges chamfered off, this may have been done to over come a brake problem as I understand one Main agent in Yorkshire is claiming that the 'A' class W169 has a noisy brake problem.
I have not owned a W169 until December the 1st of 2012 but certainly my car does not have noisy brakes and I'm now only aware of one top of the range W169 one year old 5500 miles on the clock, that has problem. Mercedes-Benz have had the car back seven times in the last year and have not managed to cure what the owner sees as a problem.
Mercedes Claim it is 'not a problem' but a charactoristic of the model !!!
I'd be interested to hear from any W169 owners who have experienced problems with noisy brakes.
It is true to say that any car fitted with disc brakes, if any wheel is jacked up and the wheel turned you will hear the pads lightly rubbing the discs, but this will not affect the running of the car and you will not hear the noise when in the car.
Remember as with the w168 callipers you will need a clamp to return the pistion into the cylinder, this is made easier if the bleed valve is undone 1/2 a turn. You will need to bleed the brakes after servicing or replacing the brake pads. I use an old wood working clamp as shown, any suitable clamp can be used but do not damage the the edges of the piston.
The sliding section of the calliper can now be removed along with the upper guide pin, clean the pin as necessary, (should have a polished clean smooth surface) lightly greased and replace.
Checking servicing the hand brake system
The first thing you need to do is remove the fixed section of the calliper from the wheel hub assembly.
Releasing fixing bolts top and bottom will release the fixed portion of the calliper
We now need to inspect the braking shoes for the handbrake
Socket sizes on this calliper were a problem because I experienced difficulty in locating the correct sizes. The mobile section of the calliper was 13mm The fixed section I feel sure was 15mm although when the bolts were measured with a digital micrometer they were under size. to prevent damage to bolt heads avoid using ill fitting tools. It was also noted that the bleed valve for bleeding the brakes was 9.45mm how they arrive at that size I do not know luckily I have AF and W spanners from past years as was able to find a well fitting spanner/socket in each case.
We now need to remove the 'Torx' Screw that secure the brake disc combined drum. This was a T30 bit ensuring that wheels are chocked, make sure the handbrake is fully released
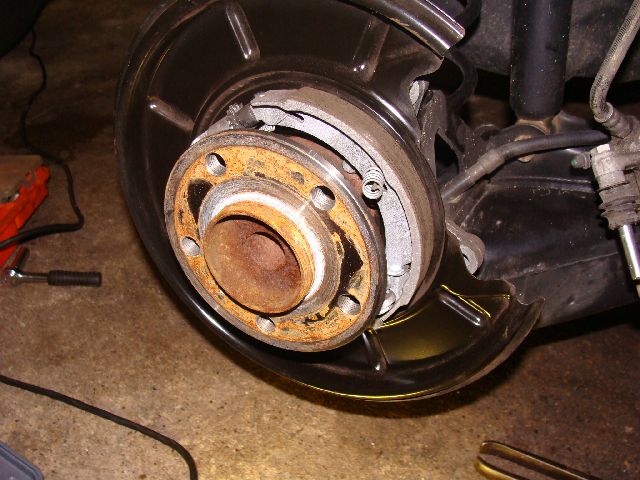
Having removed the 'Torx' screw, the disc/drum can be easily removed, the brake shoes can be seen I needed to go no further than this point as the shoes are basically unworn as they play no part in braking the vehicle when moving.
It is unlikely therefore that these will need to be replaced unless contaminated .
The condition of these parts would make a good mechanic worth his salt, professional or DIY cry Rust should never be allowed to form as seen here, it will damage surfaces and parts as it has started to do here . Just a light coating of GP (General purpose) grease grease will stop it going further and will in most cases ensure the parts last for the duration of the Cars life.
Needless to say these parts are cleaner now they have been inspected and serviced
However if you are getting your vehicle serviced by a garage including Mercedes-Benz, and this has been the case with this car for the last 3 years, then be aware they do not service or even remove brake parts or even wheels unless the need arises in which case you should be contacted before any work is done and will be billed extra for any work, parts and time.
So where is the incentive for garages to do a good job and preserve the life of parts???
In other words when the full service of brake parts does come in to the service schedule as it will if serviced by Mercedes-Benz you may have to fork out for parts that could have been saved had a decent standard of servicing been undertaken in the first place.
My experience of going round the 4 callipers on this car has proved it takes no more that 15 mins per wheel, as professionals they should be able to do the job far quicker than an OAP, as they have full facilities so money would be saved in the long term.
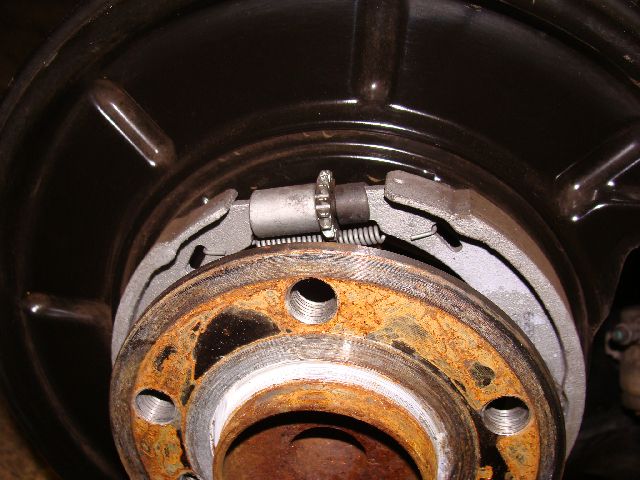
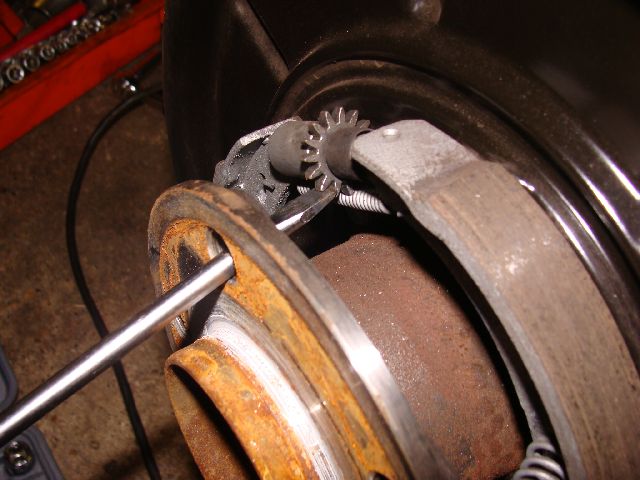
This Photo is purely to show how the hand brake shoes are adjusted when the wheel and disc/drum are still in place
All you need to jack up the rear wheels one at a time, remove one wheel bolt and with a flat bladed screwdriver adjust the spiked wheel . It is normal to adjust until the shoes can be felt lightly rubbing the drum , then back off one click that adjustment should also be felt on the handbrake movement. Shuld you need to adjust the hand brake cable adjustment the common adjuster is situated on the near side of the care just forward of the rear axle Detail of brakes adjustments etc are available on my e-DVD.
Note the position of the bleed nozzle, I have always been in the habit of just easing these off and re tightening when working on the braking system .
In this case there was no need to bleed the brakes as the car has been serviced by Mercedes and therefore the brake fluid should have been changed on the service. That should have involved draining the fluid from each wheel cylinder which can only be done by opening these bleed valves every two years Certainly the fluid is very clean which would indicate that it was done.
Note also the rubber protective cap , this ensures that dirt In this case there was no need to bleed the brakes as the car has been serviced by Mercedes and therefore the brake fluid should have been changed on the service. That should have involved draining the fluid from each wheel cylinder which can only be done by opening these bleed valves every two years Certainly the fluid is very clean which would indicate that it was done. Note also the rubber protective cap , this ensures that dirt does not enter and block the bleed nozzle. One rubber cap was missing on this car and will need to be replaced.
If you are servicing you own brakes do remember your life and the lives of others depend on the working 100% every time do not cut corners when undertaking such repairs and I would always use manufacturers parts, these may cost you a few extra pounds but you will get all the parts you require to do the job and the parts will fit 100% One rubber cap was missing on this car and will need to be replaced.
Always use you car's VIN number when ordering parts it will start WDD and is displayed in the bottom right hand corner as you look at the windscreen from the outside.
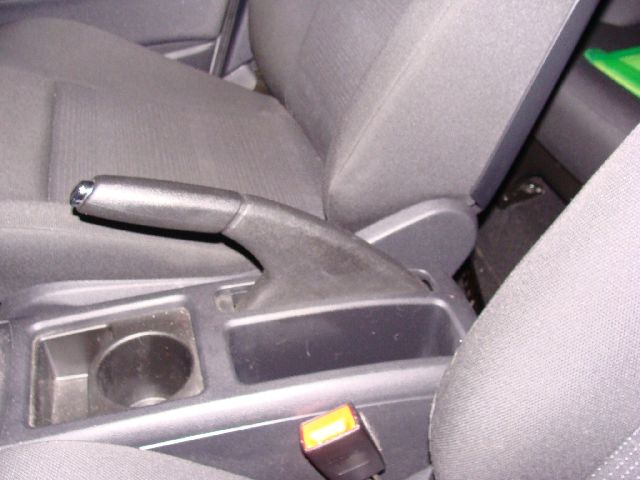
Hand brake (Parking Brake)
In the case on my present car there is no obstruction to the hand brake, although the W169 armrest has a cut out for the brake it can still partially obstruct the hand brake .
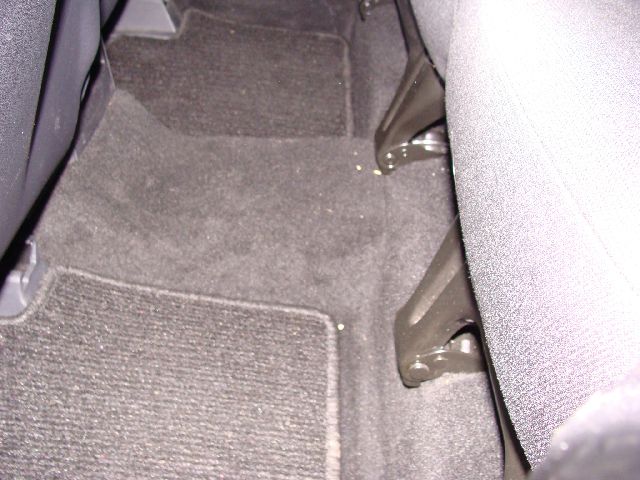
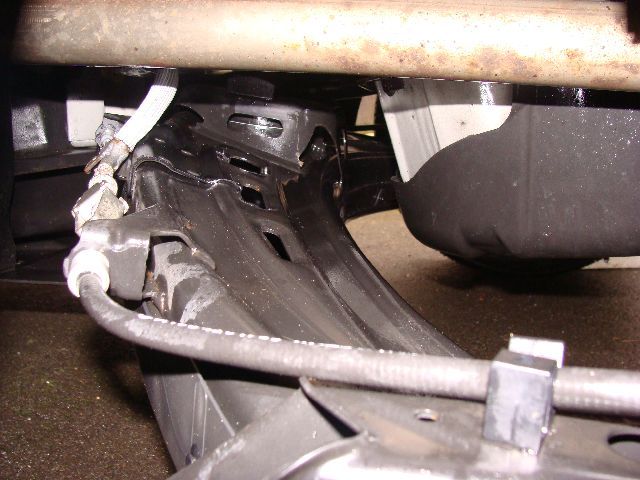
It is interesting to not that a tunnel has appeared in the W169, All car's of the 1950s and earlier has these tunnels (Raised floor in the rear compartment ) which is where the prop shaft to the rear axle passed, ( rear wheel Drive) With front wheel drive vehicles this disappeared, now re-appeared in the 2009 W169. I suspect in this case the cables for the hand brake mechanism along with hydraulic pipes for the rear disc brakes as well as ABS/ESP cables are housed in this tunnel. I will confirm this when the weather gets better and I drop the under floor panels.
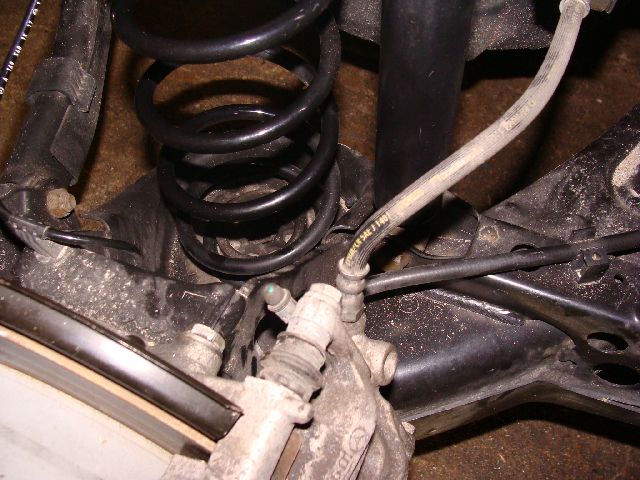
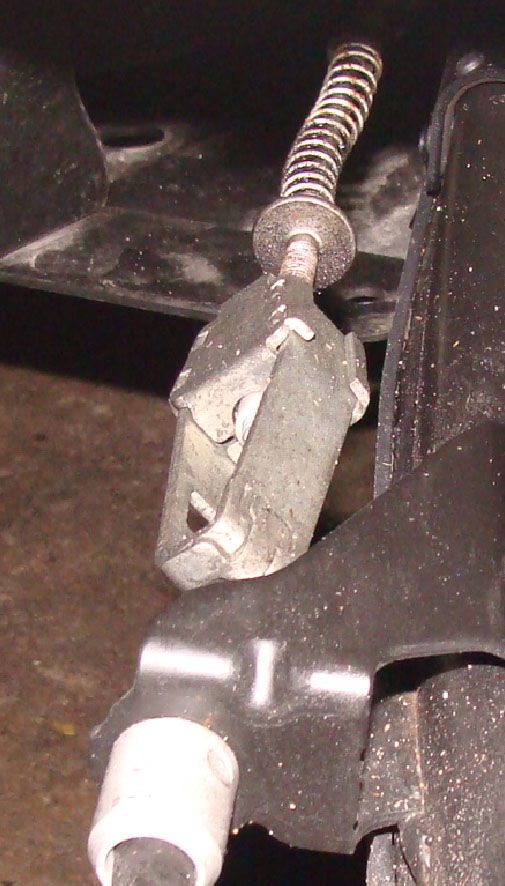
The is one of the hand brake cable adjuster, this one is on the nearside , there will also be one on the off side. I have enlarged this photo so that you can see the first signs of problems , which in this case in the cable return spring which on this three year old car is already starting to show signs off rust. It is for that very reason that I always spray the underside, metal parts I have owned, the task is relatively easy if done while doing other checks and a gallon (5ltres ) lasts years. I apply it using a compressor and applicator but the job can just as easily done with a garden type spray. From previous experience I know that it prolongs the life if these sorts of components which are difficult to replace and costly to buy.
While you are working on wheels, etc it is always worthwhile ensuring the cables are retained in the clips provided in this case attached to the rear cross member

 Two top tips to make you brakes work smoother:-
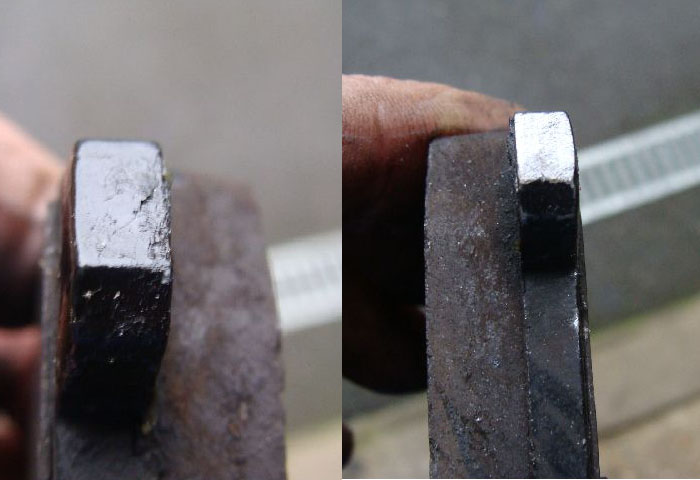 2. Ensure that the shoulders of the pad that slide in the pad clips are free of paint and rust.