For more details on Front Callipers as well as top tips. Although the details relate to the W168 model there is in fact little difference between the two models. Note. that the Classic SE front brake discs in my case are not vented as with my previous W168 A160.
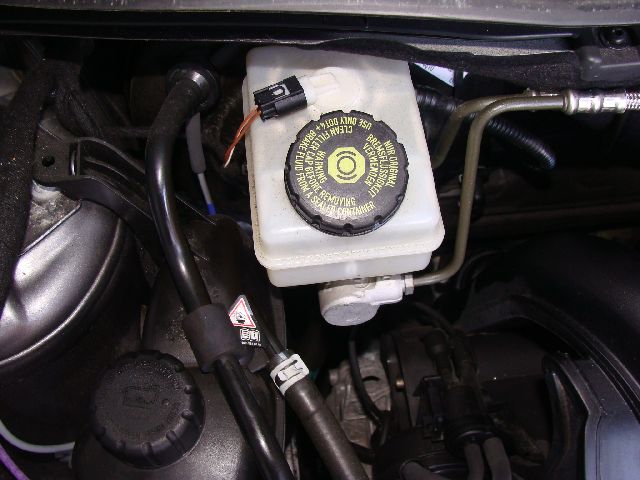
As with the previous A class models the brake fluid reservoir is situated on the left hand side of the engine bay, attached to the firewall(Bulkhead).
Fluid should be kept up to the level mark indicated on the reservoir at all times. Dependent on the mileage covered this should be included in weekly , monthly checks as appropriate. There is a low level indicator on the unit but checking the level manually keeps you fully aware of the situation , the last thing you want when driving is warnings lights showing due to poor maintenance.
If your car is serviced by Mercedes Benz they will change the brake fluid every two years.
I have followed this procedure with my previous a class model over a period of ten years and unlike many cars previously owned have not had to replace a single wheel cylinder, from that evidence alone I feel the advise in this case is worth while.
By changing the brake fluid the level of water/moister in fluid is reduced The brake fluid being hydrostatic,(Attracts water moisture) which causes rusting of the piston and components of the braking system.
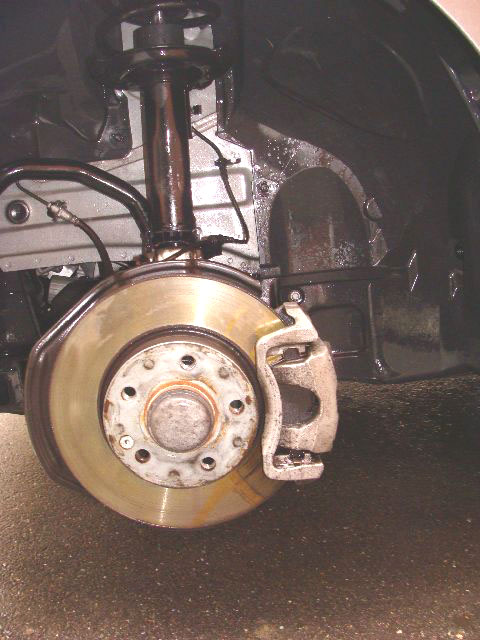
The brake disc and calliper are the same layout as on the w168 the brake calliper may be a little larger but this makes no difference when it comes to changing the brake pads.
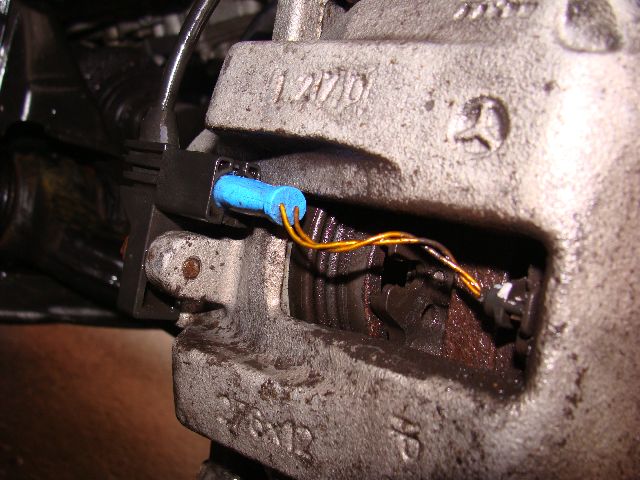
The low pad warning sensor is very evident, this will give warning of low brake pad levels by producing a warning light on the instrument cluster , However if the car is kept services this warning will never show and the mechanic will check the pad levels on each service. If the wire going to the low pad warning probe which fits in to a hole in the edge of the pad is damaged or broken, then a low pad symbol will appear in the instrument cluster when you start the car.
It is most important that you withdraw the sensor probe from the pad before removing the pads, fail to do this and the wires my be broken.
Should you accidentally damage the sensor then simply detach the warning probe from the pad and replace as soon as you have a spare available. The warning lamp on the instrument cluster will remain lit while the ignition is on so replace the sensor as soon as possible. The symbol is a brake drum, low warning brake pads.
I have just replaced my brake pads all round at 31000,miles with pads manufactured by 'DEPHI' which cost approx £50.00 However if you do buy this or any make of pads other than Mercedes-benz buy a new low pad sensor as well the reason being that the hole in the edge of the pad for the L.P.W.sensor is fractionally larger and so the sensor may be a loose fit in the pad even though the small clip is fitted. (See below) . This is obviously not acceptable and you will either have to 'pack it out' or buy a new sensor with the same make as the Pads. DIY Fitting brake pads all round and servicing the callipers takes not more than two hours, You will need a 9mm ring spanner for the bleed valve as it is larger than on the W168. remember you will also need a clamp to return the piston on the calliper. If the brake pad clips on you vehicle are worn then purchase Mercedes parts as the cilps are included in the pack. Mine cleaned up like new and were no replaced on this occassion.
Any work done of the braking system is outside of the normal service if undertaken by Mercedes Workshops unless specified.
New job sheets will be raised for such work which is charged extra to the normal service. Your approval to carry out such work should be sought before any such work is started unless you have instructed otherwise. You have the right to see the parts removed.
When using any garage Workshop to undertake such work I would always recommend you the customer to ask for parts to be available for your inspection, this action is also a way of confirming the parts in question have been replaced.
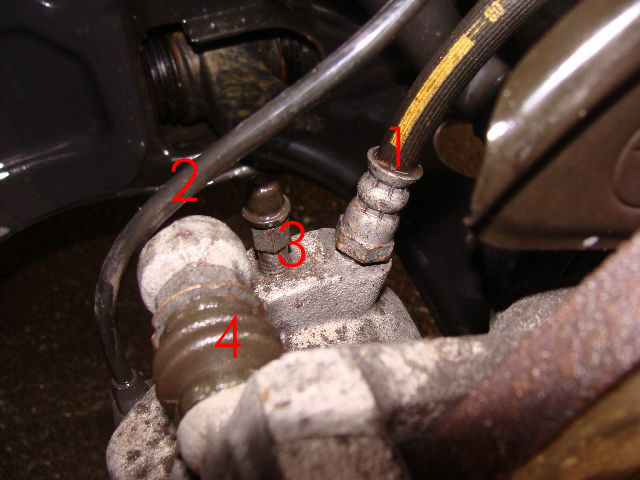
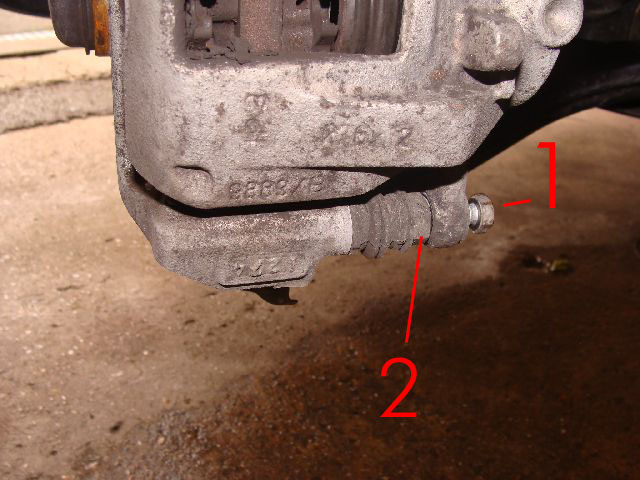
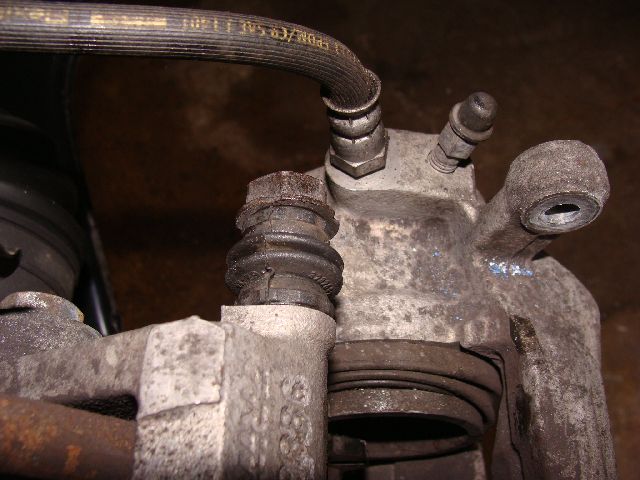
This photo shows :- 1. Hydraulic hose going to the caliper 2. The electrical connection from the ESP/ABS detector on the drive shaft. 3. The bleed Valve 4. The corrugated gaiter on the caliper slides which should be kept in good condition.
These protect the two axles on which the caliper slide allowing both brake pads to apply even braking pressure to the braking discs.
For all servicing ,replacement of pads etc see:- my pages 27 & 28, Brake pad inspection /replacement, Front brake caliper inspection.
Remember when ordering spare parts to quote your Vin number which starts with WDD169
Having used Mercedes Parts over many years I have found it is always worth comparing prices. they are in the main no dearer than other suppliers. My experience has been that parts from Mercedes come complete with springs, nut, washers, etc where as other suppliers do not include these sometimes vital extras.
Procedure for servicing front calipers
Taking all preliminary safety precautions remove front wheel.
This procedure differs from the W168 where you will find the guide pins bolted to the calliper body.
Remove the lower bolt 1. from caliper. I used a 1/2"AF spanner which was a precise fit or a 13mm socket will do the job . This bolt is screwed into the end of the lower caliper guide pin 2. which may turn as you attempt to undo the bolt.
I secured this by holding with a 17mm open ended spanner.
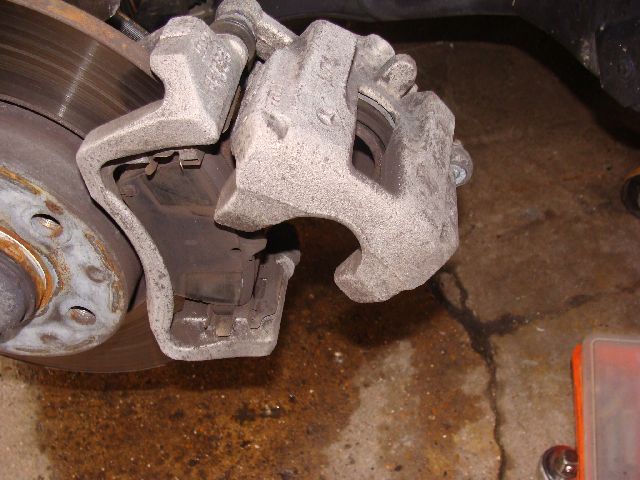
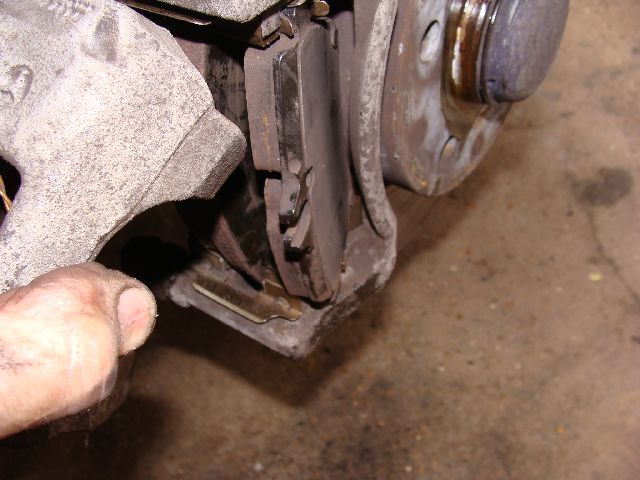
You will now be able to lift the sliding section of the caliper and remove, or inspect the pads.
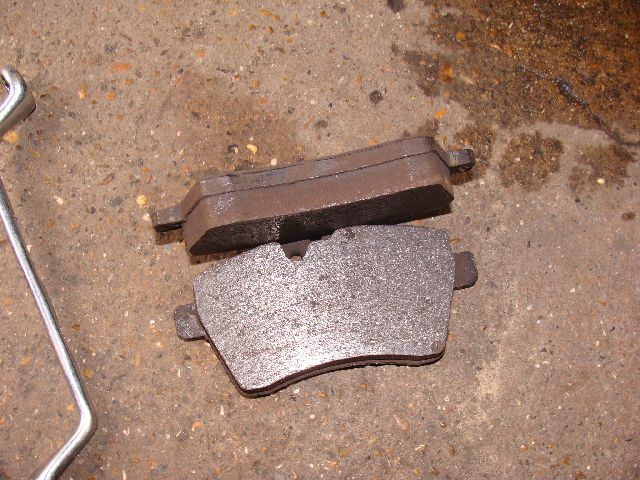
You will now be able inspect and clean the pads which in this case have many thousands of miles of life left and are free from any form of contamination.
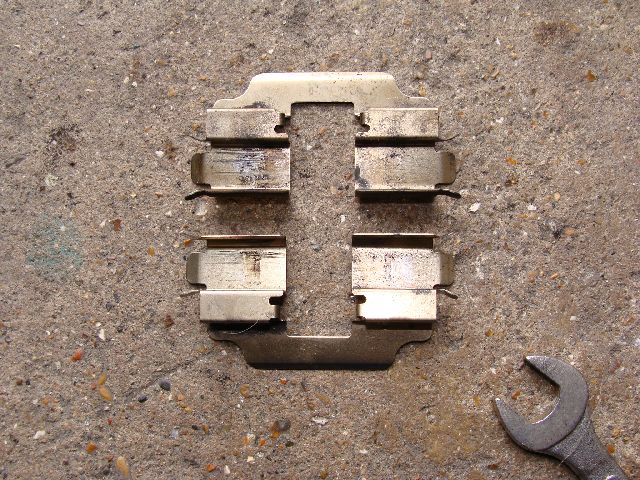
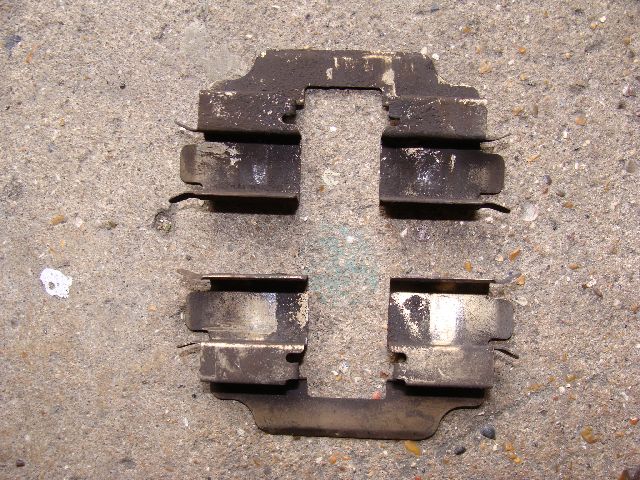
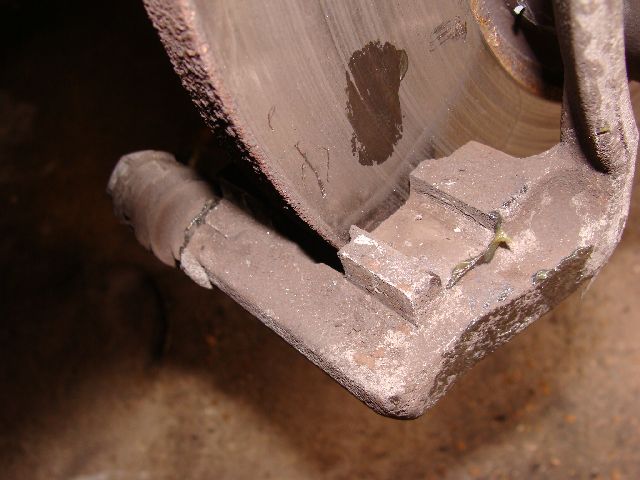
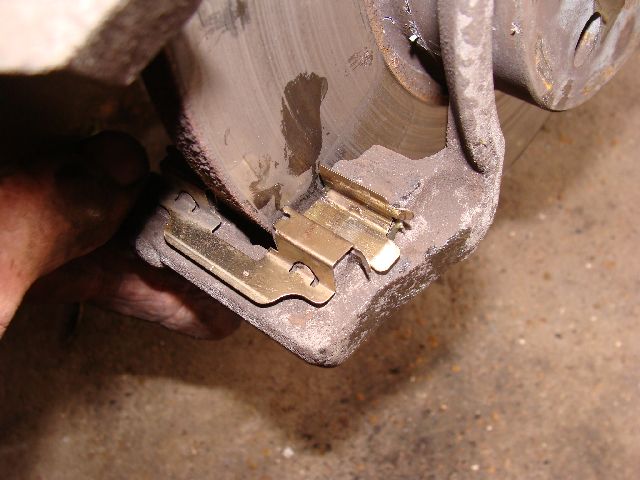
At this point I remove the pad clips and clean using a solvent this removes all the carbon and accumulated dust on the clips dry with a clean cloth and lightly grease the seating on which the toes of the pads are supported. This will ensure the pads can adjust easily as they adjust to wear.
Remove the pad retention clips, clean using cleaning agent such as, white spirit. This are quite frail so avoid bending them while cleaning. (New pads purchased from Mercedes-Benz parts come complete with new clips )
Two top tips to make you brakes work smoother:- 1. Lightly grease the back surface of the pad that comes into contact with the rim of the Piston of the caliper.
2. Ensure that the shoulders of the pad that slide in the pad clips are free of paint and rust. I use a fine file just to remove the layer of paint, you will find this is not done when the car is manufactured, as a result your pads may not back off from the brake disc as they should, leading to excess rubbing of the pads on the brake Disc.
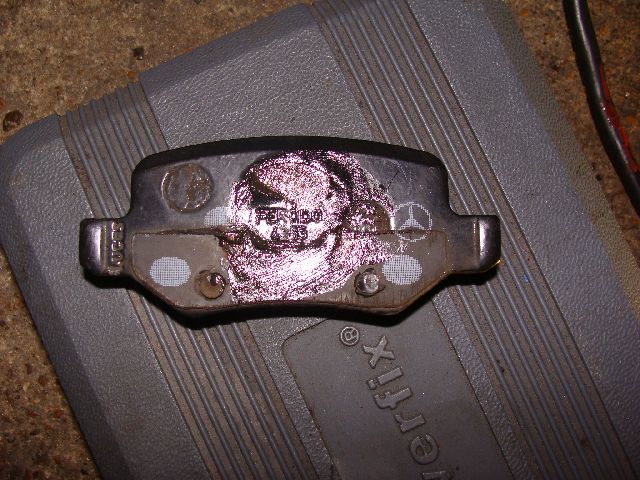
Having removed and cleaned the pads with a clean cloth it is easy to replace them to their original positions as the rear pad will be marked where the piston applies pressure as the brakes are used.
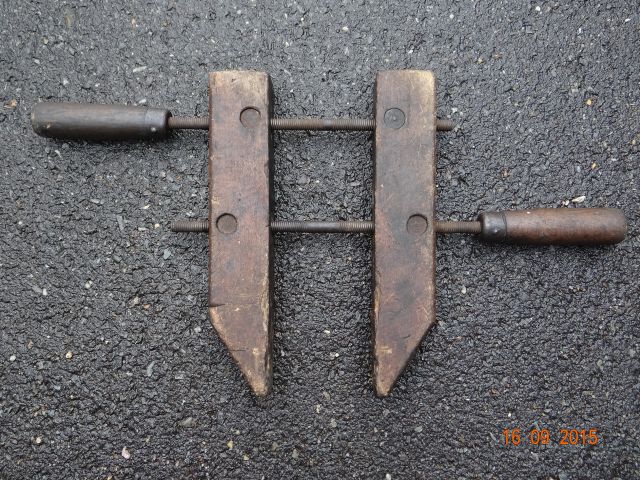
If the need arises you may need to push the piston back towards the cylinder of the caliper, this can normally only be done using a clamp or compressing tool. It is not unusual if the piston moves slightly from the cylinder while you are working on brakes, you may therefore need to return the piston using a compressing tool I myself use and old wooden clamp.
Opening the bleed vale on the caliper will make the job easier but is should not be necessary.
There should be no problem with contaminated brake fluid providing the schedule for brake fluid change has been followed. Ie. every two years.
Brake fluid is hydrostatic naturally attracts water, in view of this store any brake fluid in sealed containers.
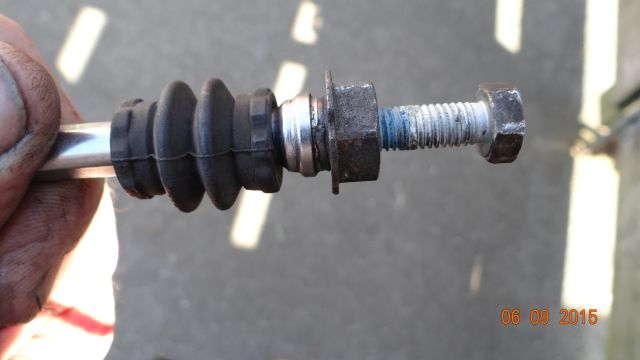
I took the opportunity to check the caliper guide pin ,clean and lightly re-grease with GP grease. Take care not to damage the corrugated rubber gaiter. Replace ensuring the inner end of the gaiter is housed in the groove.
Repeat the cleaning and lightly greasing of the upper caliper guide pin. Remember as with the w168 callipers you will need a clamp to return the piston into the cylinder, this is made easier if the bleed valve is undone 1/2 a turn. You will need to bleed the brakes after servicing or replacing the brake pads. I use an old wood working clamp as shown, any suitable clamp can be used but do not damage the edges of the piston.
Replace the Pad clips having cleaned and lightly greased., Ensure that any surplus grease is wiped off ensure the brake disc is free of contamination before re-fitting pads.
When offering the pads back to the caliper place in to the caliper at a 45%angle this will make the task easier. Ensure the pad is firmly against the brake disc before lowering the sliding section of the caliper. If you find that it will not drop fully this may be because the piston has moved and therefore need to be compressed back into the cylinder.
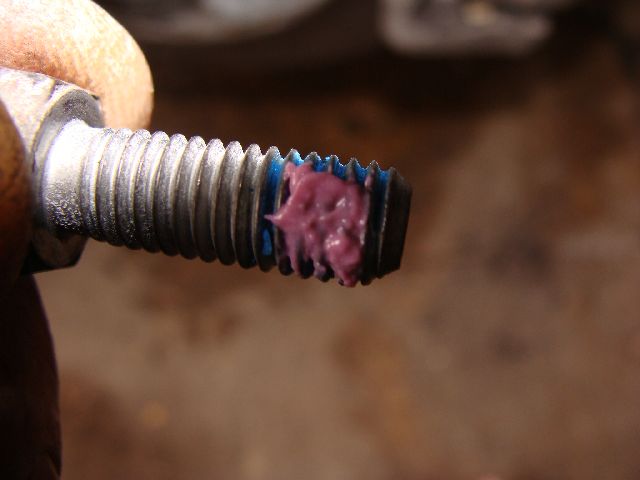
Re-fit the lower bolt applying a small amount of 'Lock-tite'-to secure. Unlike the w168 these two bolts are all that hold the caliper together so ensure the bolts are secured and tightened fully.
There is sufficient flexible brake hose to be able to move the caliper but avoid any weight be placed on the hose. Ensure any cables and hoses including the low pad warning probe is fitted correctly clipped where necessary before replacing road wheels.
Duplicate the procedure on the other side to maintain Balance.
Note There is only one low pad warning devise fitted and that is on the off side caliper, outside pad. When replacing the sensor ensure the cable is clear of the brake disc, and that the small clip is present on the section that slides in the slot on the brake pad this will ensure the sensor does not slide out of the pad.
Although the brakes on my car appeared to be working well, the caliper on the off-side was very difficult to remove and only one pad had been moving freely when the pressure was released on the brake pedal.
Servicing the caliper has overcome this problem which would certainly have resulted in one pad being worn more than the other had it been left.
 Two top tips to make you brakes work smoother:-
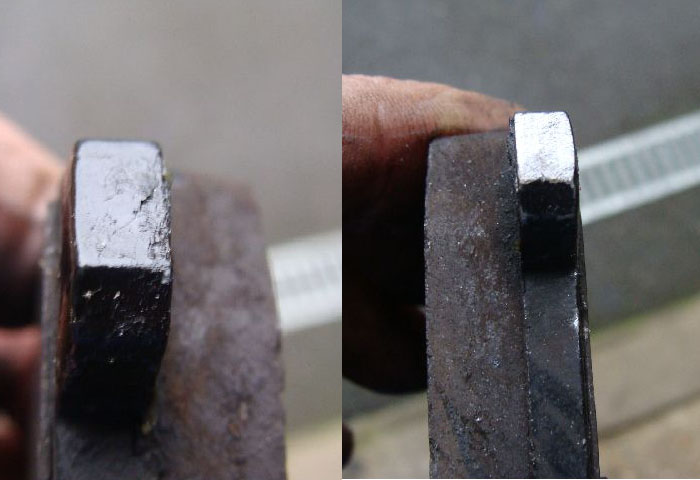 2. Ensure that the shoulders of the pad that slide in the pad clips are free of paint and rust.
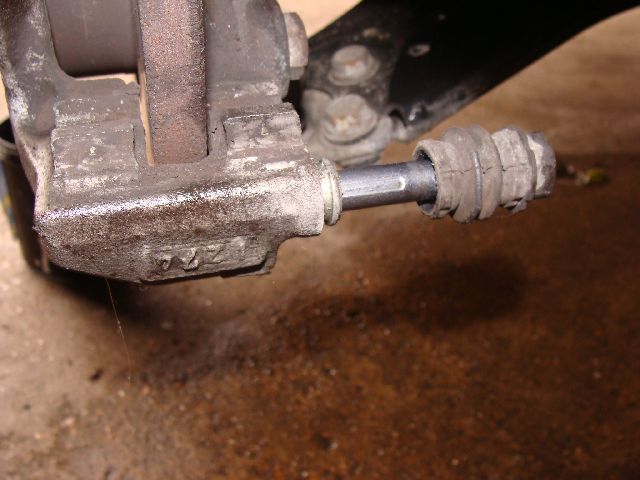

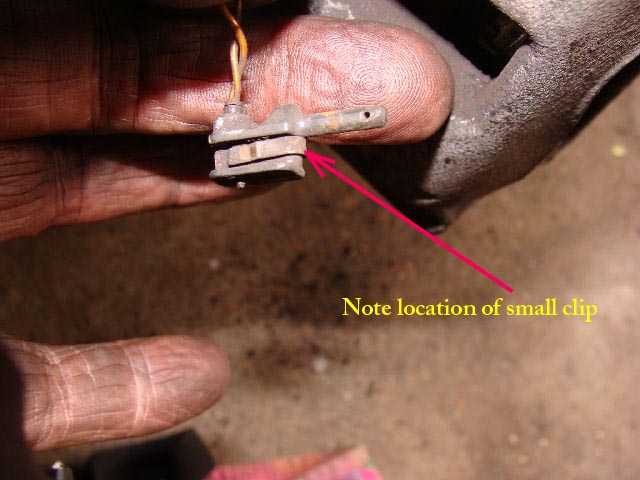
 Note There is only one low pad warning devise fitted and that is on the off side caliper, outside pad. When replacing the sensor ensure the cable is clear of the brake disc, and that the small clip is present on the section that slides in the slot on the brake pad this will ensure the sensor does not slide out of the pad.