Re-Setting On board computer settings, Service Assyst, Lighting Locking etc/ instrument cluster.
Much of this information is in the owners handbook, however I'm aware the many owners do not have handbooks and may not therefore know of these facilities. The procedure for resetting the service assyst is not in the W169 handbook.
If you are having your car serviced by a garage be it by Mercedes Independent or Mercedes Main Dealer then they will be aware of the procedures to follow and what is checked when.
However if you are doing your own servicing and many owners now prefer to do so, there is little doubt it is cheaper after you have bought the necessary tools, and is also more convenient in that you can undertake the work in stages and spread the cost, also you do not loose the use of your car, and avoid the hassle of getting the car to and from the garage usually on dates that suit them rather you .
Albeit some garages will now pick your vehicle and drop it back to you at home or work. BUT be prepared to pay!
If doing your own servicing then following the service schedule/list for the A & B service in the W168 section of this site Page 47, that will ensure you cover all the necessary points. There being very little difference between the W168 and W169 models accept to say that in a number of cases the servicing of the W169 is far easier than on the W168.
Changing the carbon filter is one example, on the W168 it can take 30 mins or more whereas on the W169 in takes only a few minutes.
Also make sure you cover the servicing of any extra's fitted to your individual car, such as Eco start Battery, and tow bar fixtures and fittings which does now come within the MOT.(Ministry Of Transport Test) required in the UK Annually after the 3rd year.
There is a need to pay more attention to the bodywork as there are now more metal parts than on the W168, front wings and bonnet for instance all will corrode and rust if not kept protected.
If you are driving an automatic then ensure the transmission fluid is changed at the prescribed intervals as set out in your hand book or as advised by a service centre.
Many owners seek the procedures for re-setting the Service assyst. I would point out that this should never be re-set until such times as the service schedule is completed, to do so creates a false sense of security whereupon your car may become unsafe, or more likely to breakdown
Changing the service data on your car does not make the brake pads last longer, anymore than an air filter becomes clean, so if altering the servicing data which enhances your safety as well as other road users and pedestrians, and will prevent breakdowns which would otherwise occur
Always bear in mind that following any serious accident the police in conjunction with VOSA can/may well impound your car for a full mechanical inspection. The last thing you want is for them to find that although all services have been done according the the cars computer, mechanical evidence Ie brakes tyres etc are found to be in poor condition or even dangerous.
When purchasing a vehicle, remember just because it has an MOT certificate does not mean that the car has been serviced or is in a road worthy condition, as many months may have elapsed since the MOT was undertaken.
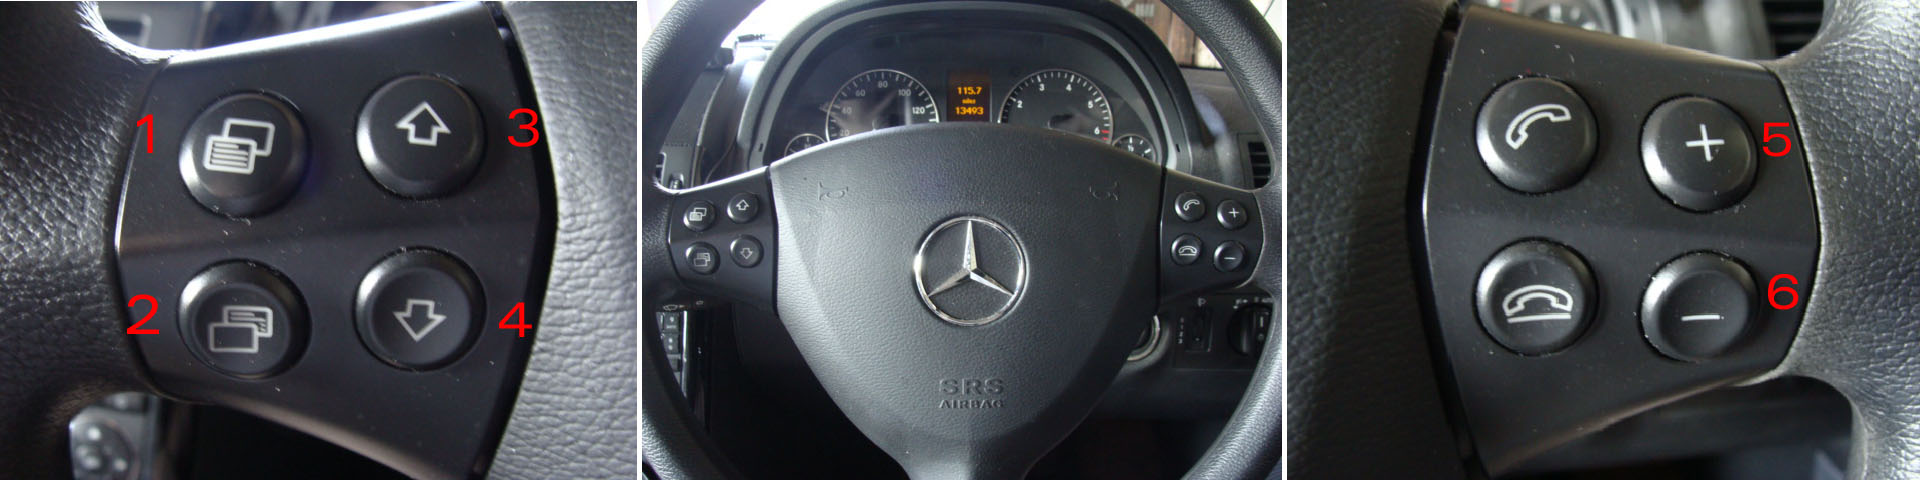
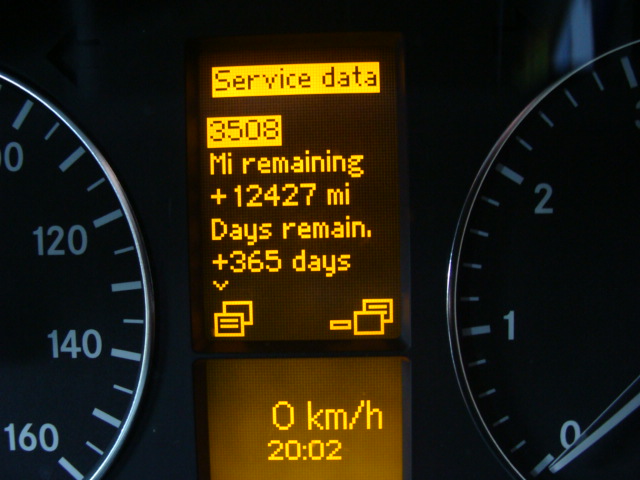
There is on the W169 A class a display that will tell at any given time when the next service is due this information can be called upon by using the steering wheel buttons.
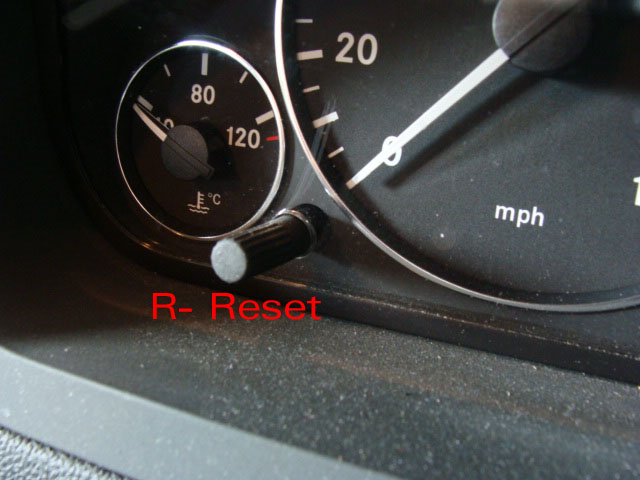
Where reference is made to the (R-Button) Reset button, in the owners manual or sites such as this, this is situated in the lower left hand side of the instrument cluster . This button only needs to be lightly pressed.
To view this feature you will need to operate the buttons on the steering wheel-: (Note some early W169 models may differ in these procedures to that applied to the 2009 model)
To view the next service due information:-
A. Turn the ignition to position 1.(one) B. Press button 1(one) repeatedly until the mileage trip and total miles run figures show in the instrument cluster. C. Now press button 4, This display miles/days to the next service.
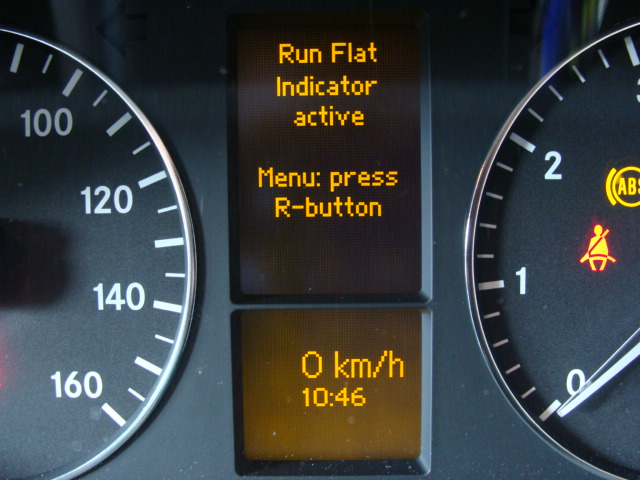
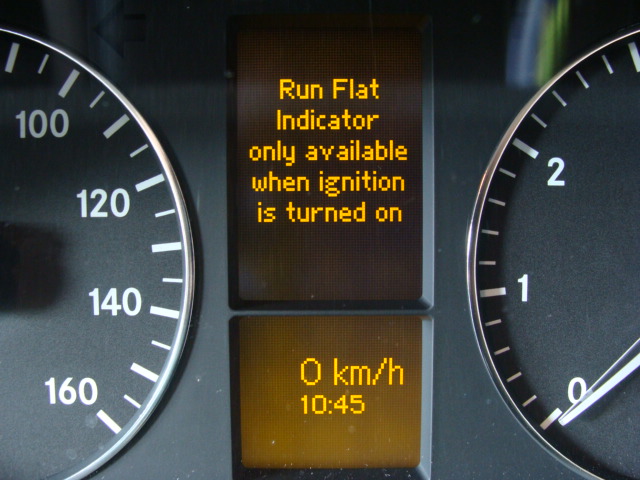
To view Tyre pressure monitoring facility (run flat indicator):-
D. With the ignition now turned to position 2 (two)
Press button 3, this will display the tyres run flat indicator, which if fitted on your car should show as being active.
If this is not the case then it can be switched on by pressing the (R)re-set button and then using buttons Five 5or 6 (six) This facility will then indicate by display in the instrument cluster as soon as any tyre fitted on the car drops in pressure.
When servicing your car do not forget the spare wheel if one is carried. Note that in the case of space-saver spare wheels the tyres pressure is greater than those fitted on the vehicle and speed should be reduced when the wheel is in use. In the case of cars with tyre repair kits, ensure this is still in date or it may not work when required.
Do remember that the general condition of the tyres along with de-flinting (removing stones and flints from the tyre tread) will extend the life of the tyre. Measuring the tread depth should also be done when servicing the vehicle. for more information see mypage 62 in the W168 section .
There must be a legal minimum of 1.6mm over 3/4 the width of the tyre tread with no damage or bulging to the tyre walls for the tyre to be legal in the UK. Tyres detected that do not meet these standards are an automatic MOT failure and if you are stopped by the police, will result in automatic points on your driving licence for each defective tyre found, as well as a fine. So it is cheaper to buy new tyres when required!
Included in your service should be a check of the battery.
Very few batteries these days require checking for distilled water, as most now come sealed. Battery terminals however should be checked to ensure they are not sulphating which will cause damage and weaken the terminal.
Checking battery Voltage
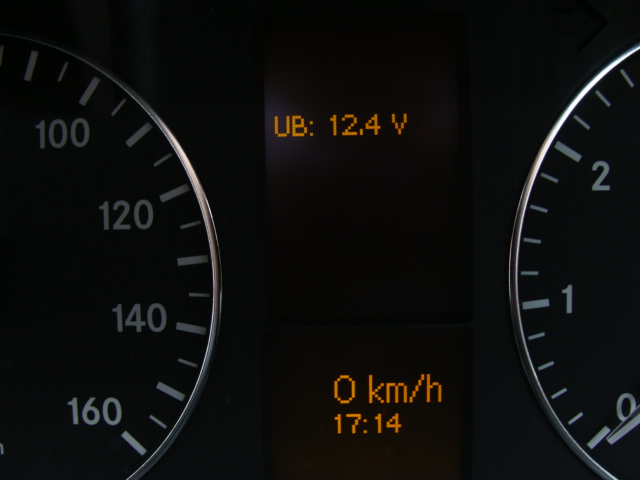
The Voltage of the battery can be checked by turning the ignition to position 1 (one) and then pressing the (R)re-set button three times in quick succession this will enable you to see the Voltage of the battery when stationary. in the case of my own vehicle the voltage was 12.4 volts, 12.9 after a 15 hour trickle charge.
To check the alternator and voltage when the engine is running, simply start the engine the voltage will increase in the display as the revs increase and will read well in excess of 12 volts, in my case with all light on 13.7, 14.8 volts after trickle charge. This clearly shows that the alternator/dynamo is doing its job.
The A class is notorious for not starting when the battery is below 12 volts.
It is not just a case of the engine failing to start but the the starter fails to turn the engine, generally there is no clicking or indication as to why the engine will not turn.
On some vehicles the lights dip (Are seen to decrease in intensity )if the battery is low on power as the key is turned to the start position, with the A class this is not always the case. So if you are not doing a lot of mileage ensure your battery is trickle charged from time to time.
For more information on batteries and chargers visit mypage 13 in the W168 section of this site.
On completion of Service , Re-Set the Service Assyst.
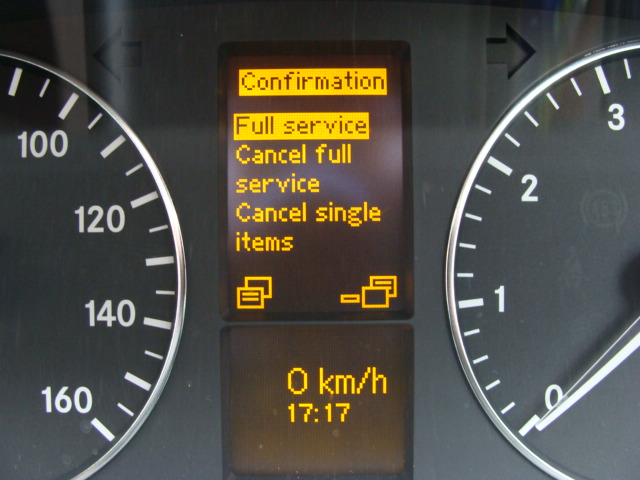
A. Turn the ignition to position 1.(one) B. Press button 1(one) repeatedly until the mileage trip and total miles run figures show in the instrument cluster. C. Press the (R) re-set button three times(3)in quick succession, the battery voltage will appear D. Press the down arrow, 4 This will call up the service menu E. Press the Plus (+) or minus (-) Buttons 5 and 6 to navigate up or down the service menu, select confirmation F. Press button 2 to confirm the full service. G. Press button 1 until the standard display appears H. Turn off ignition.
You can confirm the recording of the service by looking at the next service due, see above
These menu pages are used for recording your service, and may help you in finding your way around the menu pages, however feed back on this subject from other owners is mixed with different owners taking different actions to achieve the same end, i.e. recording the DIY service
The above procedure appears to differ for W169 up to 2006. There are slight variations listed on my DVD, for availability see items for sale.
While investigating this procedure a number of other menu items were located, although these may be used by Mercedes they appeared to play no part in re-setting the assyst.
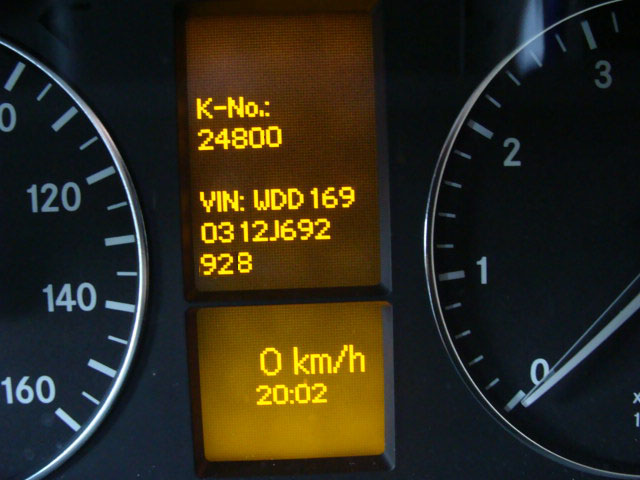
Additional information located. Vehicle Vin code etc.
K-No I assume is the ignition Key number, however this is not the same number as located on the plastic body of the remote key , see page 4 of this section. The information in this photo has been altered for security reasons .
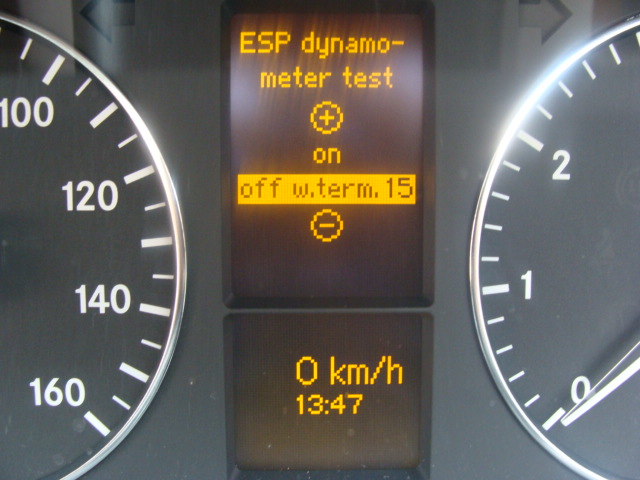
I will endeavour to obtain more information on these and will update the page accordingly. In the case of the ESP/dynamo + was selected indicating that it is ON, at present I have no information as to what this feature is for, other than what is says!
In view of the details available on the instrument cluster I strongly suspect that the instrument cluster will have been coded to the vehicle. So check if it is necessary to replace for any reason.
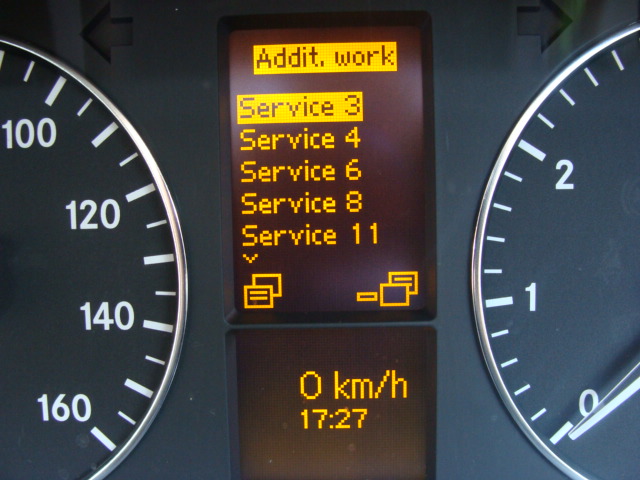
The service schedule on my 2009 W169 appears to have 13 services, these would take into account the different tasks that need to be completed on each service and no doubt priced accordingly + parts + Vat.
By servicing the vehicle yourself items like air filters can be changed more frequently thereby getting maximum fuel efficiency.
The replacing of brake pads and brake shoes would also come into one of the later services they being changed without inspection, unlike DIY servicing where they would not be changed until they needed doing, this would be following a service/inspection which if you have the tools and knowledge plus time is a cost effective way of running a car.
That said with the technology now built into modern vehicles and the way the power pack is located in the A class, some jobs will be beyond even the best of DIY mechanics. Monies saved in labour costs can then be invested in getting these jobs done by a good Independent Mercedes Dealer, or garage of your choice.
If getting you car serviced/repaired by Mercedes Main dealers make sure you are aware of costs before leaving your car. With older vehicles the service costs can be greater than the value of the vehicle mainly due to high labour costs!
Be aware that even if your car is still under guarantee, you are legally permitted under EC law to get your car serviced at a garage of your choosing , however genuine Manufacturers parts must be fitted and invoiced or the guarantee would be affected
You would of course loose the 'Mobilo life' facility (Mercedes Free breakdown service) Like the anti-corrosion warrantee for this to be available you must have had all services and checks done by a Mercedes Main Dealer
I will add to this page as the various screens are located, I found it difficult to duplicate a number of the actions taken to gain access to this information. However nothing seen was vital information and the service could be conducted and recorded without accessing those pages.
Being aware that many of my readers have had their W169 for many years, if any of you are conversant with the service assyst reset and other pages of information available I would like to hear from you
Thanks
Lofty
Useful information for changing settings to get the best from your W169 A Class
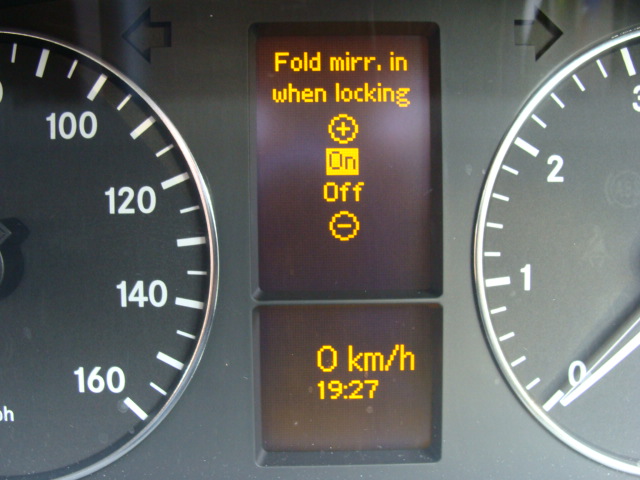
Changing electric folding mirrors settings
The electric mirrors can be set to automatically close and open when the car is locked/unlocked with the remote key, or set to be controlled manually.
To change the settings :-
With ignition in position two(2)
A. Press button One (1)
B. Press button three(3)
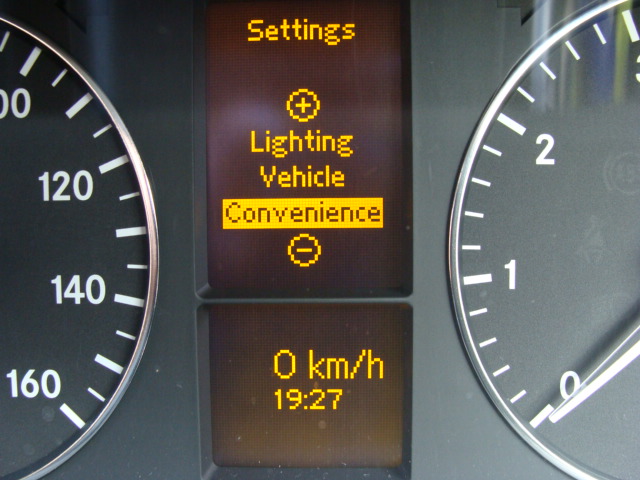
C. Press button, (5) or (6) to select the CONVENIENCE sub menu
D. Press button three (3)to select FOLD IN MIRRORS WHEN LOCKING
E. Press button, plus (5) or (6) to deactivate this facility.
F. Press either buttons, 1,2 or 3 to select a different display.
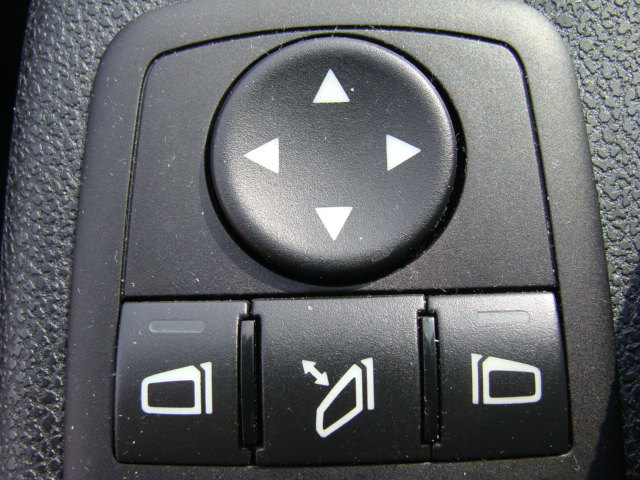
If when driving the car you wish for any reason to close the mirrors this can be done by pressing the centre mirror switch situated in the drivers door card.(Door Panel)
If the last action was to close manually, then they will not open automatically when unlocking the car.
This is a useful facility, as I cannot for instance get the car into my garage without closing the mirrors first, in the same way if I were to open the car with the remote key and the mirrors opened out, then they would become damaged when I pulled out of the garage.
Once reopened manually they then open and close automatically when the car is locked and unlocked. if:- 'FOLD IN MIRRORS WHEN LOCKING' has been selected from the menu.
Adjusting the mirrors is done by selecting either left or right mirror switch and then using the upper button to move the mirror glass in the direction required.
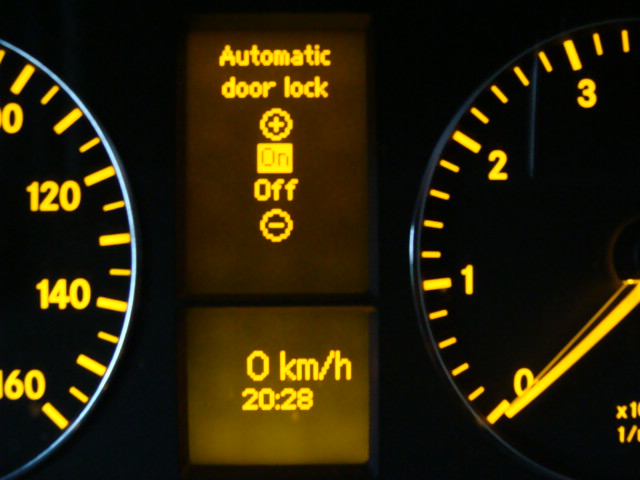
Activating/Deactivating the Automatic Door locking feature.
When you activate the Automatic door locking function your vehicle will be automatically centrally locked above a speed of approx. 15km 8-10MPH
This prevents unauthorised persons from opening your doors while stopped for any reason. I.e. Waiting at traffic lights, junctions, traffic queues etc, thereby making your car and the contents safer.
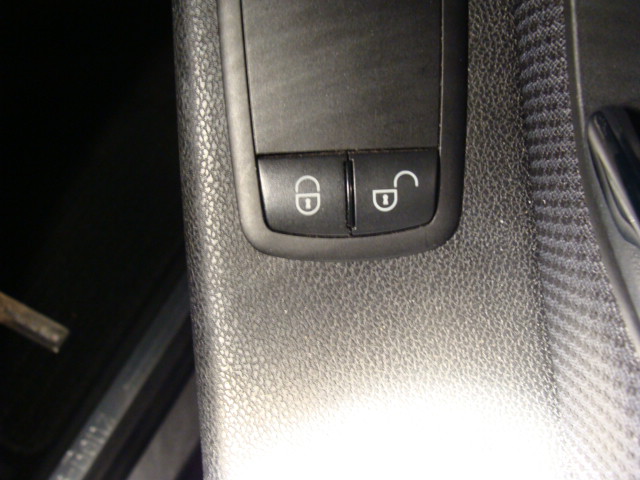
All doors can be opened by pressing the unlock button on the drivers door card (door panel) or opening any door from the inside.
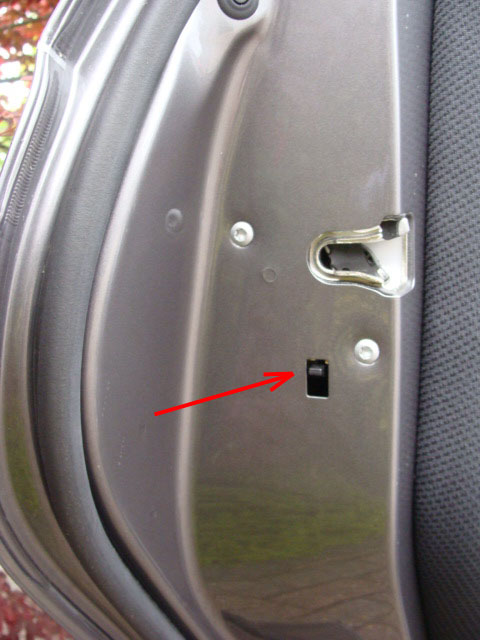
Note rear doors will not open from the inside if the child lock facility is On This can be switched ON or OFF using the black switch located on the rear of each door slam.
To Activate/Deactivate Auto locking -:
With the ignition in position two (2)
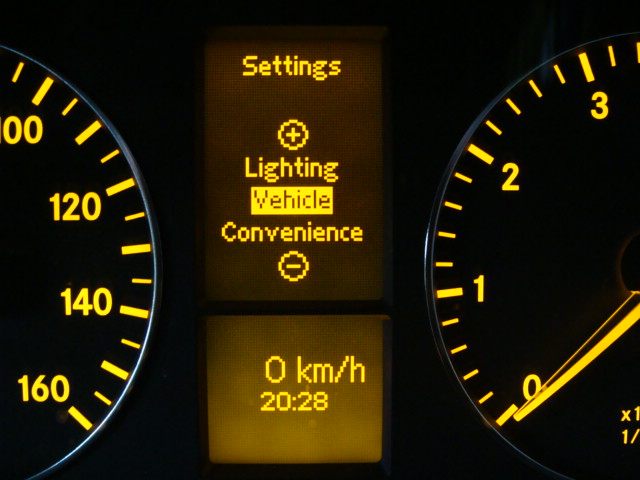
A. Press button one to select the settings menu
B. Press button three (3) to select the sub menu.
C. press buttons five or six 5 or 6 select 'VEHICLE'
D. Press button three (3)to select next page
E. press button 5 or 6 to select ON or OFF
F. Press either buttons 1, 2 or 3 to select a different display.
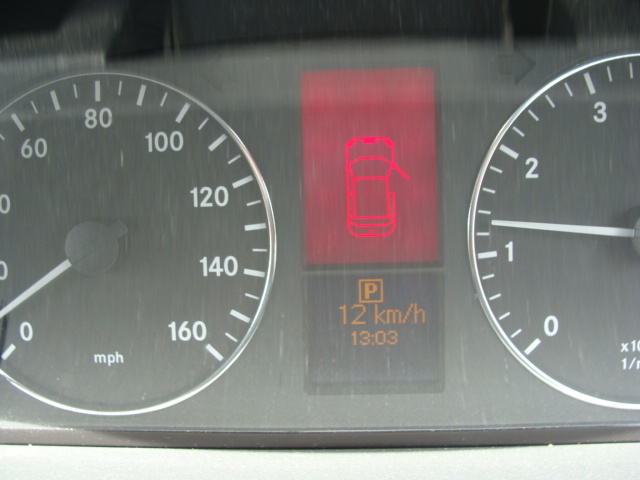
One of the more obvious displays that appear in the instrument cluster is the insecure door, this is accompanied by an audible warning. This will appear as you pull away in this case the speed was about 2-3 MPH The only action required is to fully close the door the warning then disappears.
 To view the next service due information:-
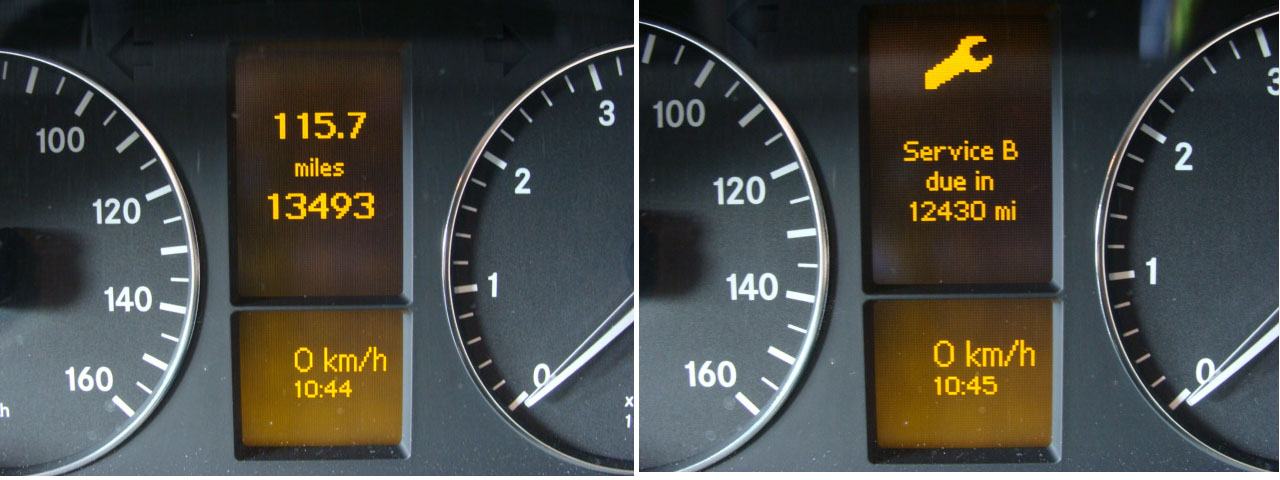
 To view Tyre pressure monitoring facility (run flat indicator):-
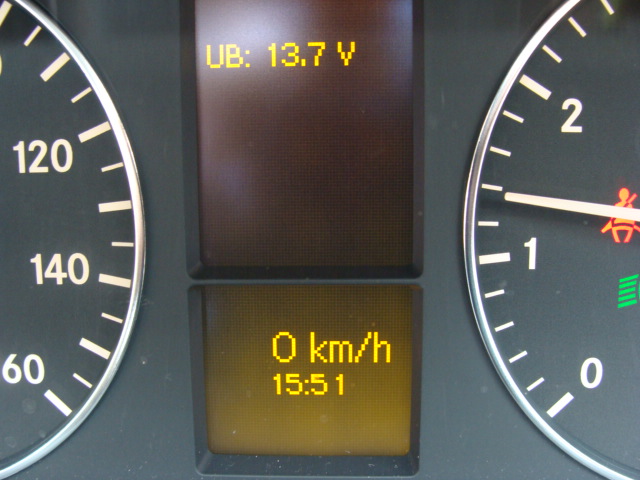
 Very few batteries these days require checking for distilled water, as most now come sealed.
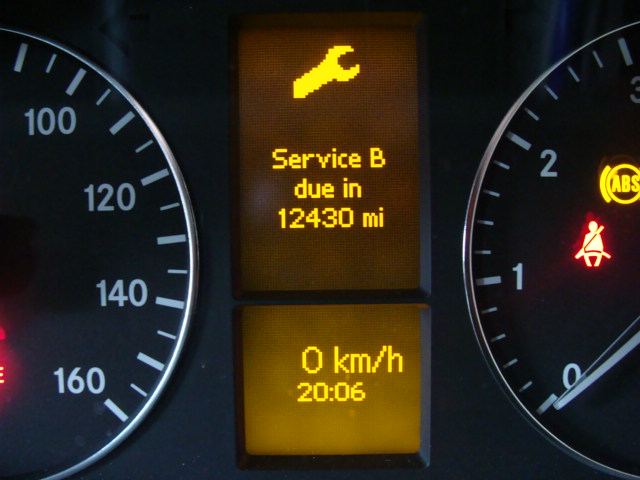 You can confirm the recording of the service by looking at the next service due, see above
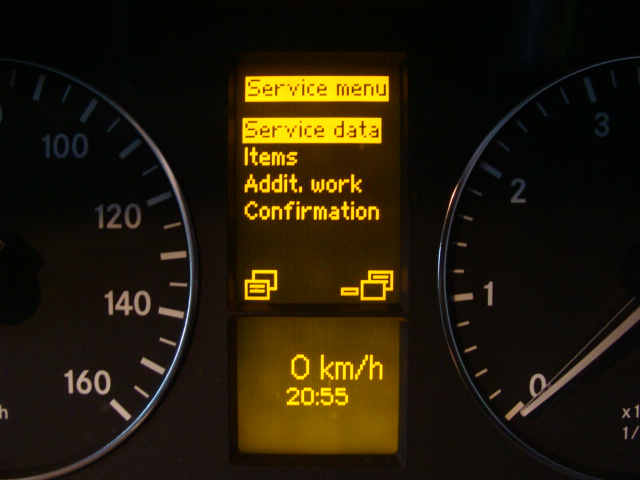
 The above procedure appears to differ for W169 up to 2006. There are slight variations listed on my DVD, for availability see items for sale.
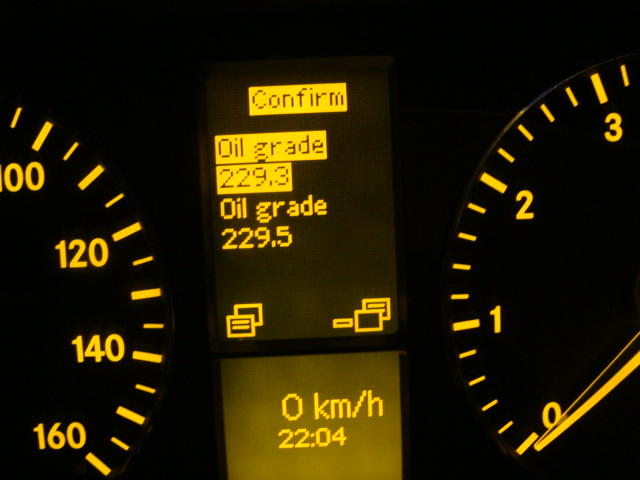
 Note rear doors will not open from the inside if the child lock facility is On