Day time Running lights In 2011 all New cars must be fitted with day time running lights However this new requirement is not retropsective and so will not affect existing vehicles .
Should you wish to install these on your car, then various kits are availble which would enable you to do so.
EC Legal Directive
In September 2008 the European Commission adopted a proposal for a Directive that will introduce dedicated daytime running light (DRL) on all new types of passenger cars and small delivery vans from February 2011 onwards. Trucks and buses will follow from August 2012 onwards.
There will be no requirement to retro-fit daytime running lights to existing cars and no Europe-wide requirement for drivers of cars without dedicated daytime running lights to drive with headlights on during the day.
Where fitted, dedicated daytime running lights will switch on automatically when the engine is started.
Many electrical problems even on modern cars are caused by earth connection failures, for an example of the problems caused see mypage 3 Item number 165 which highlights why a good earth is so necessary.
1
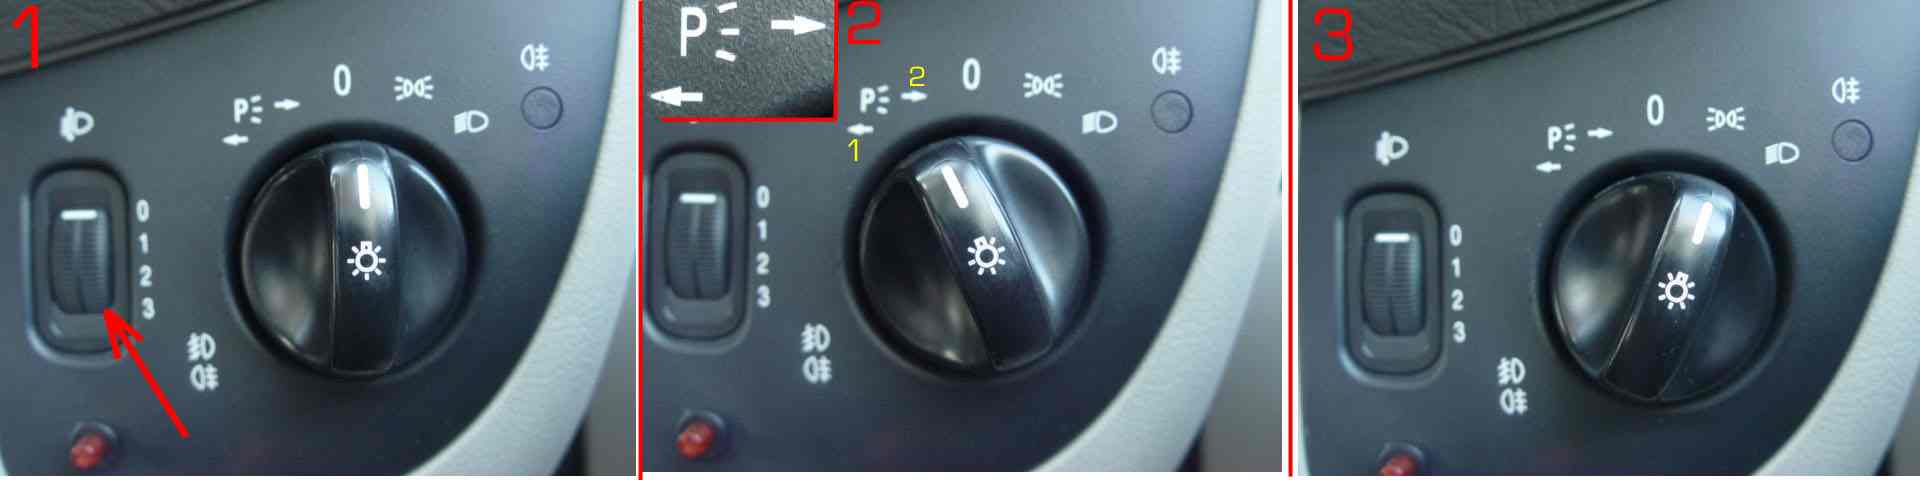
Head Light Height Adjuster
Position 0 Front seats only occupied. Position 1 When front and rear seats are occupied. Or Drivers seat occupied and load in the rear luggage compartment, up to the permissible rear axle weight. Position 2 Front and rear seats occupied and load in the rear luggage compartment, up to the maximum rear axle weight. Position 3 is not required, Note Back axle weight's differ for different models. Hand book reference 160/2002 Page 114./356/7,
2Parking light Near/side or off/side. Move switch to positions 1 or 2 With the switch in this position only one front and one rear light will be illuminated.
3 Side lights In this position Both front an both rear lights will be illuminated.( See UK Highway code for the limited use of parking/side lights.
4Headlights With the switch in this position the headlights will illuminate, The beam set will depend on the position of the switch on the left hand site of the steering column. The beam being either Dipped or full, When the beam is on full a warning light will illuminate on the dashboard display. (see example below) 5 Front fogs lamps With the switch in the headlamp position Pull the switch out away from the dash. (The fog lamp is supplied by the second element in the main beam bulb) 6 Rear High visibility lamp With the switch in the front fog position Turn the switch clockwise and then pull, the switch will be seen to move further from the dash and an amber warning lamp to the right of the switch will illuminate. This warning lamp is obligatory and must illuminate when the rear high visibility lamp is illuminated. Where there is a large amount of water spray creating a fog such as on Motorways and 'A' Class roads Drivers quite often use these lamps, and it does make sense if the driver behind gets more warning of your presence However they must be turned OFF when the conditions & visibility improve.
See the UK Highway Code in respect of the use of this lamp which is restricted to foggy conditions
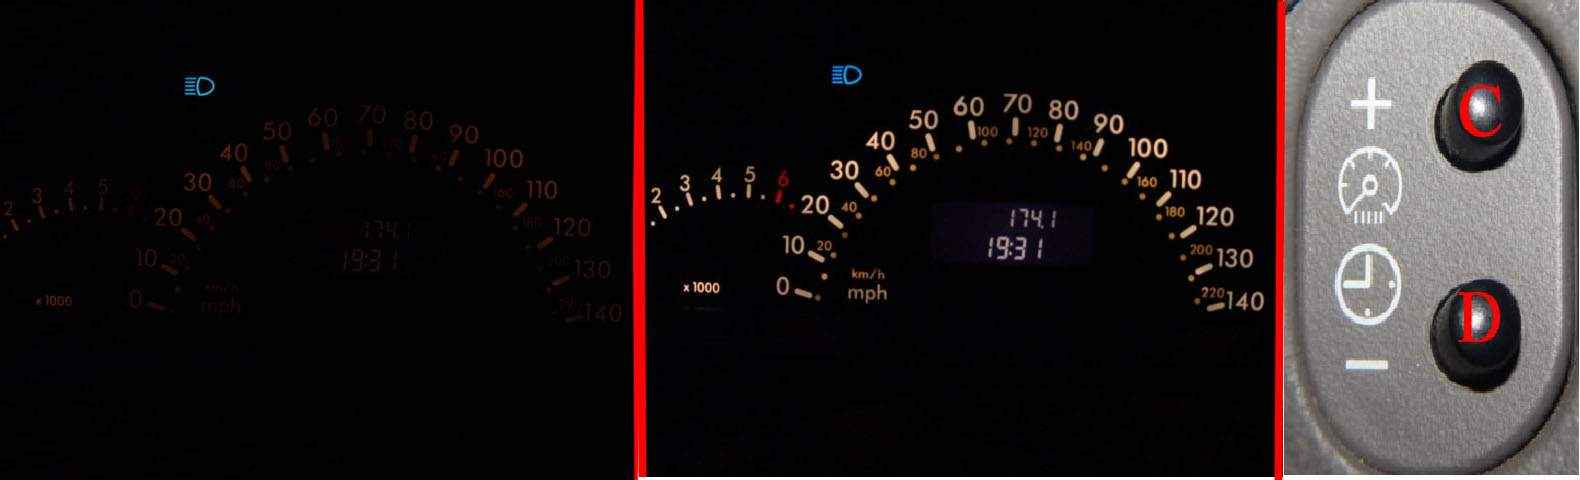
Remember you can also dim or brighten your dash & centre consul display:-
Increase the light display, with the light switch in the ON position, press the +C (Plus) on the right hand side of the steering column. Reduce the light displayed, press the - D (Minus)sign. (When sitting in the car the lights are brighter than in the photo) Note the blue headlamp display:- Indicating the the Headlights are set to FULL main beam, There is no indication when the headlights are on DIPPED main beam
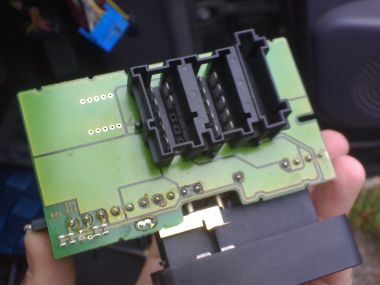
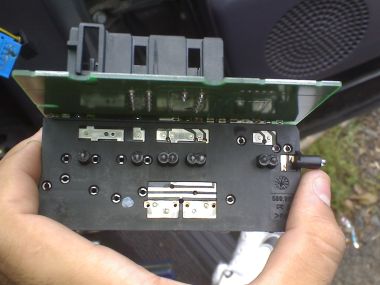
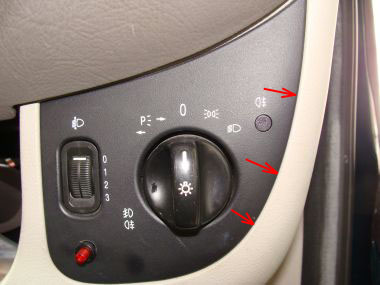
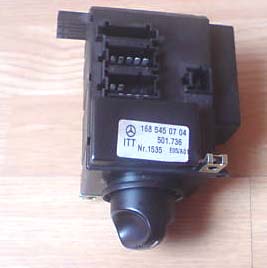
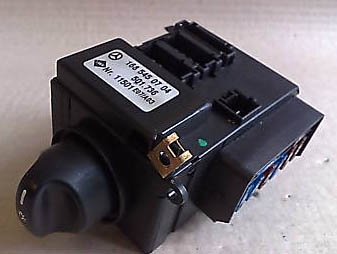
Problems associated with this switch and adjoining components.
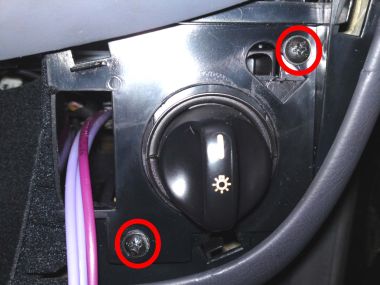
The main lighting switch is a complete unit and also encompasses the lighting fuse board. The switch is secured by three screws with speed nuts, attached to the switch assembly (indicated by red arrows) fixings can be seen in the photograph. One is accessible from the underside of the dash, close to the bonnet release lever and the other two from the front, easily seen when the main light switch facia is removed. Take care note to dislodge or move the speed nuts or you will have problems when re locating /fitting the screws.
Generally the switch gives few problems, however if it does go defective then you will get all sorts of problems which can be difficult to locate.
One owner lost the power to his fog lights, the power being provided via this switch, however because fog lights are not included in the MOT and rarely used (Annul test of all UK vehicles) he didn't follow up the reason they had stopped working.
However the car now being due for a further MOT had developed a further problem in that the near side head lamp main beams was not lighting when the switch was turned the the head-light(2)position, dipped or full.
The owner is this case spent a great deal of time trying to work out why the bulb would not power up when a meter clearly indicated that power was at the cable.
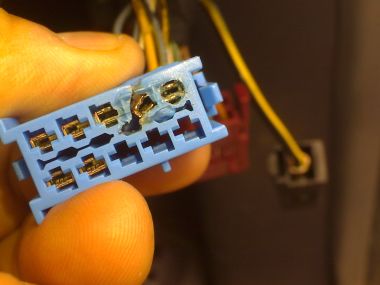
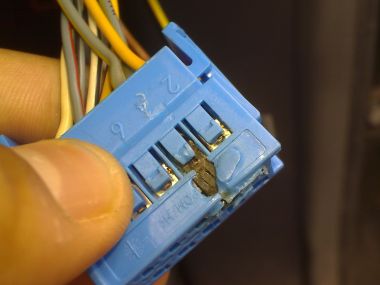
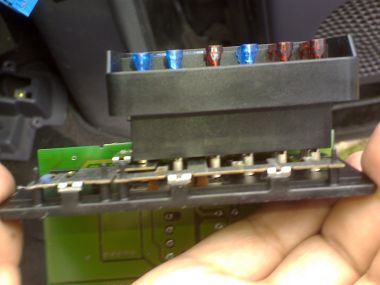
To cut a very long story short and after many e-mails he discovered that the multi pin connector which fits on to the main lighting switch spade contacts had at some point overheated almost certainly due to a short circuit and that this failure had caused three of the electrical contact pins to come into contact with one another this was the cause of his problems headlamp and fog lamps.
there is little doubt that this could have caused a serious over heating of the wiring and connectors which although protected by a fuse, could easily have caused a fire.
It is not always wise therefore to simply replace a fuse without first trying to investigate why it has burnt-out in the first place and NEVER replace a fuse with a fuse of higher rating than that specified by the manufacturer, had this owner done so he would almost certainly have finished up with a burnt out car.
He now having replaced the multi pin block every thing now works fine.
It is worth noting that the off/side and near side bulbs are fused separately and that a fault one side may not affect the other, it is of course always worth checking fuses, then bulbs in the lighting fuse box located on the end of the main dash. Only after having checked these two aspects move on to look for other faults.
It is always best to check bulbs either on a battery or meter as some bulb defects cannot be seen with the naked eye.
If it becomes necessary to remove the main lighting switch to replace or inspect, then you would be well advised to disconnect the battery remembering to re-insert the radio code, re-set electric windows and ABS/ESP on completion. Please also note my comments with reference to turning the lighting switch to at least the side lights position (to reduce the spike of power hitting the ECU) when connecting the battery also follow the correct connection procedure.
Half the battle is of course getting to the switch in the first place. However in this instance is it is pretty straight forward.
Disconnect the battery and take precautions to make sure the battery leads do not touch the terminals while you are working
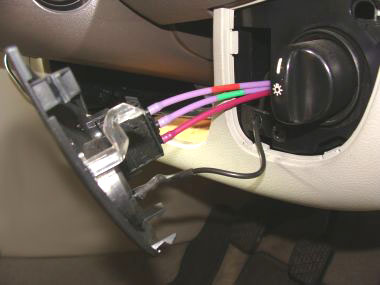
Using plastic wedges ease the front light switch facia away from the dash, this is best done when warm as plastic components become brittle when cold, gently ease the panel away. Note that the head light adjusting switch complete with the hoses and alarm indicator/switch will come away with the facia avoid putting any of these connections under stress and do not attempt to remove.
You will now be able to see two of the screws that will need to be removed to release the switch.
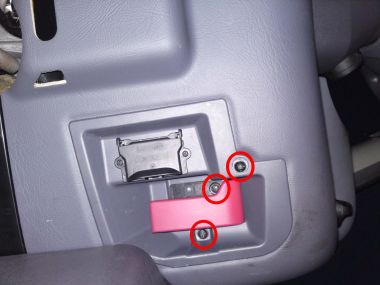
The screws shown in this photo also need to be removed which will then allow the removal of the switch, through the hole left by the bonnet release and diagnostics connection point panel, there is no need to touch the screws on the diagnostic connection, the plug at the rear is easily removed, ensure on re-assembly that this is re-fitted
Releasing the bonnet fixing screw may be an advantage.
Although the combined switch unit can be with care be manoeuvred/withdrawn through this hole care should be taken not to damage any of the components parts, avoid placing any stress on wiring and multi block or contacts may be damaged. take your time.
A lighting switch complete costs in the region of £100 so you do not want it damaged while being replaced Second hand/used parts may be as worn and defective as the ones being replaced, where possible fit new.
Handle all components carefully noting how they are positioned and fixed. Replace all components and secure, re-connnect battery & test Re insert radio code where necessary. Re-set electric windows Re-set ABS/ESP.


 The owner is this case spent a great deal of time trying to work out why the bulb would not power up when a meter clearly indicated that power was at the cable.