And yet they see Reversing Sensors 'Parktronic' as an optional extra. Why?
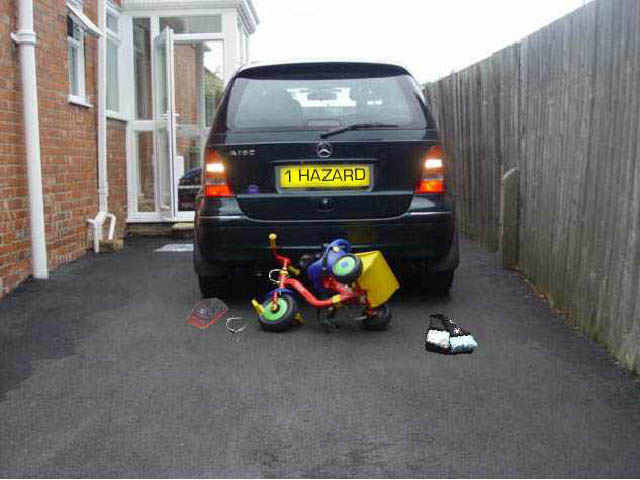
When the consequences of not having them can be so disastrous and costly and as many of you know the above photo highlights a scenario that is not uncommon as far as children and accidents go, and sadly some result in fatalities.
To have 'Parktronic' fitted as part of the standard factory fitted equipment on your New 'A' Class today will cost you £460. 23/07/07. Who knows you might even get 'Parktronic' on the front of the car for that figure? So on the rear of the car only that's £230 approx at MB prices.
10 x more that I paid for my reversing sensor kit which does the same job. OK lets be fare the warrantee only last a year on my kit, 3 years on the New Mercedes car. But is leaving such an important sensor off a car when there fitting others that do not affect the lives of others really realistic & justified? We are all capable of checking our oil manually , but can't walk behind the car and drive it at the same time!!
 YOU CAN NOW MAKE THE DECISION!
Or if you have a young family?
CAN YOU AFFORD NOT TO MAKE THE DECISION
For just a few pounds and an hours work you can fit reversing sensors to your own car, and not just avoid that odd reversing accident but also the nightmare scenario which involves one of your loved ones . The choice is yours I hope this page of information will help you make the decision. There is little doubt that every form of assistance that can be given to drivers when driving their cars safely on today's heavily congested roads has got to be welcomed.
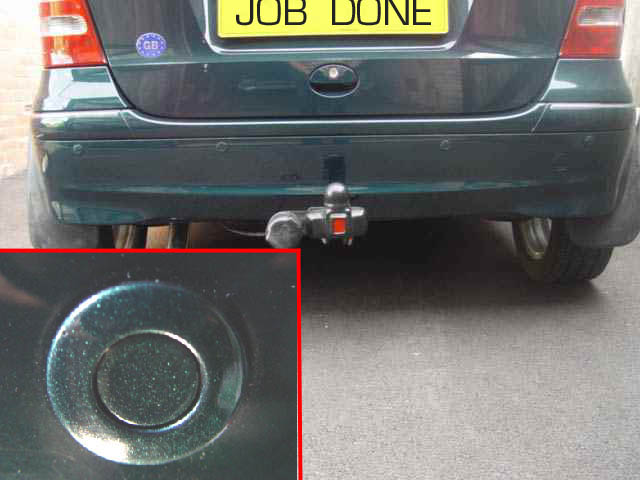
As well of course the added safety it gives to your family and pedestrians who will insist on walking behind your reversing. In this photo the hazard was .9 of a metre(3'-0" feet) away when I stopped the vehicle, with nobody put at risk.
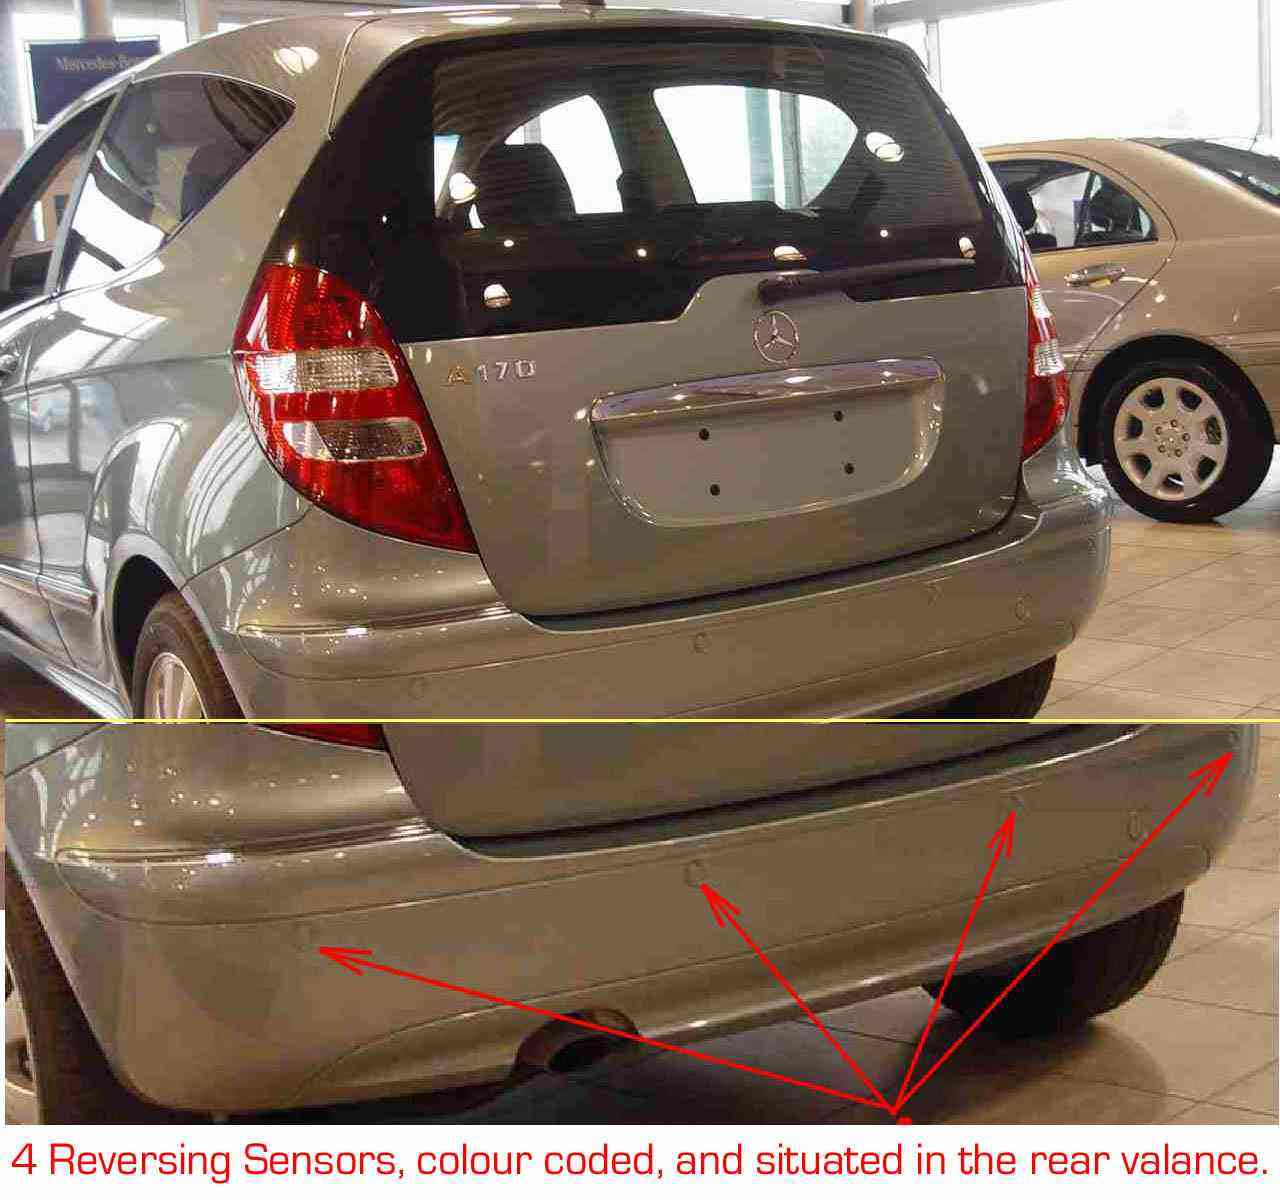 I'm not talking about gimmicks and swinging dice hanging on the mirror or nodding dogs on the rear parcel shelf which distract rather than help, but modern items of technology that assist the driver in the real sense; like the 'Parktronic' reversing sensors that are fitted to this New W169 'A' Class above which enable to driver to be aware of how close items/other vehicles are behind his car when/while reversing, showing not just consideration for his own vehicle but also to the vehicle behind.
 Although the Car in the photo is fitted with factory fitted sensors these can now be purchased quite cheaply in kit form and fitted to earlier cars, where the original specification did not include them or the cars were produced before the facility became available .
The kit I have was purchased off e-bay UK this will link you, then just enter search 'Reversing Sensors' Click Back when you are ready to return to this site.
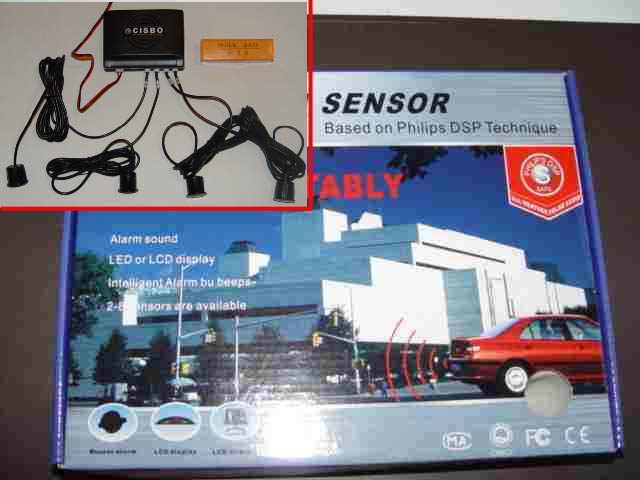
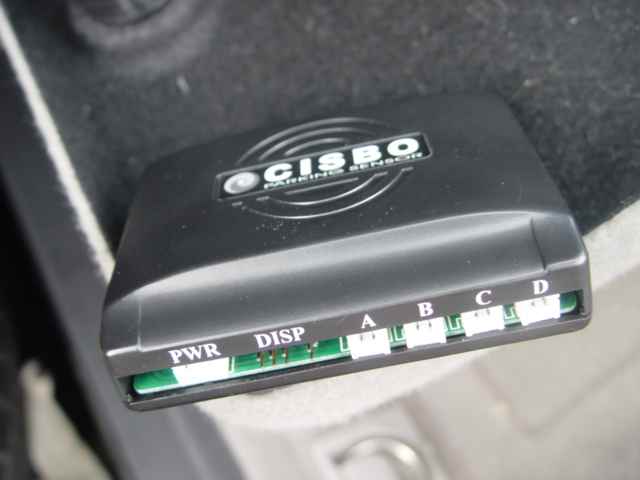
The unit is based on the Phillips DSP technique, the kit consisted of 4 sensors monitor, control panel, and all the components required to install the unit. Take care when looking at the add some sellers have very high postal charges, while others do not stamp the users manual making the 12 months manufactureres warrantee valid. albeit the seller I used did exchange two sensors, I'm still left waiting on a replacement VDU, because one of the segments is not working in my present unit after only six weeks of use. So look for sellers who have some sort of warrantee. Or ask the seller the question before purchase.
Preparation of the kit for your car
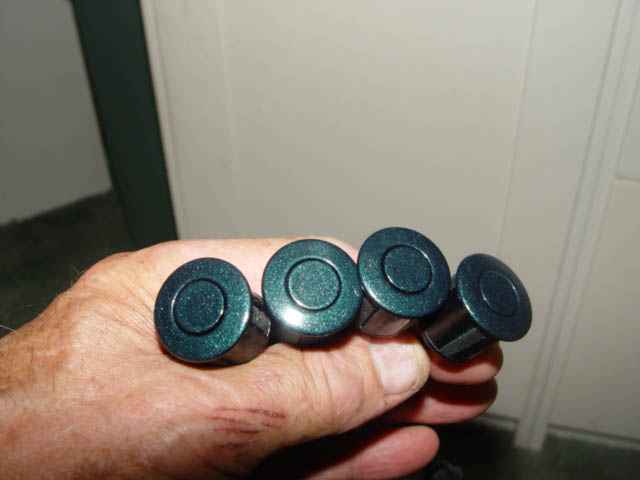 The 4 detectors ideally needed to be colour coded to the car, my car (mangrove green )which took minutes as I had a can of paint available.
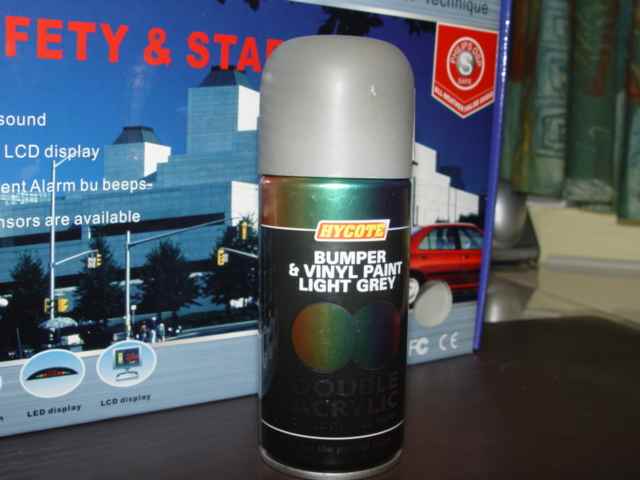
However the visual display for installing on the dash was far to pail in colour, and needed spraying to match the dash covering. A vinyl paint which was a very good match for the grey covering of my dash was readily available from my local car parts store and the job really was done in minutes at a minimal cost.
However having sprayed and fitted my units, I now see on a competitor/companies web site that they stipulate to spray the sensors with a none metallic paint My paint is an Acrylic metallic based paint but does not appear to have affected their performance.
www.parking sensors
for those that are sold units in non english this may help you . sorry about the quality, but its better than nothing! g
 Wiring for the visual display from the centre dash to the rear of the car was very straight forward, easier than I thought it would be.
I positioned the display unit but did not fix it. I feed the wire pre-fitted to the display down into the space below the windscreen and along to the off side of the dash, this followed the contour of the dash fitting tucking the wire out of site and having eased the door trim seal/rubber away from the bodywork placed the wire into the available space.
At floor level I placed the wire under the metal rail situated across the front and rear doors openings , and continued to hide the cable below the grey panelling.
By removing the 'D' Clip fitting and the rear seat support well, off side, I was able to feed the wire complete with pre fitted connection right through to the lower rear boot area, at no point can the cable be seen and I'm happy that it is not in an area where it will become damaged or worn.
Note. I will not fix the visual display unit using the self adhesive base until the unit has been completely installed and tested.
Removing the rear bumper.
The first job I did was to remove the off side rear light assembly where both connections were to be made. ( see mypage.11.) I connected the live feed to the reversing lamp wire and earth to the wire, which goes to the earth on muti- block/ bulb holder unit.
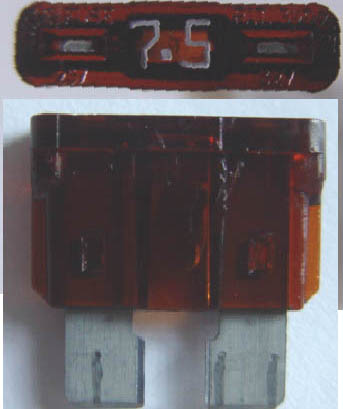
This circuit is protected by a 7.5 amp fuse located in slot 39 main fuse box.

 This on my car involved cutting the Grey and Yellow wire to which the Red wire from the unit was connected and then the cut the Brown wire to which the Black wire from the unit was connected, the black being the earth wire.
 These were the only wiring connection to be made as everything else was pre-fitted with multi pin connectors
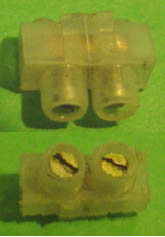
I use small screw type cable connectors which is easier than soldering and more secure than the crimped type connectors which are also bulky. In my case I put an outer sheath over the connector.
If you are wiring your car check the wires you need to cut, this is easily done by following the metal circuit board on the lamp holders and noting which spade connectors serve what purpose.
I then connected up the whole unit as fitted to the car and carried out a test which was wholly satisfactory.
The reason? I did not want to cut holes in the rear bumper only to find that the unit was defective in some way, or that my tow ball fitted on my car prevented the unit working satisfactorily. There were no problems in either instance.
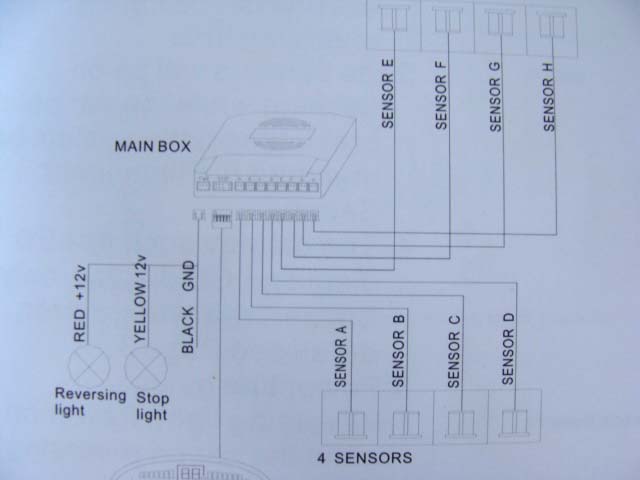
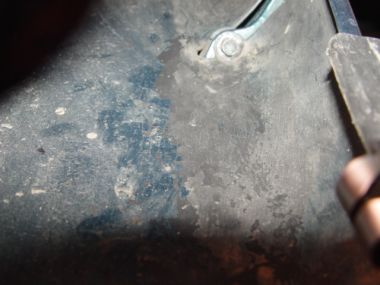
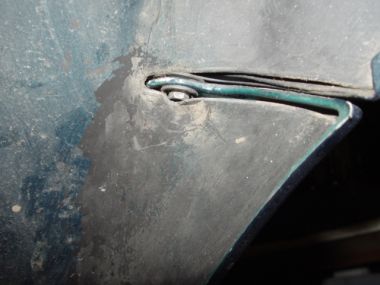
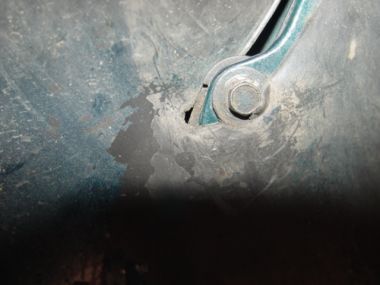
Even with the help of the diagram above you may have trouble locating the bolt which is situated within the wheel arch, These photo's may help you. The bolt head size is 8mm and it helps if you jack up the car to allow more space to work in the wheel arch but make sure your jack is secure before placing you arm/hands into the space created.
I referred to the Mercedes above fitted with the 'Parktronic sensors' above and located the kit sensors as near as possible to that pattern.
I left the two centre sensors slightly further away from the tow ball as a precaution against false readings. I felt it was better to mark there location before removing the bumper.
Having looked at the above car and the positioning of the 'parktronic' sensors I marked my rear bumper with adhesive dots, having double checked their location I drilled a small pilot holes with a 1/16" drill I then removed the bumper.
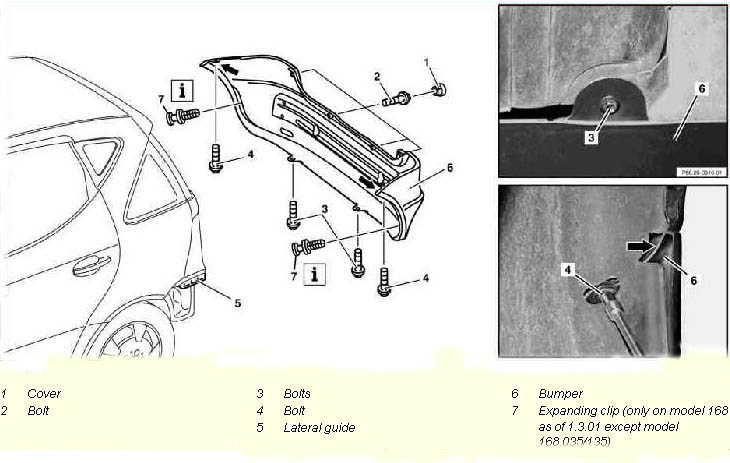
The detail in the above diagram for removing the bumper was wholly correct, except that I have a tow bar and electrics which I did not want to disconnect and also have mud flaps on the car.
This involved extra work in that two screws from the rear flaps had to be removed and that I could not move the rear bumper more than 12" 18" away from the rear of the car as the cable for the trailer electrics passed through a hole in the rear bumper.
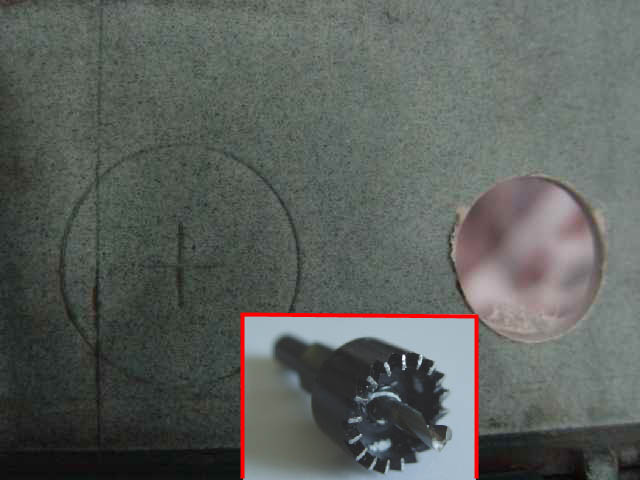 Having removed the bumper I then drilled the 4 holes required using the hole drill that was provided as part of the kit. However on turning the bumper over it was noted that the 'Mercedes Parktronic installation points are marked on the rear of the bumper, this was one of my centre holes which I had moved away from the towing ball even so I was within an 1" to 1" 1/2" away from the marked point.
If you decide to fit such a unit drill a small pilot hole using the pre-marked points and you will be spot on. Then reverse the bumper and drill the large holes for the sensors from the painted side.
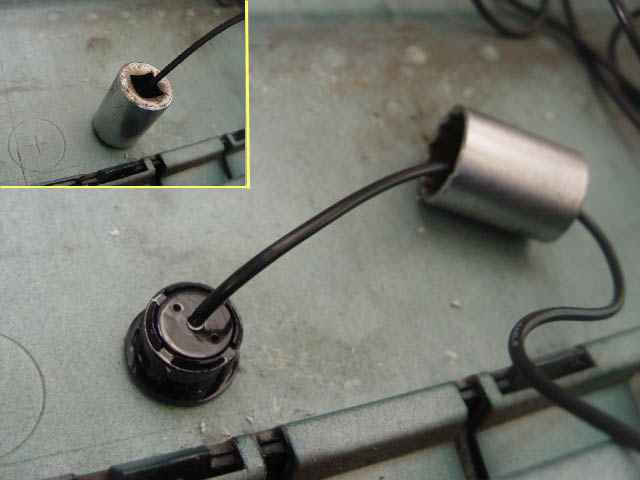 I then fitted the sensors, and ensured the securing rings provided with the kit were firmly pressed down using a suitable socket through which the sensor cable had been passed.
Because my sensors were not precisely fitted to the Mercedes Pre marked points I had to cut a very small portion of the high density polystyrene which is inserted in the bumper as a stiffener/shock absorber. If the sensors are fitted exactly then there will be no need for this action on your part.
I could not see where the cables from the sensors should enter the boot area, and so drilled a hole, fitted it with a suitable rubber grommet and passed the sensor cables complete with the pre-fitted connections through into the lower boot area.
Having fitted all 4 sensors I located the cables in the channels provided in the polystyrene block and passed them through my prepared hole and re-fitted the rear bumper.
My only observation re-the fitting is that the sensors are not flush with the bumper as with the factory fitted units, however they are very neat and wholly acceptable.
 I now fitted the control box onto the rear of the lower spare wheel area
 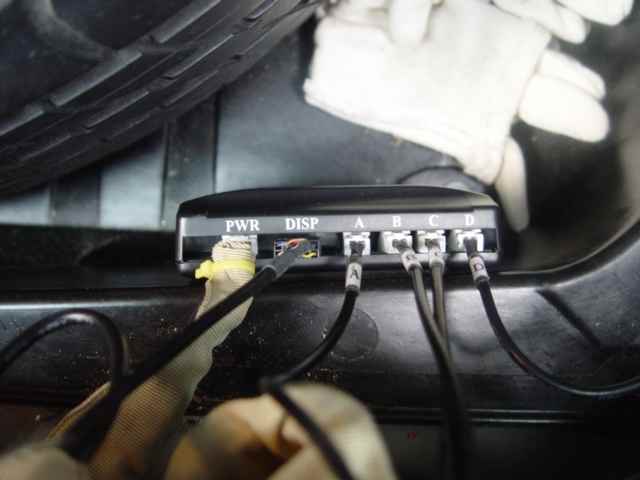 And fixed it using the double sided tape provided , I then placed the majority of the spare cable from both the sensors and monitor into a loom casing, ( old flexible Garden hose casing )which being made of man made fibre will protect the cables from abrasion,
 Note that in this area of the car there are some very sharp edges which will easily damage cables.
Having tidied up the whole job, I ensured the unit was operational and carried out some tests.
Cable run front to rear of car
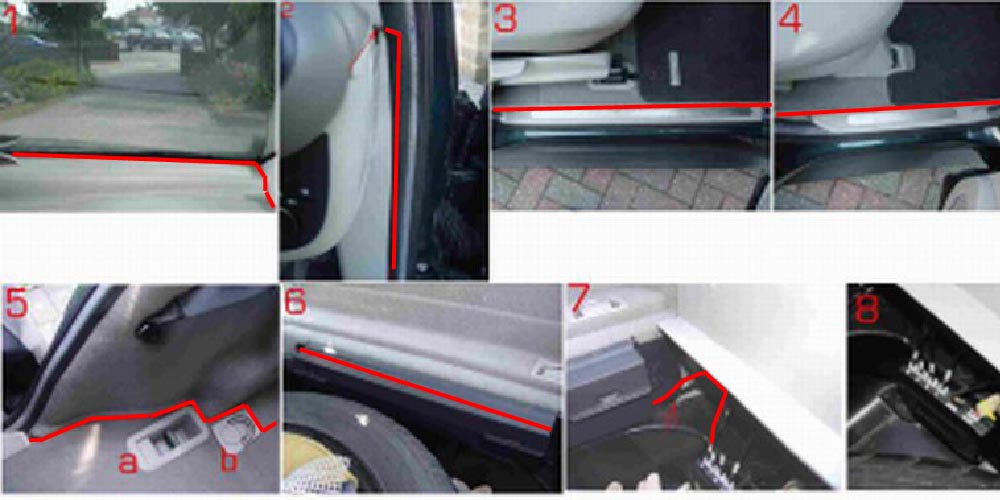
*1 I tucked the cable attached to the VDU to be placed on the Dash, down behind the dash and the windscreen
*2 I then followed the contour of the dash and 'A' Post, then ran the cable down behind the rubber door trim to floor level. To do this I eased the rubber seal away from the car then having placed the cable pushed it back into it is correct position. (Approx 1" of cable is visible indicated by the arrow.)
*3, 4, I then eased the cable under the door sill plates both front & rear doors
*4 I then folded the rear, off/side seat into the forward position and removed the rear seat location plate and 'D' ring fitting ( a & b), this enabled me to lift the carpet and ease the cable round and into the lower section of the boot(spare wheel Bay)
*5, 6, 7, 8. I then removed the warning tri-angle stowage box and eased the cable along under the edge of the carpet this brought the cable out at the rear of the lower boot area where I had placed the control box. the cable being fitted with a pre-fitted connector was then connected to the box.
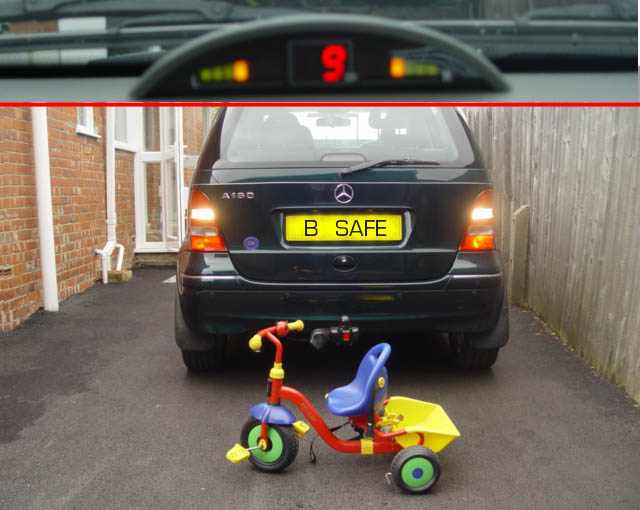
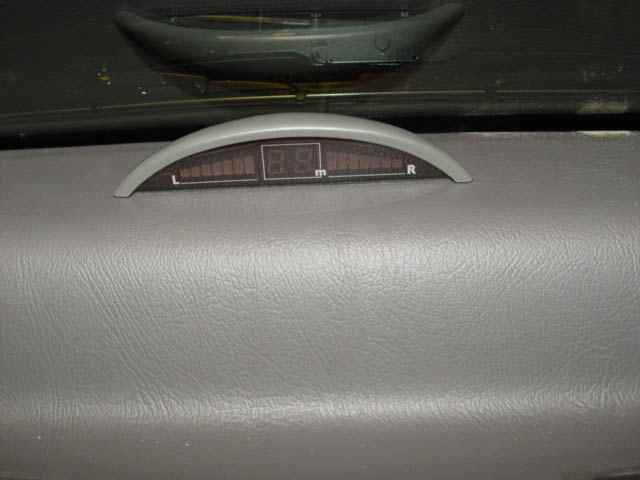
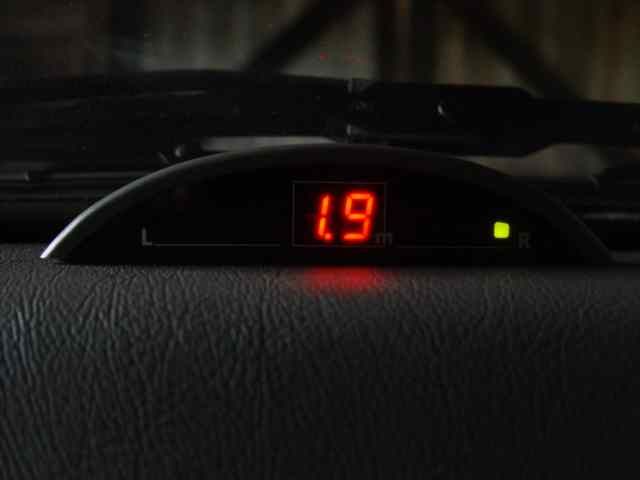 When reverse gear is engaged the unit is activated, and you hear an audible warning of two short bleeps. Where there are no obstructions to the rear of the car two small bars are visible on the monitor. However as the car approaches an obstruction an indicator light shows and the distance away from the car in metres, and the audible warning starts, but it is not intrusive.
In this case the obstruction was on my off side at 1.9 metres. However when I got closer to obstruction so the indication changed showing an obstruction on both sides and to the rear at .03 of a metre and the warning was more severe
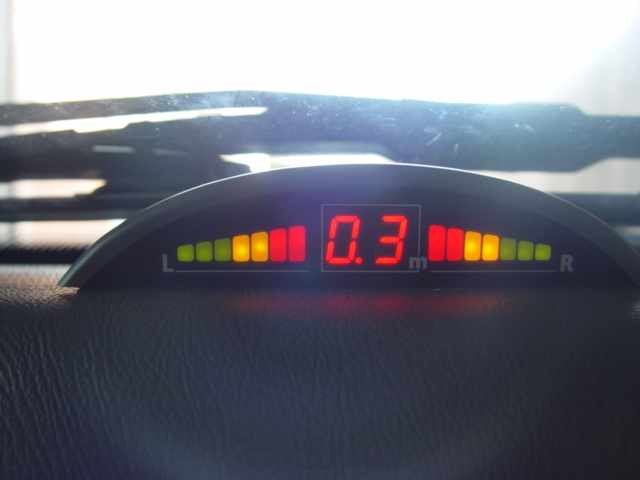
As can be seen from the visual display the obstruction is now only .03 of a metre away, plenty close enough , I would never normally be able to park this close without supervision from a third party.
It is worth noting if you have a tow ball fitted that this is not taken into account by the unit . The distance remaining is from the sensors to the obstruction, not from the projecting towing ball.
Towing Trailer etc
.If you like me use a small trailer to save putting junk and rubbish in your car then the sensor will indicate a total obstruction when ever you engage reverse gear, Not a disadvantage, in fact quite the opposite! It will remind you the trailer is attached before you start reversing, As many of us know if we are honest it causes considerable damage to car and trailer.
Unseen in your rear view mirror! But clearly detectable by your Reversing Sensors.
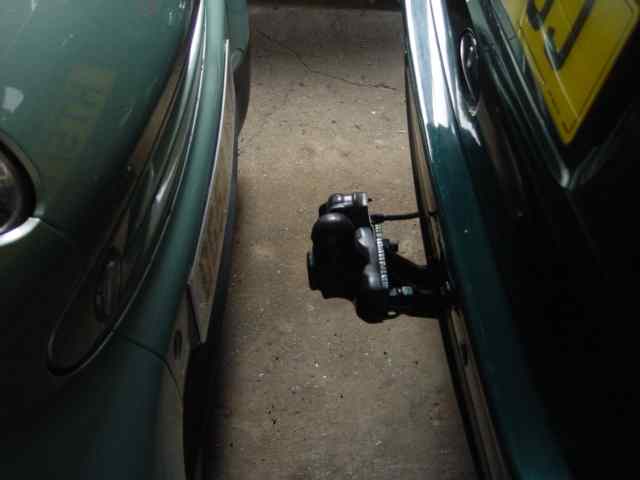 My wife was pleased the unit worked well because the obstruction was in fact her little 'Smart' Car , as can be seen the unit is most useful where space is tight.
In conclusion the fitting was reasonably easy although a bit of a fiddle rather than hard work, the kit comes with a booklet which is easy to understand and follow, all the parts are well marked, everything you need to fit the kit is provided.
If I have one comment further it is undertake the job when you have time on your hands rather that rush , holes drilled in the rear bumper for instance will cost you money so take your time & think what you are doing.
It should be noted that the unit is also fitted with an audible alarm which can be switched off however I have left mine on as the audible warning warns you by the gap between the bleeps of the remaining space, bleeep-bleeep-bleeep, bleep-bleep-bleep, blep blep blep the gap getting shorter until it finally goes into a continuous bleeeeeeeep, which clearly indicates you are at a minimum distance from the obstruction to the rear of your vehicle.
So you have visual and audible warning from the unit, no excuse now for reversing into obstructions to your rear.
However if parking in your garage with lawn mowers or even pedal cycle etc to your rear make sure the handles/handlebars and projections are not in a position to damage your vehicle, if they are above the detection area of the sensors you will come into contact with them even though the unit indicates you still have some space.
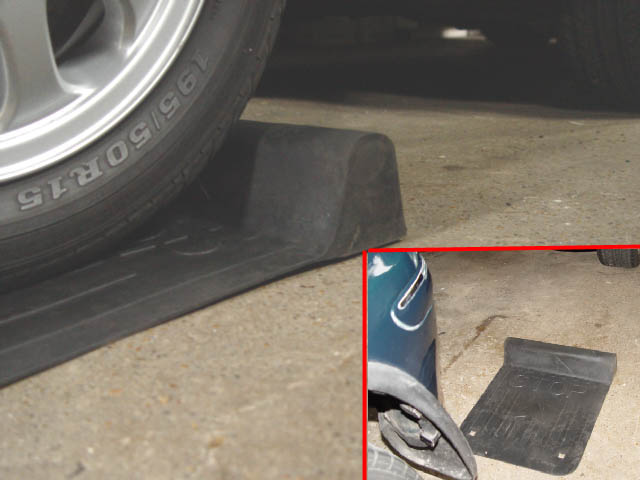 The alternative to reversing into these appliances is of course to use pre-set wheel chocks, these purpose made units are prevented from moving as the wheel sits on part of the wheel chock, alternatively if there is only one car in the garage they can be fixed to the garage floor.
If you are going to purchase a unit take care and look to see what your are buying as these kits vary in what they contain, some have more sensors than others, some are just buzzer warning, where as my unit has both audible and visual warning. In some cases the sensors are available in silver although you must request these when you purchase or black sensors will be supplied
Next.
Back to Index,
Purchase DVD.
Please Make a Donation.