Rear Springs on all W168 models of A class are notorious for breaking.
In the main this is caused by corrosion.
My A class is coming up to ten years old and still has the original springs fitted , I attribute this to the fact that I spray them at least annually with 'Duck oil' which protects them from corrosion.
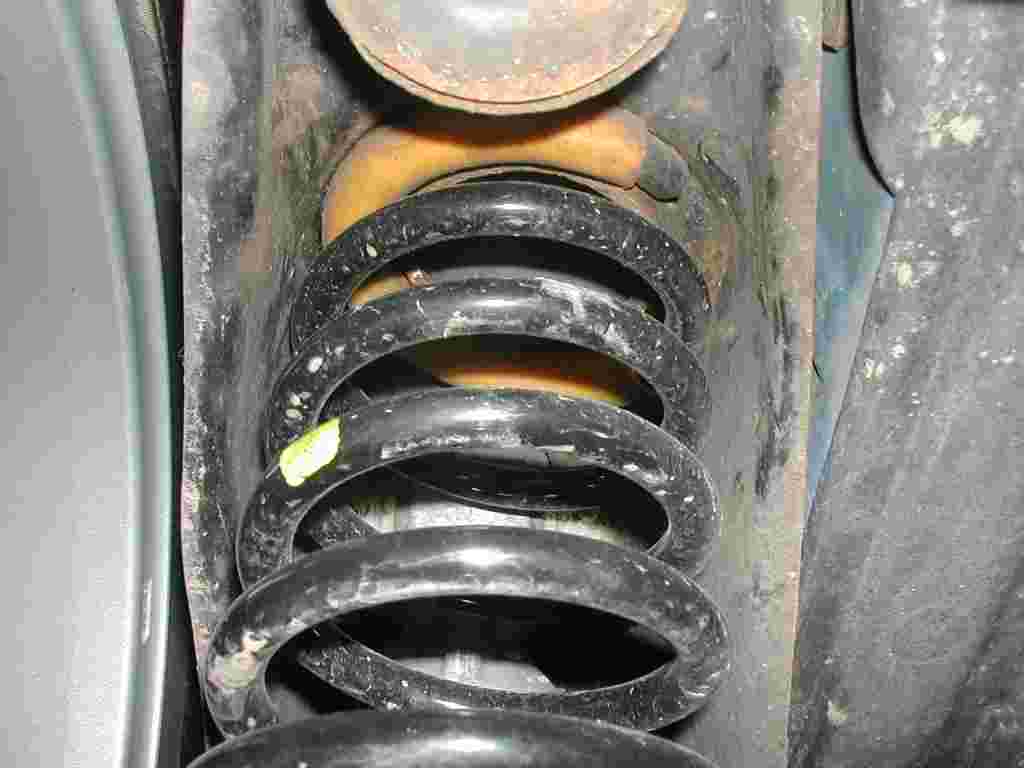
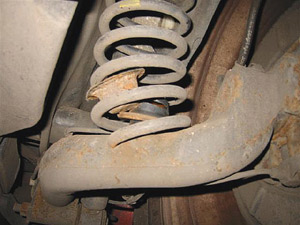
The coil spring is held in position by the tension it is under, There are recorded incidents where these springs have broken, which I have been given to under stand is at the bottom of the spring close to the lower location cap. Where a spring has failed, expect to see your car sitting very lop sided and avoid driving any further than is necessary. This defect will dramatically affect the stability of the vehicle, reduce the load on the affected side as much as possible, drive at a safe speed particularly when cornering . Replacing the spring is not a difficult job! When replacing the spring ensure that the cap and rubber cushion is in a sound clean, a smear of grease around the bottom edge of the spring will do no harm avoid getting grease on the rubber cushion.
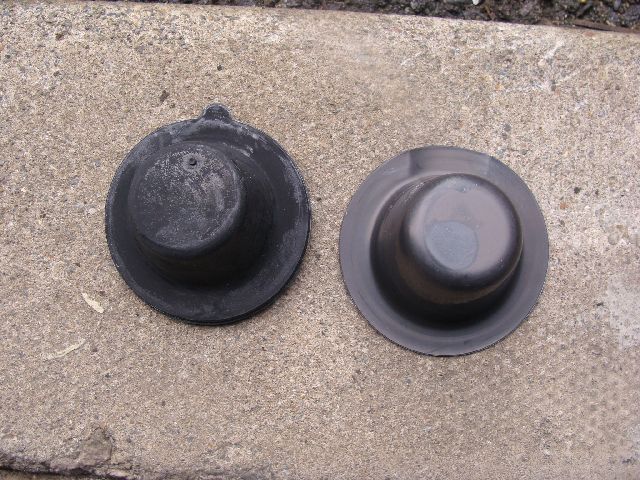
The caps have been known to rot out being made of quite thin metal so it is worth checking them prior to its M.O.T. 1
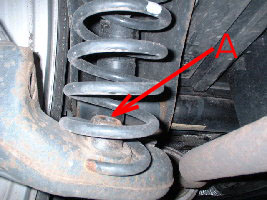
Shows the fitting at the head of the spring. 2
The fitting at the bottom. F
The thin metal cap. G
The rubber cushion.
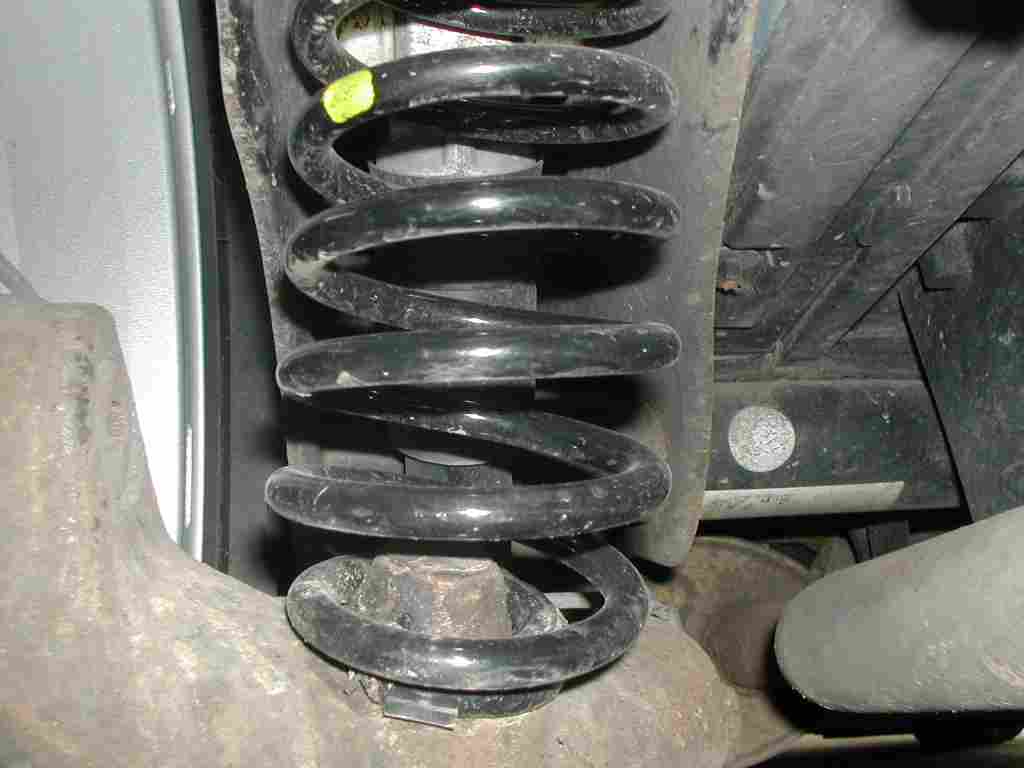
The new rear spring still has the plastic tubing at the head as well as now a plastic lower cover, this does away with the need to fit the rubber cup and metal cap when fitting Mercedes Springs.
Springs supplied by other outlets may still require these to be fitted so do check.
The rear spring fitted on earlier A class are known to break on the lower 4" of the spring, this can allow the the cap to ride up inside the spring and fall out. The spring has been modified twice in recent years , the spring shown in this photo is the latest available and does away with both the dome cap and the rubber , sitting straight onto the dome on the suspension arm which should be pre-fitted with a grommet.
If you are purchasing from other than MB outlets there is every chance you will be sold the old style spring. To get the most up to date version Go to MB parts they may be more expensive but at least you will have to correct and most up to date spare part for your car MB part No. 168 320 0408. ensure you get the most up to date spring, as old stock may still be held by some branches.
So how can we prevent our springs failing as in the photos above? I use Duck which comes complete with a mini hand sprayer keep your springs sprayed and like me you will have no problems, it will also protect all of the under parts of your car exposed to rock salt applied to our roads during the winter months. Also note it is a waste of good money to put New springs on the car if the metal around them is left untreated against rust , spray with 'Swarfega' Duck oil designed to protect the underside and vulnerable parts of your car.
Two examples of broken rear springs, Note the cup inside the coil of one of the broken springs. In the other example the cup is missing."
Note the exposed hole in the casting central to the base of the spring. A
The only saving grace about this problem is that the springs are very easy to replace and are not that expensive as car spares go. £21.00 plus vat august 2006.
The new Springs like the old are colour coded for the various models of 'A' Class and you will therefore need your Vin/chassis number to obtain the correct springs.
It is advisable
to always fit springs in pairs to maintain the overall balance of the car.
Plug the hole left in the arm using the Bung/grommet MB Part Number A168 997 0686.
When fitting the modified spring it will be necessary to remove the metal dome & cap along with the rubber from the swinging arm. However on early 'A' Class models a hole in the casting of the arm central to the base of the spring will be exposed. This hole should be plugged to stop water and contamination getting inside the arm.
On the later models the hole has been re-located in the casting to the rear of the stub axle, see photo. B
This plug should be fitted on the early models and replaced if missing or perished on later models. The part number applies to the plug fitted in both instances mentioned. Part no.A168 997 0686 @ approx .50p each
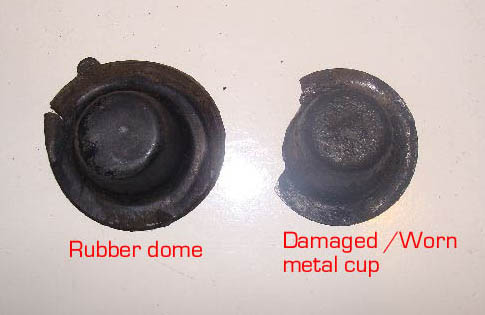
Another problem associated with the springs, is the lower spring rubber cup which perishes after a number of years and the metal cap which becomes damaged by the spring. Mercedes will deny that there is a problem with the springs on this car ,However they have in the last 3 years modified the read springs at least twice which now has a plastic moulded base which does away with the Rubber cup and metal cap These are NOT FITTED WITH THE NEW Mercedes-Benz springs.
However if you are buying you parts from other than Mercedes -Benz check if the cap and cup are required.
In my experience it is always worth checking with Mercedes Parts for price as more often than not their parts are competitively priced and you will know that you are getting the component best suited to your model.
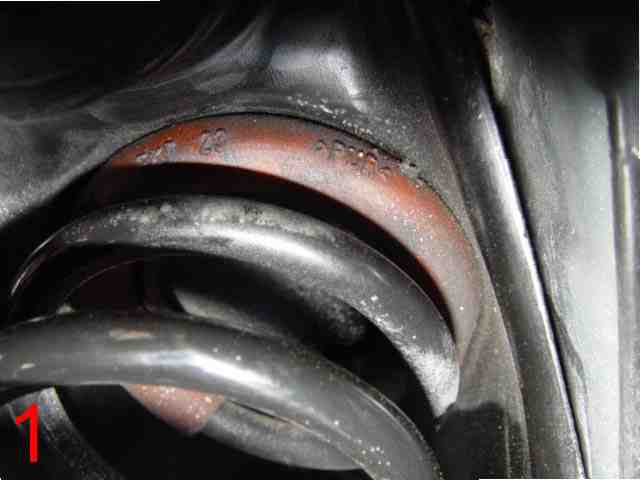
Springs are marked with a paint dots both examples of grey and yellow are shown on this page, I feel sure red is also used this indicates the spring type. Your Vin number will pre-determine which spring is currently fitted to your car if original.
Tools required to change rear springs:- 1. Two jacks one vehicle jack and one other 2. All tools associated with removing wheels including locking wheel nut key if fitted. 3. One long ring spanner to use as lever . 4. Wire brush to clean off trailing arm
Procedure
Replacing rear springs
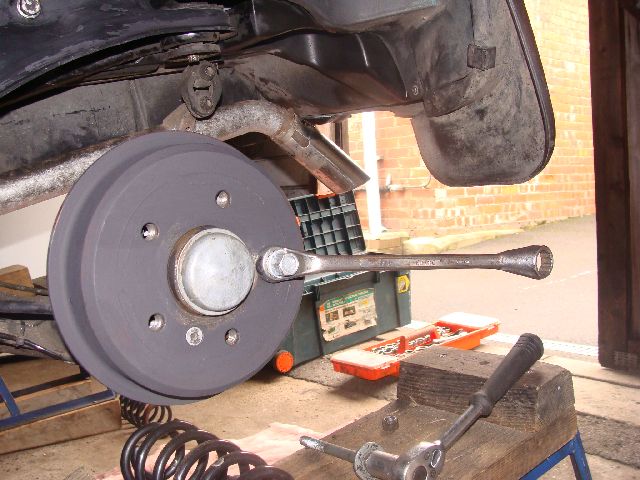
I found by far the simplest way to remove and replace the spring was to remove the lower shock absorber bolt (Fixing ) and then press down on the arm to remove and replace the springs.
I attached a long ring spanner to the rear brake drum using one of the wheel bolts and with the hand brake firmly on, used that as a lever to lower the trailing arm sufficiently to remove and replace the springs.
To replace the lower securing bolt I simply jacked the swinging arm up until the holes in the shock absorber lower bush and swinging arm aligned, I then pushed the dummy bolt out as the securing bolt was pushed in .
Do bear in mind you do not fit or require the metal or rubber cup with Mercedes-Benz newly supplied rear springs.
You do however require 2 grommets to fill the holes in the swinging arm lower spring mounting block. see details above. This prevents water and road grim getting into the hub end of the swinging arm assembly.
If however you replace the rear shock absorbers and do not renew the springs then you may need to replace the rubber cups and metal caps.
Procedure 1. With the wheel removed 2 Place a suitable jack below the rear brake drum and jack up slightly 3. Remove the lower shock absorber securing nut 4. With the 12mm dummy bolt tap out the shock absorber securing bolt, The Dummy bolt should not enter the lower bush on the shock absorber , it is used solely to retain the rear torsion bar in position. 5. Lower and remove the jack 6. Press down on the swinging arm, you should now be able to remove the rear spring . 7.Fit the new spring ensuring it is positioned correctly
place the jack under the rear brake drum ensure hand brake is fully on. 8. Jack the rear swinging arm complete with spring until the lower shock absorber bush can be aligned
replace the lightly greased lower shock absorber bolt, pushing out the dummy bolt 9.Now re-fit the securing nut and fully tighten.
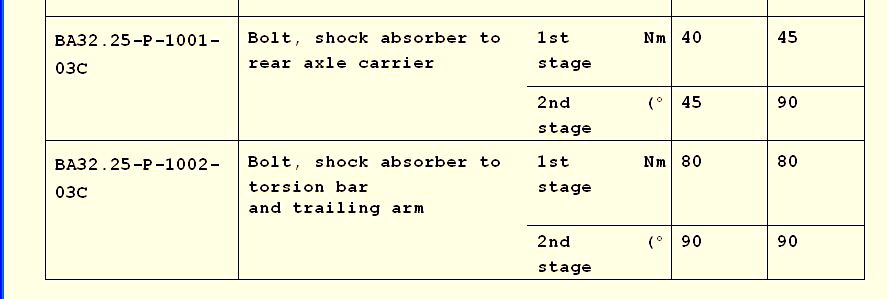
Note shock absorber nuts should be replaced if removed , failing renewal apply 'Locktite' tight to secure
If you have a torque wrench then tighten as per this table either way these nuts are done up tight.
I would rate this job 4/10 simple, providing you follow the safety rules and detail .

 The coil spring is held in position by the tension it is under, There are recorded incidents where these springs have broken, which I have been given to under stand is at the bottom of the spring close to the lower location cap. Where a spring has failed, expect to see your car sitting very lop sided and avoid driving any further than is necessary. This defect will dramatically affect the stability of the vehicle, reduce the load on the affected side as much as possible, drive at a safe speed particularly when cornering .
 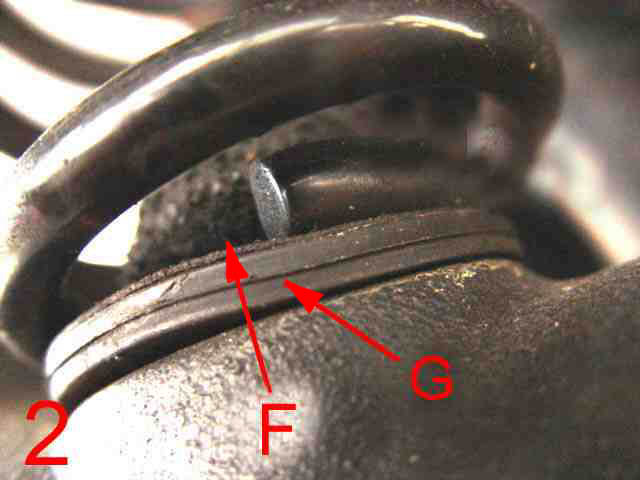 The caps have been known to rot out being made of quite thin metal so it is worth checking them prior to its M.O.T.
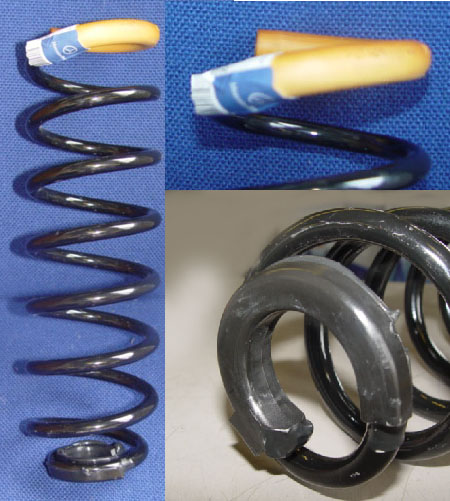
 If you are purchasing from other than MB
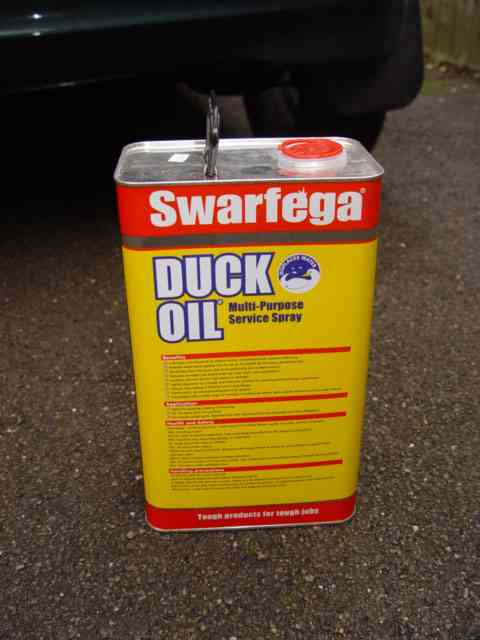

 I found by far the simplest way to remove and replace the spring was to remove the lower shock absorber