how many of us do look at our rear lamps? We see more of other drivers lights than our own that's for sure! And the number of vehicles on the road with defective lights clearly demonstrates that drivers do not check! Any way that aside if your interested enough to visit this site then spend a few more moments and watch the following sequence, are you sitting comfortably, then we will begin! If you pick up the sequence from the
Indicators, I'm confident all of us are familiar with them! We will see the various lights perform Indicators
followed by
Stop lights
which work in tandem with the rear window high level stop light assembly, followed by
Rear Road Lights
which are then joined by the
High Visibility Fog light
Both elements within the bulb now lighting together, then the
Reversing Lights
of which there are two on the on the 2002/A160, (Note if you can't see it working, you haven't gone mad your Firewall is blocking it)
Note Purchasing twin pole bulbs.
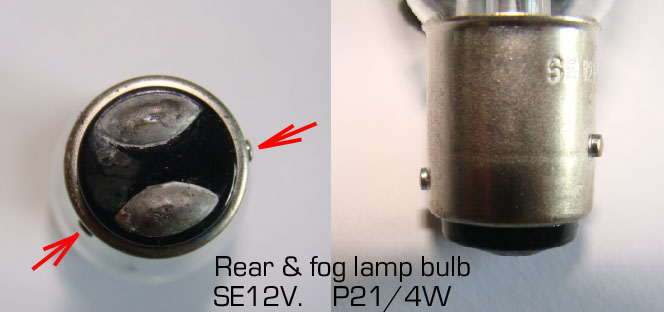
Ensure you get the correct bulb when purchasing, the rear & fog is a twin pole staggered off-set pin, if you like me have old bulbs check they are staggered off-set or they will not fit.
Having read comments on the forum BB owners site baby-benz.com I have come to the conclusion that the easier versions of the 'A' Class could only have had one that was connected up, although both sides carried a bulb.
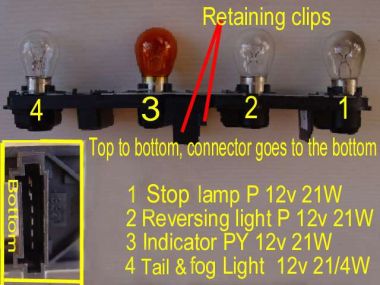
The rear light cluster is reasonably easy to get at, however MB have done it again, For forty years man & boy I've known this bulb as a "stop and tail" Now suddenly & according to MB it becomes "fog & tail" so do not get caught out. Quite right the owners manual does give the correct detail but truthfully how many of us look at the manual every time a bulb needs replacing. When I saw the black shadow on my stop light bulb it indicated to me that it wouldn't be long before it needed replacing, being tight I switched it with the reversing lamp which gets little use, worth remembering if one goes while your out! With the exception of the Fog & tail all the bulbs are single pole
 The fog & tail is a staggered and off set pin and will therefore like the multi connection block to the bulb assembly only fit one way.
The indicator bulb has off set pins ,and is not compatible with any of the other positions, and again will only fit one way
see a photo of these different bayonet connection
Bulb Specifications .
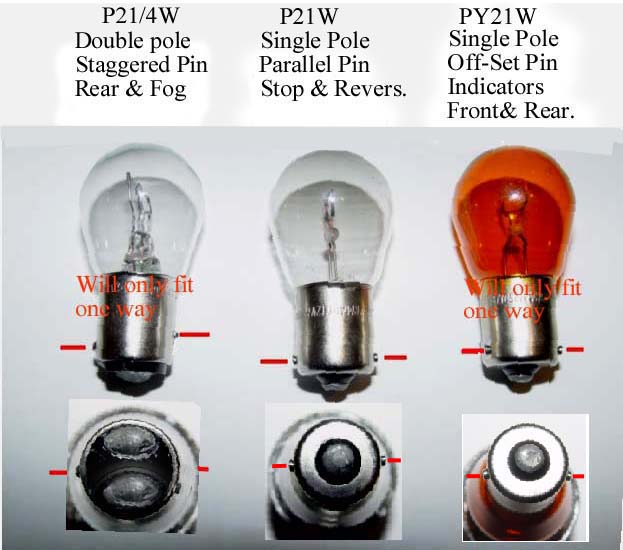
If buying your bulbs using the references below then you should have no problem. However be aware that there are three types of bayonet fitting used on the 2001 'A' Class two of which will only fit one way. The rear/stop light staggered pin, and the indicators lamps front & rear. see examples of bayonet above.
If for any reason and like a fellow owner John you car's indicators at the rear will not allow the fitting the off-set pin bulb, then you can overcome this problem by purchasing standard pin ,orange as with the PY bulb with parallel pins. These are special none standard bulbs and will not normally fit your car. The bulb number in this exceptional case is available from Halfords on the special rear lens Upgrade counter, details:- 12v 21W BA15 SCC but I tress this is not the bulb fitted as standard on the Facelift 'A' Class .
Rear bulbs Licence Plate 2 x 37R E1 0010 N1C C 5 W (Festoon Lamp)
High mounted brake lights (Rear window) 4 x W 5 W
Rear Brake lights P21 W
Reversing Lamps P21 W
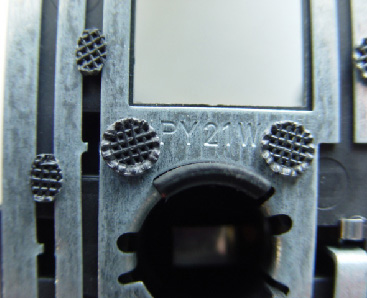
Indicators (White lens only )PY21 W
Rear Tail & Fog lamps P21/4 ( Note Both rear lamps are fitted with the same bulb, Fog lamp, lights O/S only with standard wiring)
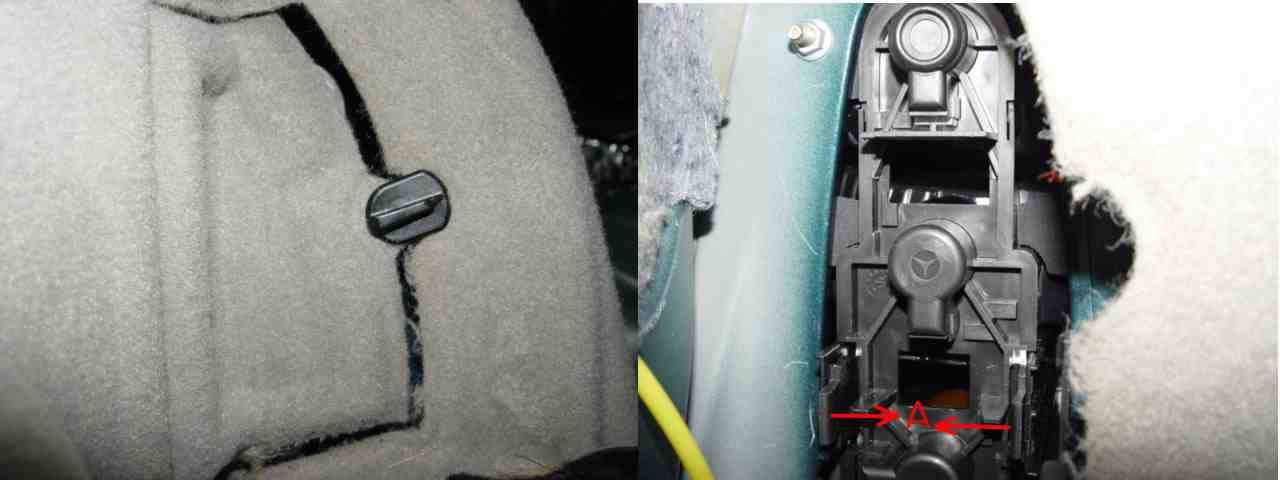
Access to these units is via the storage boxes in the boot, left and right, having opened the box there is a flap secured with a plastic catch which when opened allows access to the rear light assembly.
To release the bulb holder complete with bulbs from the rear lamp assembly squeeze the two tabs towards middle . A
The electrical contact will only fit one way
The red reflector is integral of the unit and cannot be removed for replacement the complete lens and body has to be purchased at a cost of approx £60.00. 7/2006.
The new unit A168 820 28 64 (Tail lamp) comes complete with bulb holder and bulbs.
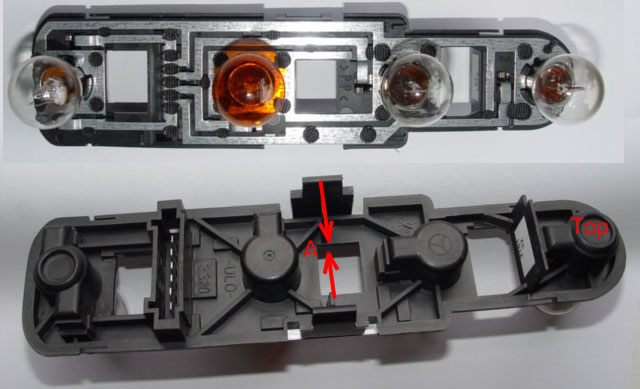
Note that the bulb sizes for each position is marked on the metal contact for each bulb , also that it is the indicator flasher bulb on the face lift version that is coloured not the lens.
One car recently purchased had clear bulbs in a clear lens, totally wrong and illegal for indicator requirements.
Above each bulb location point the bulb specification is marked, the only staggered pin bulb double element bulb is the fog & tail in the bottom
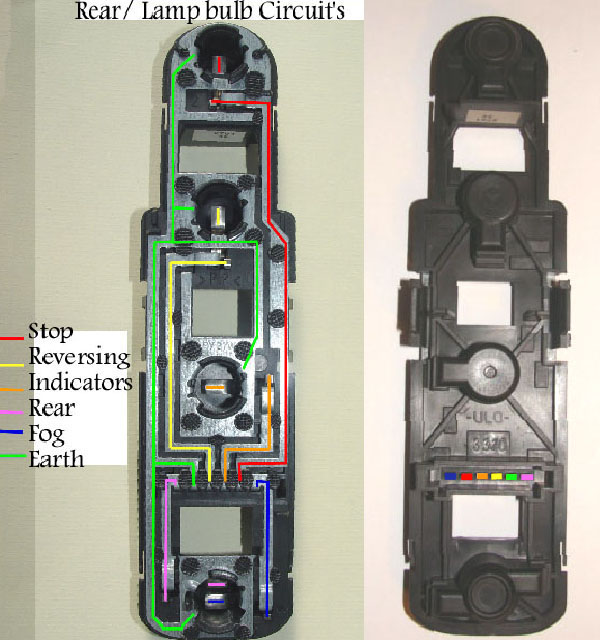
I have shown what section of the contact plate serves what bulb. The Multi block that feeds power to the bulb holders at the rear of the vehicle is fitted with very fine wires indeed and will only fit one way. However if you have problems with a given circuit then you will need to check the wires servicing that component/bulb The colours I have used to indicate each circuit do not indicate the colour of the wires in the loom.
remember spade contacts seen from the rear of the bulb holder are seen in reverse order.
One common defect on this type of unit is a number of bulbs operating when only one each side should light, For instance brake lights flashing with indicators bulbs, this is more often than not caused by a bad earth or loose earth wire, and is easily dealt with. Where an individual circuit fails, it normally relates to a defective bulb or loose wire on that circuit only.
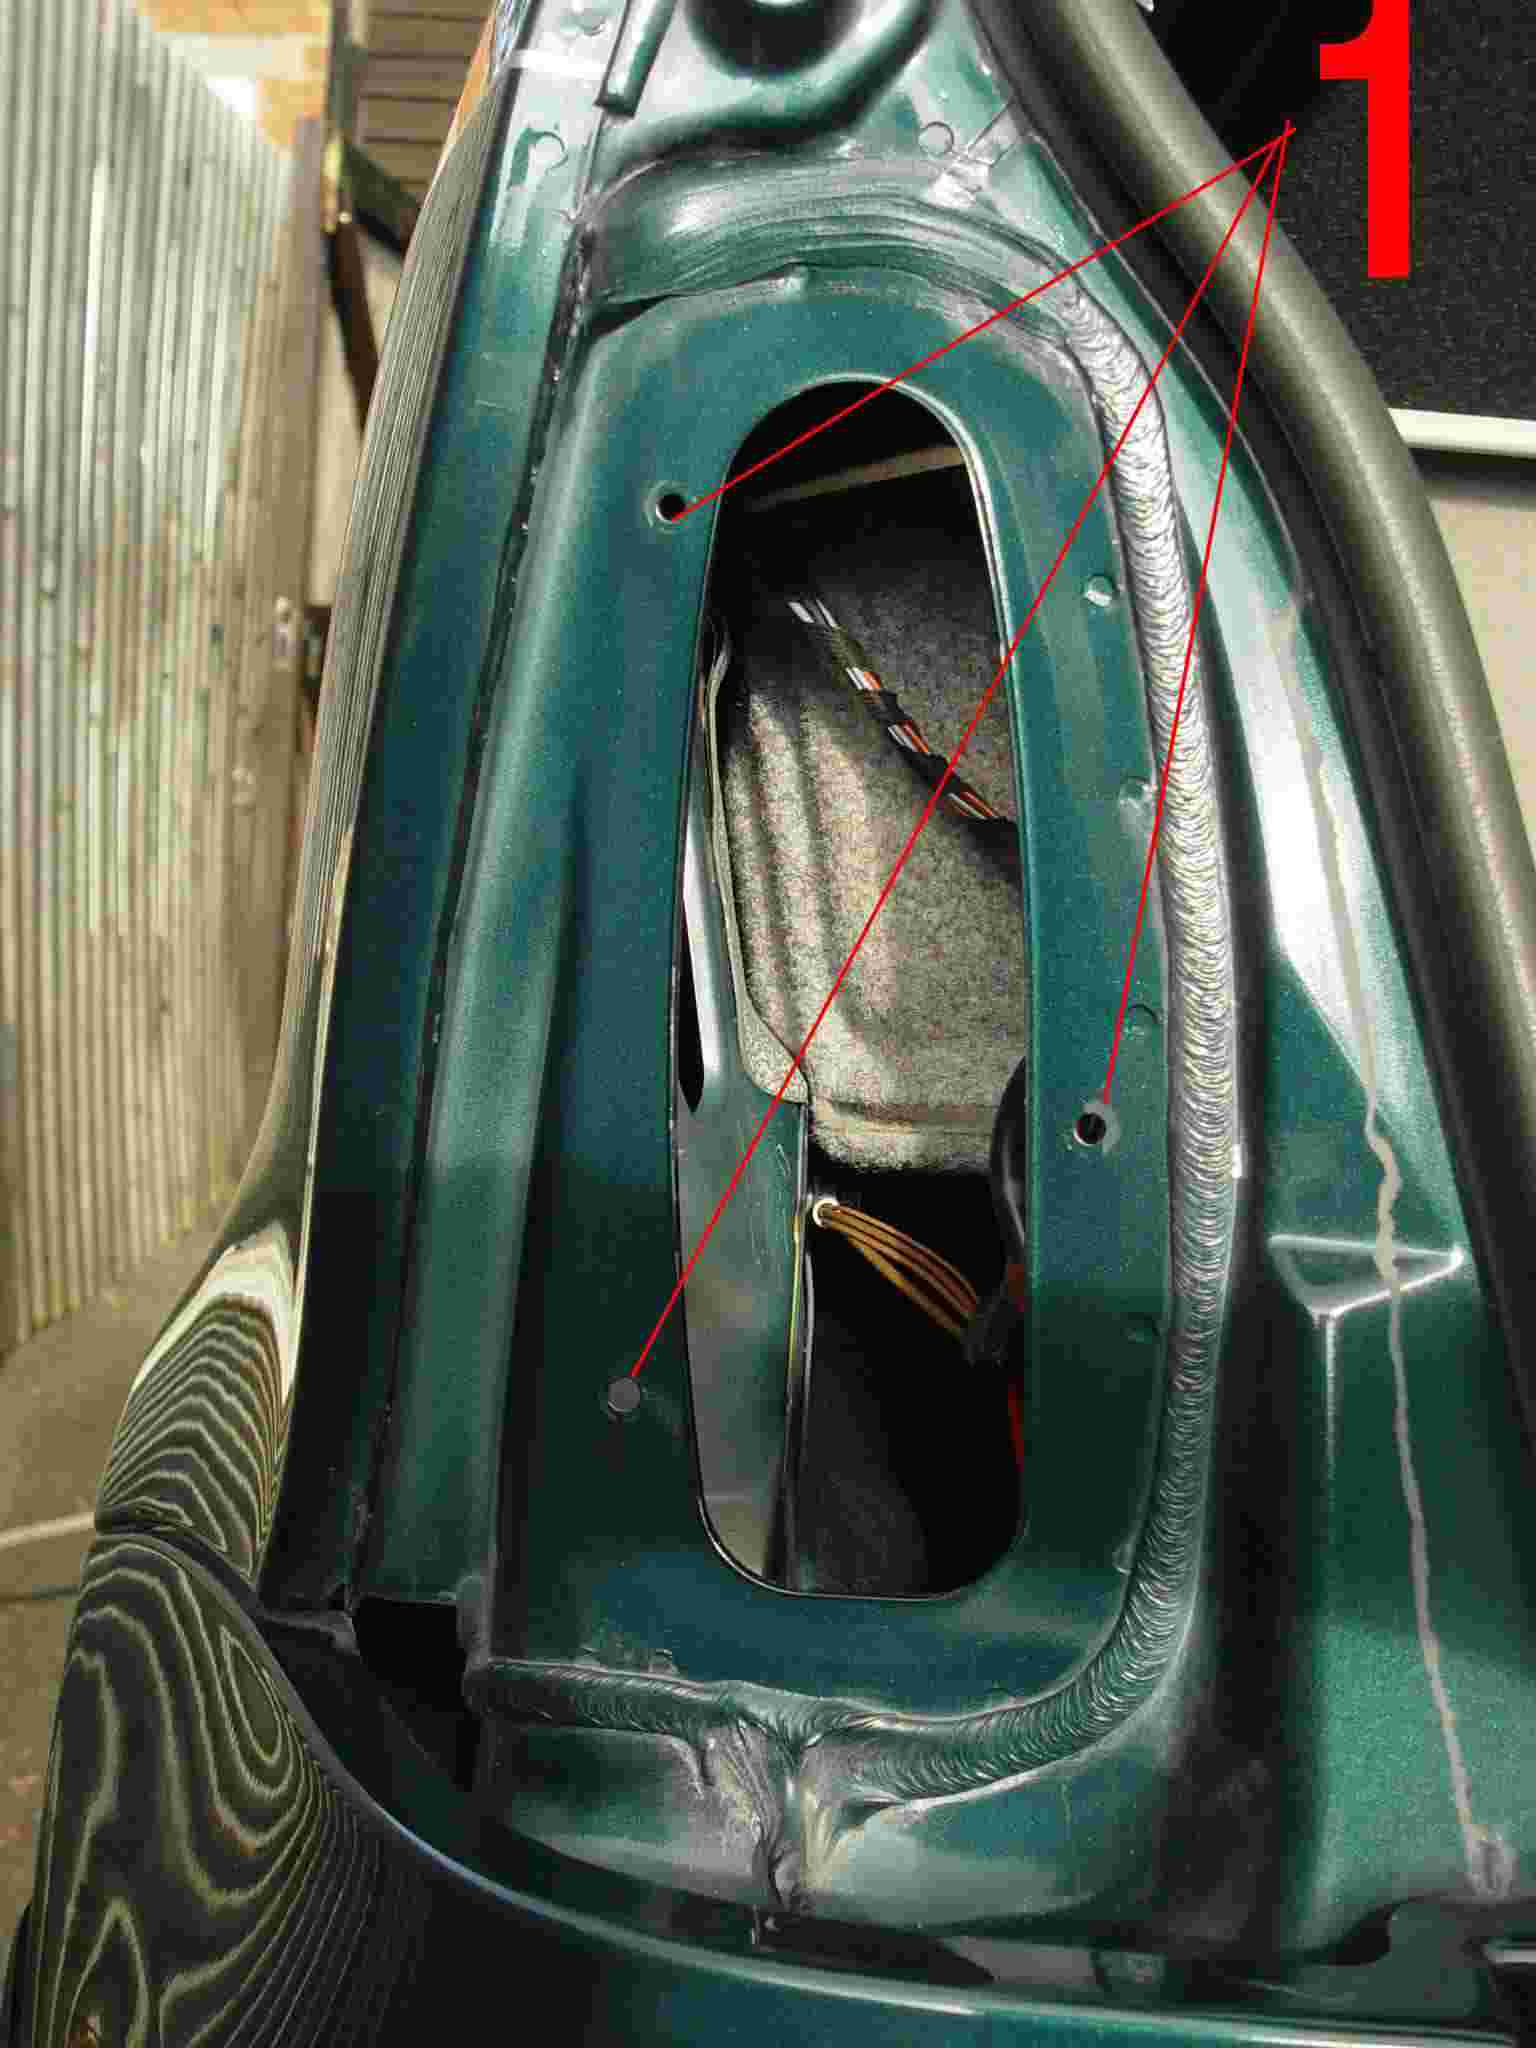 If for any reason you have to remove either of the rear lens clusters from the car, take extreme care not to drop the nuts or spanner, which will disappear into the deep wells below, only a flexi magnet will retrieve them as they are too small for the average male hand to penetrate, also the edges of the metal body work are lethal. You will cut yourself to threads unless you take great care, and I am talking with experience! A cloth pushed into the wells will save a lot of grief as trying to retrieve the nuts is almost impossible.
1
Indicates lens assembly location holes.
If for any reason you have to remove either of the rear lens clusters from the car, take extreme care not to drop the nuts or spanner, which will disappear into the deep wells below, only a flexi magnet will retrieve them as they are too small for the average male hand to penetrate, also the edges of the metal body work are lethal. You will cut yourself to threads unless you take great care, and I am talking with experience! A cloth pushed into the wells will save a lot of grief as trying to retrieve the nuts is almost impossible.
1
Indicates lens assembly location holes. 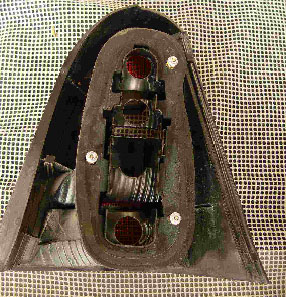
Once the three 8mm nuts are removed the lens assembly comes away from the housing, the bulb cluster fitting are best removed having first disconnected the electrical contact block. this will allow easier access to the nuts.
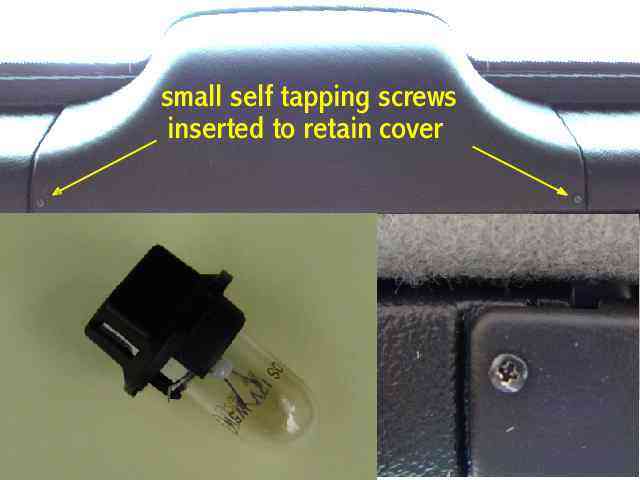
The high level rear light cover is not that easy to remove without breaking the very delicate self destruct retaining clips, no problems , carefully drill the cover and using self tapping screws salvaged from old video cases re-secure, you will now be able to remove the cover when you wish without the cost of the replacement cover which is so obviously disposable like many of the other of plastic parts on cars these days. Remember it is no good getting old if you do not get wiser! and if I'm not wise now there's no hope because I'm getting old! The lower left picture shows one of the four bulbs complete with bulb holder that are resident in this unit, an O/S 12V W5W(E1)2GL (push fit) the same bulb as is used in the parking light front headlamp assembly
Lower right, one of my little securing screws, there are five waiting to be salvaged in every old video case!
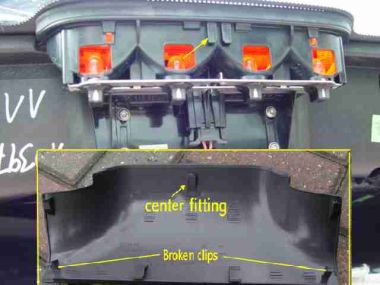
The H.L. Stop light assembly exposed once the cover has been removed the four bulbs can be clearly seen along with the electrical connection. It is worth noting the condition of the bulb in the photo above its dark colour indicates that it won't be long before it wants replacing in which case I will purchase all four and replace them together, after all I saved on the replacement cover! When replacing the cover a small projection on the cover slides into the centre fitting. By the way the writing is Mercedes version of graffiti, appears all over the car, hidden away. I feel sure it was made up from a DIY kit?
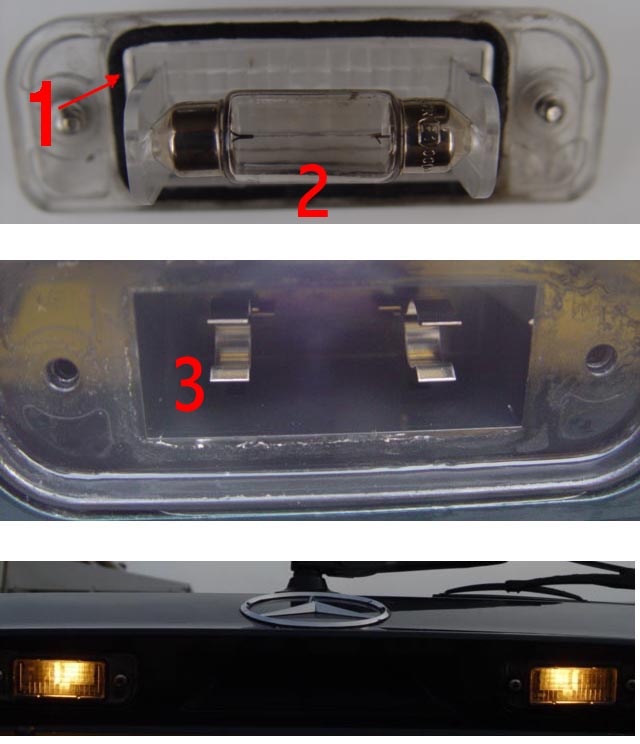
The rear Number plate lights which tend to get forgotten, performs no function other than to light the rear number plate and of course is required by law. Easily serviced remove the two Phillips screws and ease the clear cover away from the housing the festoon lamp will come away with the lens so take care not to drop it, the festoon being held by two plastic clips, take care not to break them when removing the lamp/bulb I'm sure like other plastic components they get brittle. The lamps Osram 37R E1 0010 N1C 12V C5W 2 of which there are two clip into 3 where they get their electrical supply, as the lens is replaced. Note there is also a seal 1 around the lens this is best left alone, I suspect it comes complete with the lens.
The Reversing Light.
The reversing light is actuated automatically when reverse gear is selected and works independently from the main light switch. Should your reversing light fail, remember to check the bulb first then the fuse and only then the switch. If the switch is fitted with the gearbox in any other than reverse gear the lamp will not go out when the ignition is on. On right hand drive cars only the off/side lamp illuminates, unless you have wired the near/side lamp. Rear lights assemblies both O/s & N/s are fitted with bulbs, which is worth remembering if you urgently require a single pole bulb. (single element such as indicators, reversing, or stop light. The tail and fog are a twin element bulb. (See bulb's wattage above)
Essential information
Read before touching the reversing switch .Reversing light switch
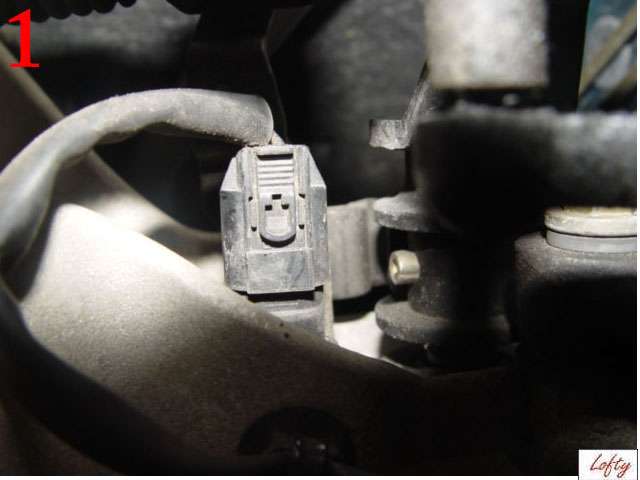
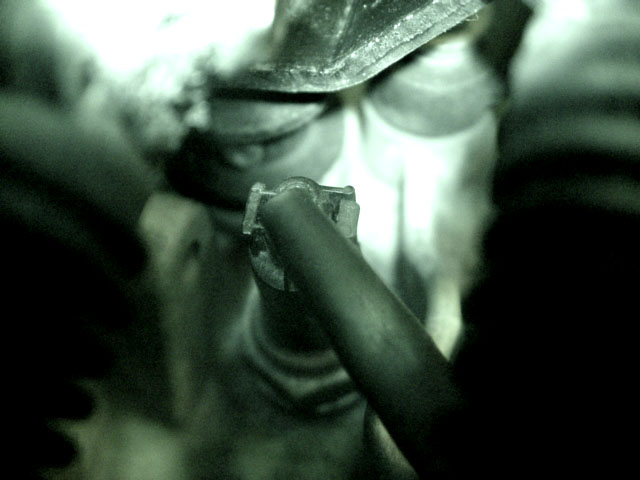
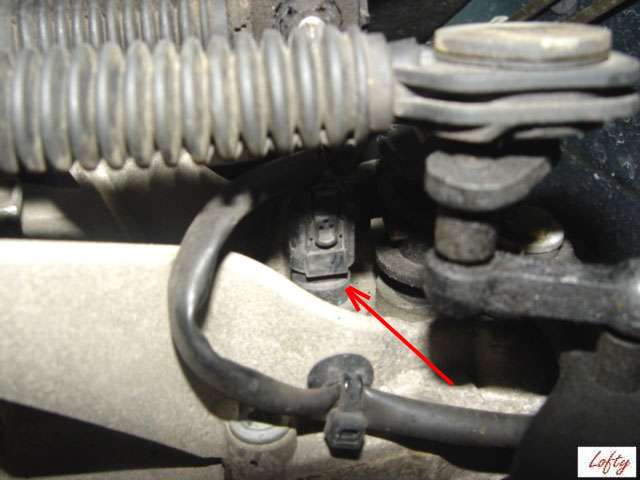 Yes the reversing light switch is located in the gearbox millimetres away from the link mentioned in the the linkage for the gear selection.
I have indicated it is location with a small arrow. The item that can just be seen is the switch electrical connector. I found that removing the electrical connector was easiest carried out with the car in 4th gear. However having removed the connector see the warning Note below, before going further.
 1 and 2
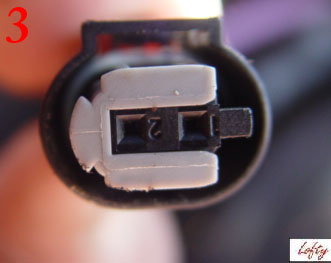
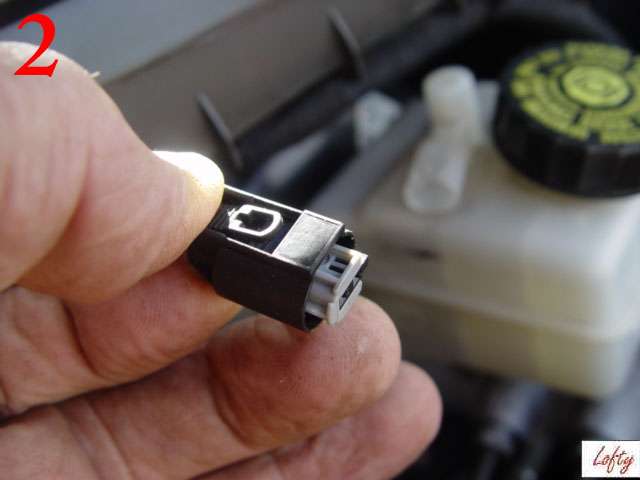
It is worth familiarising your self with the connector that is attached to the brake master cylinder reservoir, as this connector is exactly the same, the sides of the clip are pressed, which allows the connector to be removed.
1 and 2
It is worth familiarising your self with the connector that is attached to the brake master cylinder reservoir, as this connector is exactly the same, the sides of the clip are pressed, which allows the connector to be removed.Having removed the connector be aware that it must be correctly re-located for the plug to house and the clip to lock 2 & 3
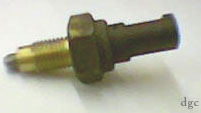
To date I have not had the need to remove or replace my switch. However 'dgc' a fellow Baby-benz.com member has, He adapted a long reach 22mm socket which he has to shorten to fit under the cables servicing the gearbox, my advise to anybody doing this is to use the New switch to adjust the socket, the switch is not unlike a plug and if you shorten the socket too much it will not reach the hexagon section of the switch which you obviously need to engage to remove and re-fit the switch.
ADVISORY WARNING
 Another of our Owners 'Shaggy' being in the know has also warned that the reverse gear
MUST
be selected.
Another of our Owners 'Shaggy' being in the know has also warned that the reverse gear
MUST
be selected.He says:-quote "Ensure that you only fit or remove the reversing light switch with the reverse gear selected and do not take the gear out of reverse until the job is completed (switch fitted and tightened )the reason for this is long and complicated but if you do it without the vehicle in reverse it may well end up requiring a new selector mechanism" so you have been warned! unquote
One owner caused himself some real problems by taking the switch out without selecting reverse gear. Having replaced the switch he was not able to get 5th gear, this was because as the switch was removed a plate in the gear box selector mechanism moved preventing the gear being selected. He had to strip the selector and manually move the plate back into the position it locates when the switch is fitted in the reverse position. He was fortunate in being able to do the job himself others may be less fortunate, so Please observe this strict rule or leave to job to the professionals.
This problem has arisen more than once so take great care to follow the above procedure If you do not you are going to cause yourself real problems. Even MB service centres have been known to get this procedure wrong. So make sure the problem is cured before you leave the garage.
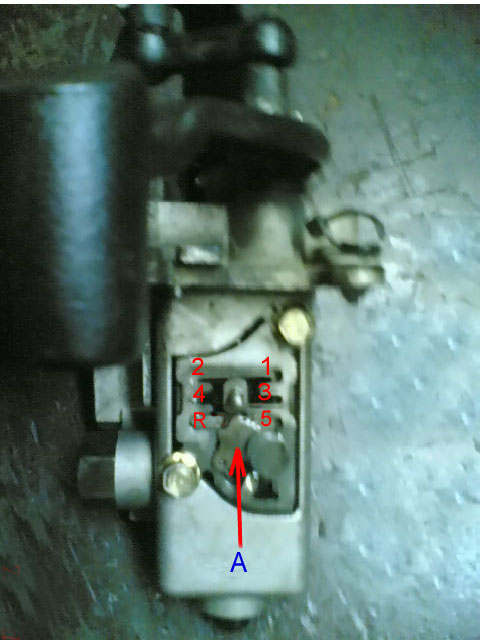
This photo shows the selector mechanism which is located by the gear selector cables. on top of the gearbox assembly.
Plate A moves if the selector is moved with the switch removed
Or the switch is removed without selecting reverse gear. This directly affects the selection of gears and will need to be corrected before the reverse switch will operate correctly or gears can be obtained as normal.
Next.
Back to Index,
Purchase DVD.
Please Make a Donation.