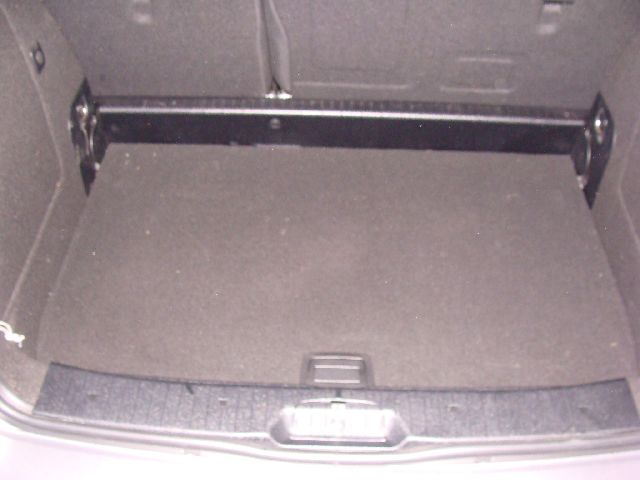
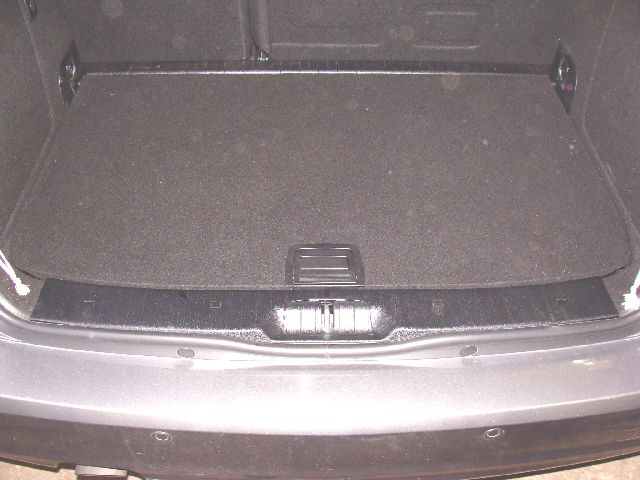
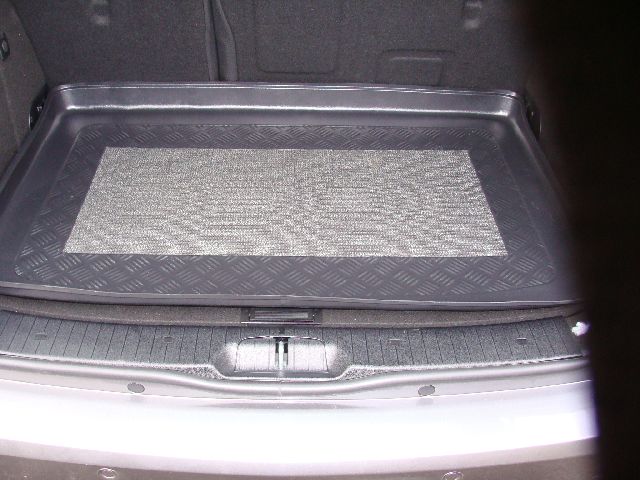
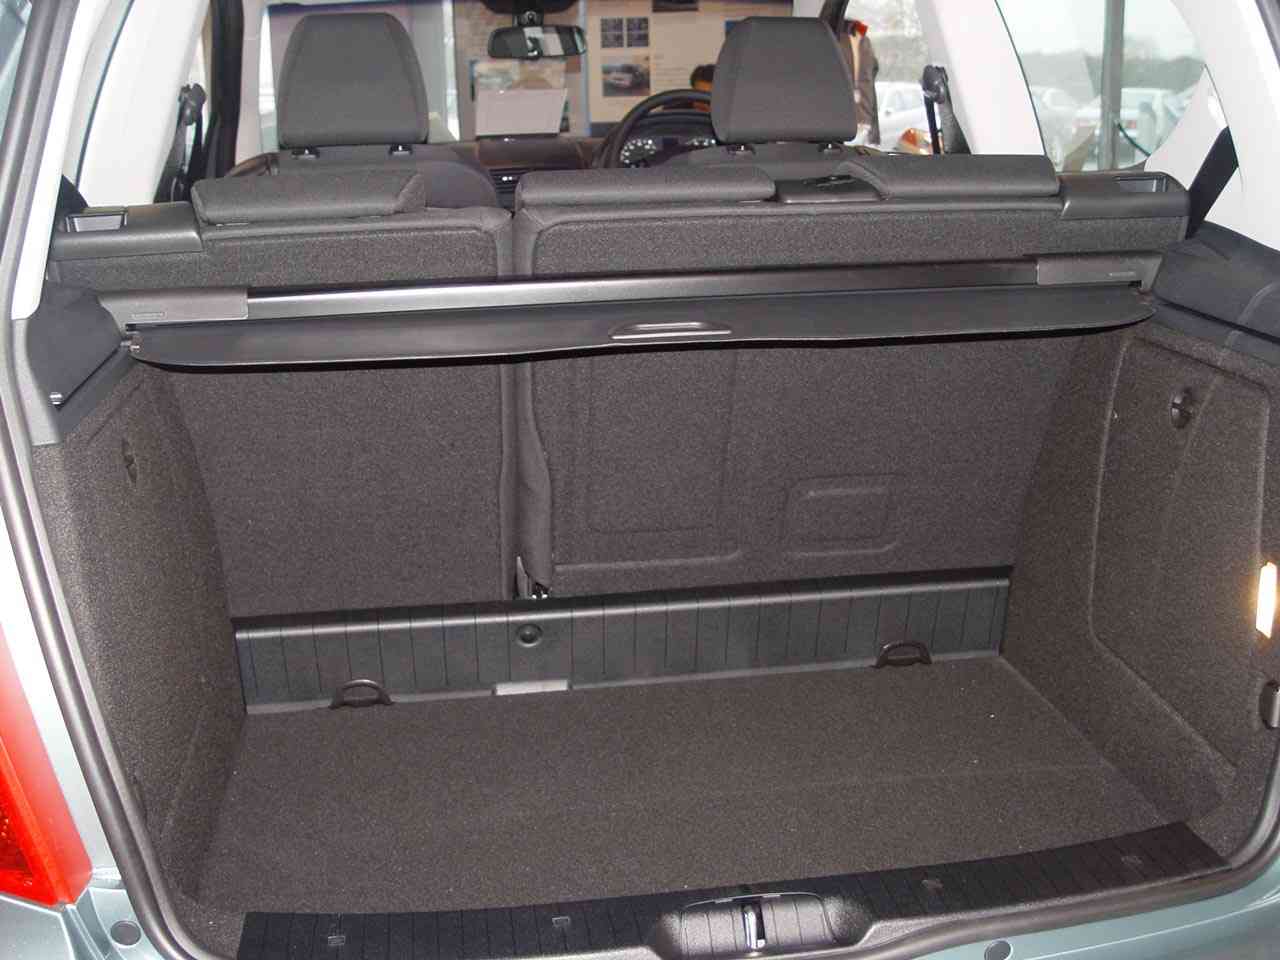
The W169 has a large boot space equal to the of the W168
However this is only achieved by lower the floor into the lower level
This then allowed carrying space for two large wheeled cases plus hand luggage, I was still able to just pull the flexible boot cover into the closed position which hid the cases being carried.
By lowering the floor you gain about 100mm but is should be remembered if you are carrying a heavy weight that the load should be supported by a flat board or some such support also that as the load is level with the door opening the load should be secured to prevent it sliding against the 5th Door (Boot Lid)
There are suitable anchorage points situated in all four corners.
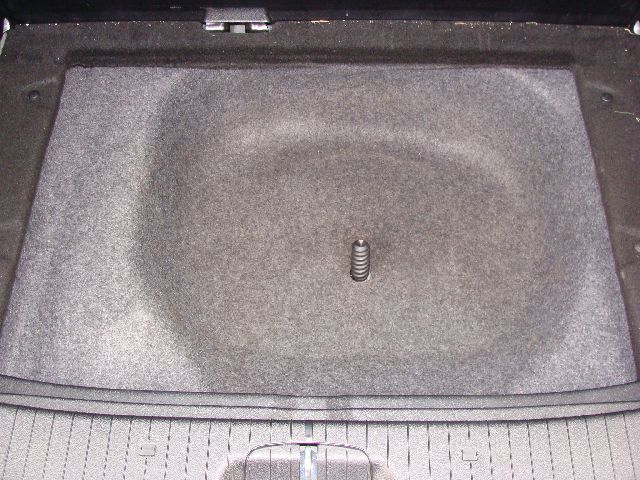
The floor level is very easy to adjust just open the spare wheel cover pull towards you and allow it to find its oven level.
To raise, Open cover pull towards you and ease the cover back into the raised position. Very handy as you now have no raised edge to lift things over but do remember security at all time.
Heavy objects carried can injure and kill if you are in involved in an accident. It is no good fitting airbags and other safety features to the car if we do not then secure loads to prevent them moving, that in my opinion is one of the disadvantages of the soft top boot cover, it may not retain items in that compartment if you have to brake hard or have an accident.
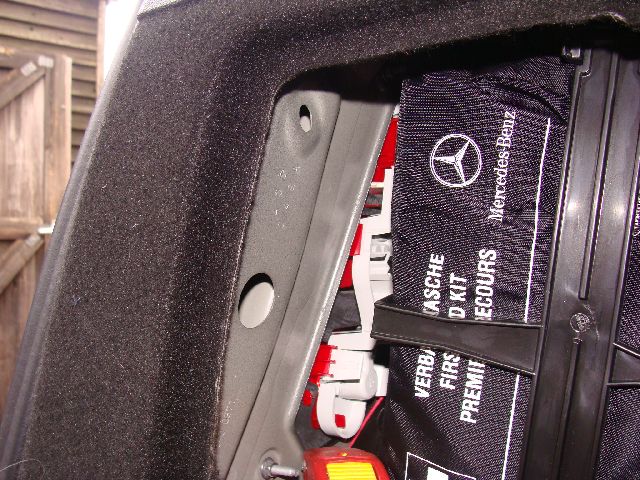
You will see in the photo that integral of the fitting is a D ring for attaching securing straps. there are four situated in the c corners of the rear compartment only. The two further securing rings fitted for when the seats are folded forward as fitted to the W168 appear to have been deleted on this model.
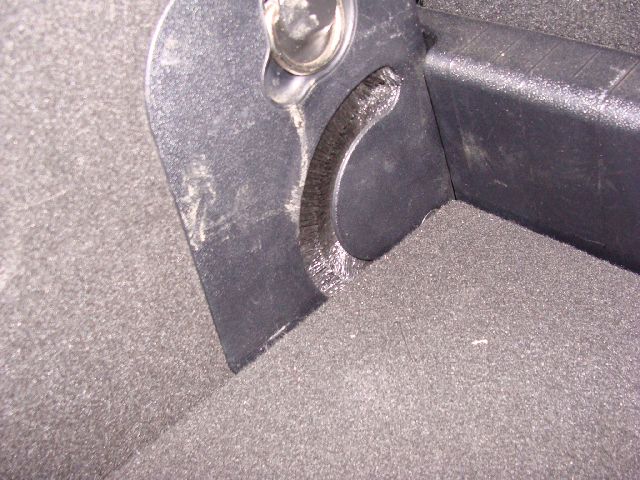
Shows the hinge which allows the floor level to be altered.
Which is shown here in the low position.
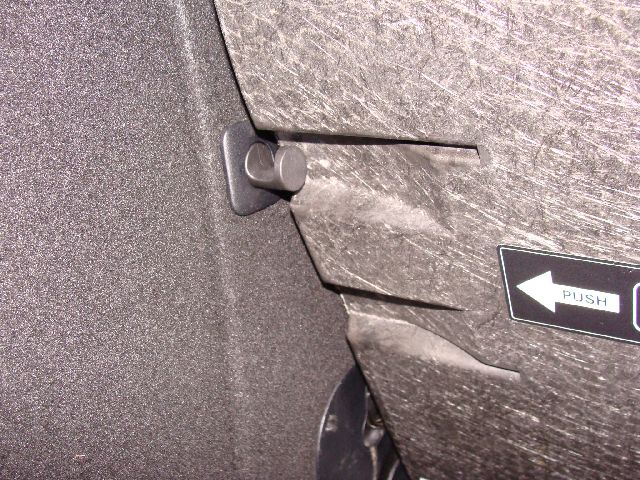
If you are raising the spare wheel cover and want it to remain in the up position, simply press the spring loaded button that will allow the peg to secure the cover. To close raise the lid slightly push the button in.
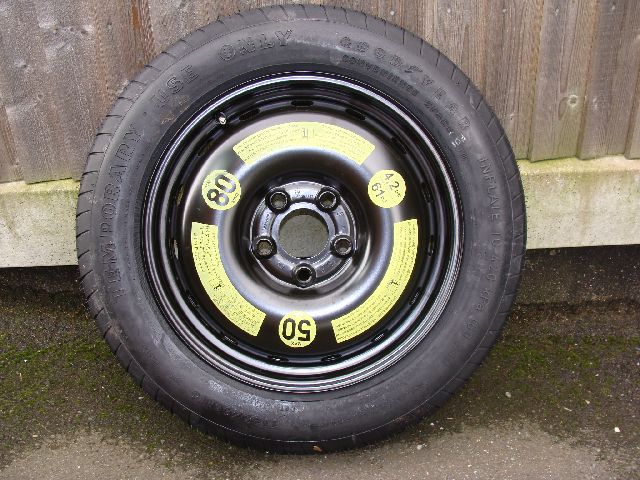
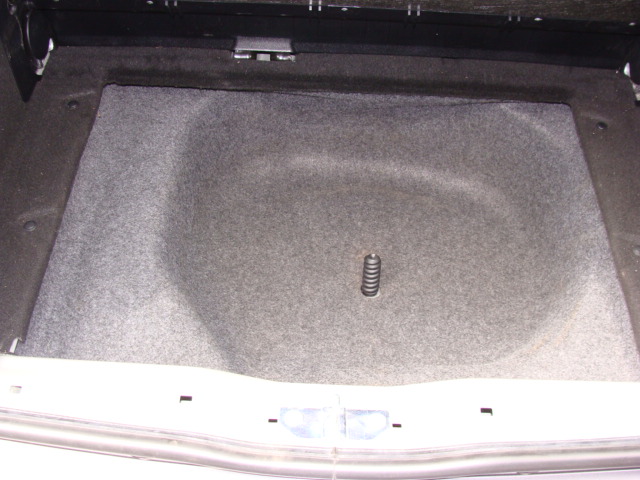
My model W169 carries a 'Space Saver' spare wheel, alt6hough this wheel has its limitations it does provided more space in the lower level of the boot.
I have found that most of the bit's I carry can be neatly paged away in that area.
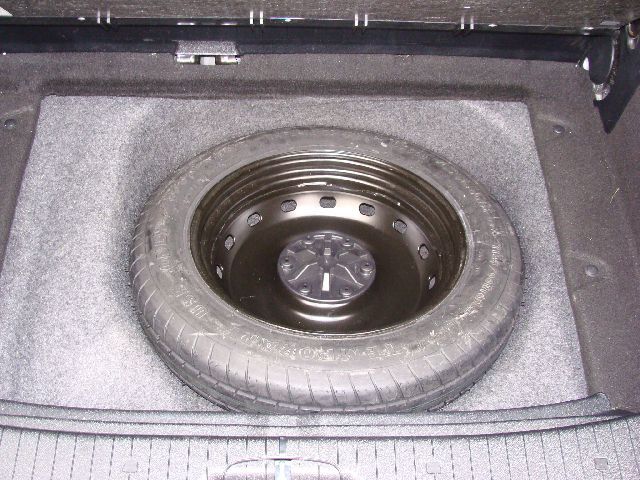
Even carrying the 'Space Saver' ( A wheel the same diameter as the road wheels but fitted with tyre much narrower than the road wheels.) wheel takes up a lot of room as can be seen in this photo, however I prefer that to the repair kit issued with some models. W168 readers will notice that the vacuum unit for the locking is not visible? I have yet to locate where that is situated. if indeed the locking system includes one which I am beginning to doubt
Note There are no wheel bolts attached to the spare wheel This is because the MB wheels both steel and aluminium use the same bolts.
Very handy being so near to Christmas when I purchased the car, I was able to add a boot tray which will keep my dirty boots etc off the Carpet. This one is shown in place with the floor level, as it does not sit down neatly when the floor is lowered, Note also that it obscured the D rings for securing items however the tray sides cold me modified to overcome that problem.
So if buying one check it out first, This one came rolled up so had to be kept indoors in the warm for several days, and then finally fitted using a heat gun to warm the upturned outer edges to shape.
If a MB W169 tray is purchased these minor problems may not exist.
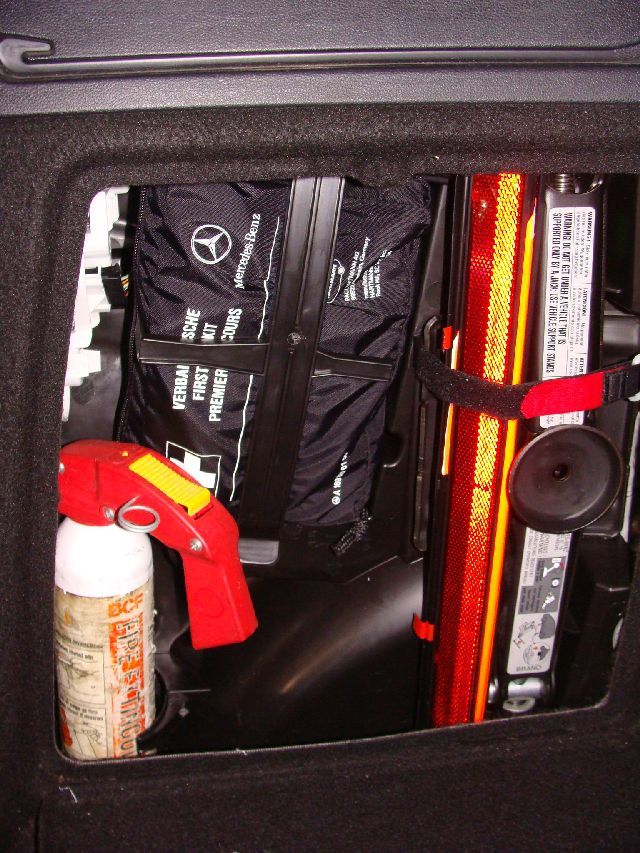
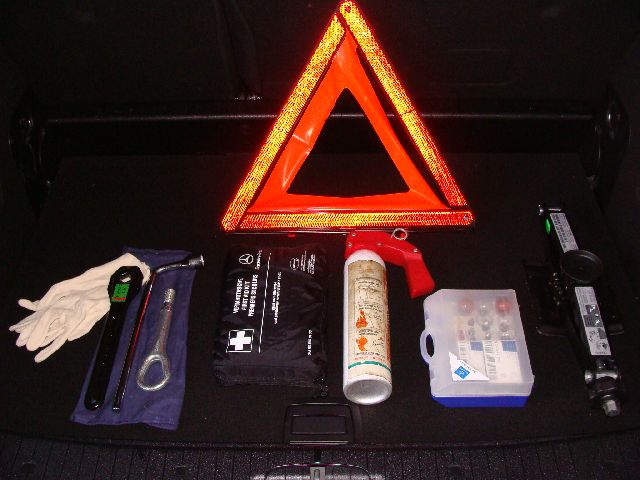
The near side Locker in the boot houses all of the items required in an emergency. Note the warning tri-angle is very like weight and may not stay where you put it due to passing traffic or wind.
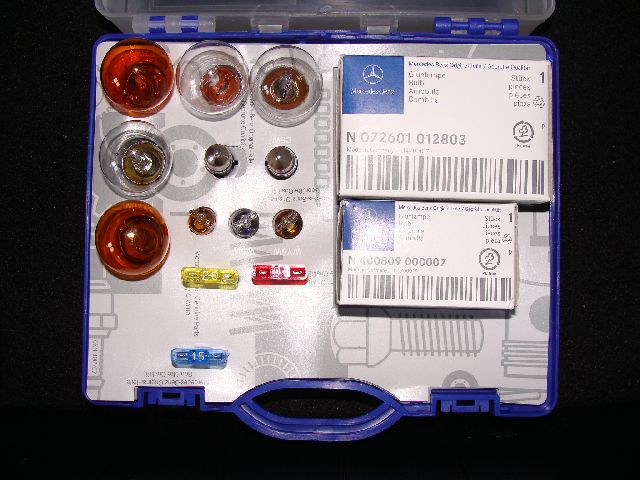
My car even though previously owned came fitted with:- 1.First Aid kit 2.Bulb Kit.( part number B6 681 0021) 3.Jack 4.Warning triangle 5. I added a fire Extinguisher from my previous car. 6.Tool kit comprising of :- A.A. Mercedes-Benz Mandatory white cotton Gloves! B.17mm Wheel bolt removal tool ( Promptly replaced by my wheel bolt spider which includes a 17mm socket) Previous experience has shown that it is impossible to remove wheel bolts that have been replaced using a torque wrench, with the wheel bolt toll provided. C.C. Jack handle ratchet action. D.D. Towing eye (Which screws in to either the front or rear towing socket.) Note this is larger than the one provided with the W168
E. Collapsible wheel Chock. (Not shown)
It is worth noting that the rear light cluster is still accessible from the lockers either side of the boot from the lockers either side of the boot
The bulb kit fits very neatly into a stowage area provided ,albeit I have added some fuses and a few extra bulbs.
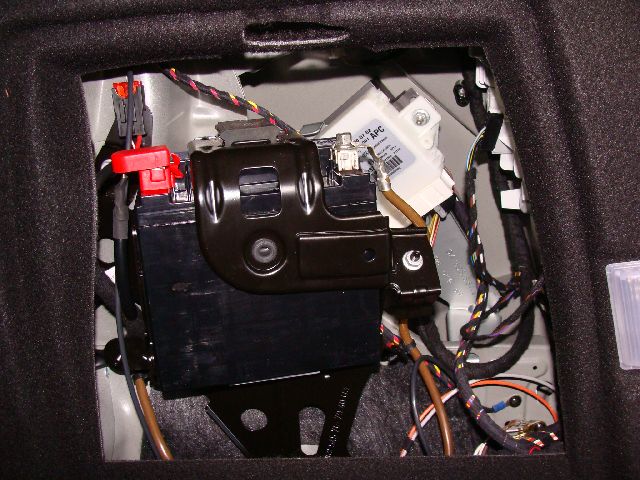
The off-side locker in my car is not usable as it houses the some of the equipment required for the Eco-Start Facility. I would just be possible to replace bulbs without touching this system.
The locker mainly houses a second battery and electronics. It is worth noting the fuse situated in the locker, albeit I have yet to work out what it is for.
The emergency fuel flap locking devise is still situated in this locker although would be very difficult to reach .
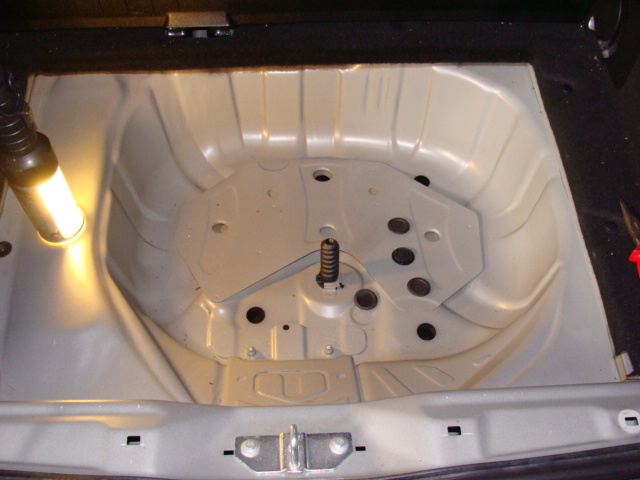
Check your lower boot level for water leaks.
When looking into the boot above every thing looks normal and we have no reason to believe that anything is amiss, However left unchecked water leaks can cause severe rust and eventual collapse of the lower boot area albeit may take a couple of years, add the winter salt on our winter roads into the equitation and it could cause very severe damage indeed.
Let me firstly say that It was not my intention to check the boot for leaks, I had a tow bar lighting problem and although the unit is almost brand new, and professionally fitted I needed to confirm that all wires were in a sound condition and connected. To get at the loom and to trace its run I removed the boot lining.
only to find that it was dripping with water as I removed it.
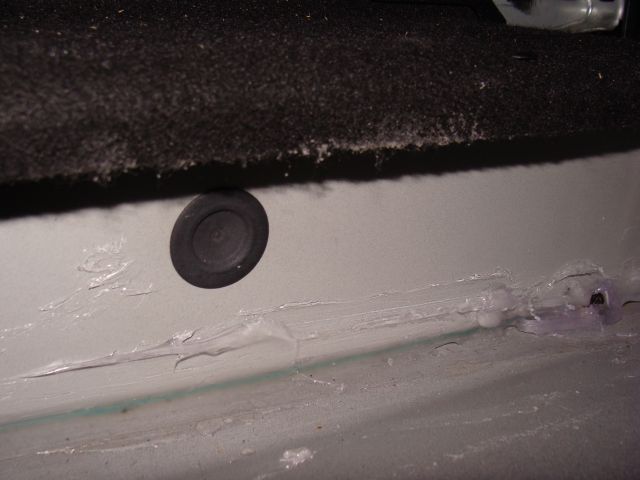
I immediately suspected that the rear screen washer hose had separated from the supply hose as is a common problem on the previous model W168 but this does not appear to be the case, however further investigation led me to 5 suspect rubber grommets positioned in the floor of the boot. Why they are there is any bodies guess apart than the obvious , to fill up man made holes! They appear to no function what so ever and simply let water into the boot area as they are not a tight fit and are not sealed.
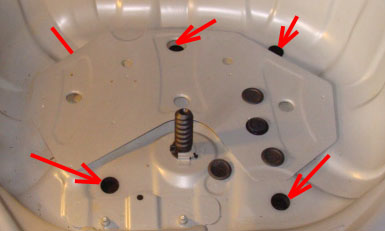
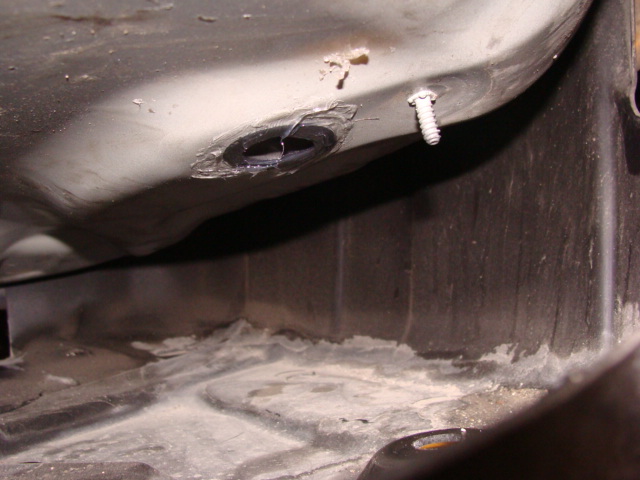
This photo indicates where the grommets are located, 4 can be removed and then sealed from inside the boot, easy job no fuss job done! NOT SO
The 5th grommet is under the reinforcing and cannot be got at from inside the boot.
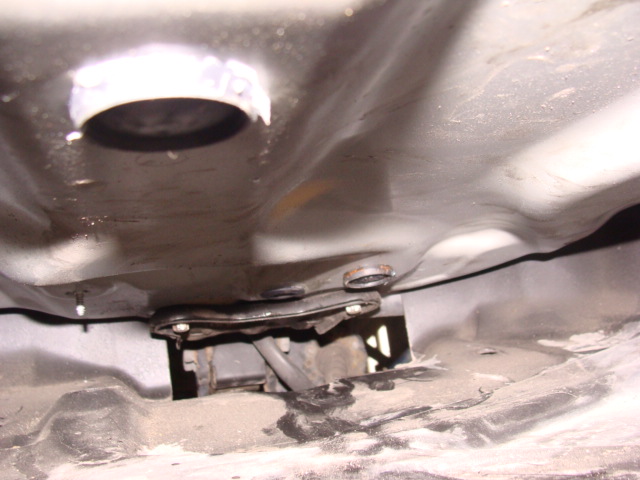
No worries we will do that one from under the car. If only it was that straight forward The lower boot /spare wheel housing in covered with an under body shell which has to be at least loosened , this involves removing the several speed nuts and undoing the exhaust hanger
It is then just possible to get at the 5th grommet , the whole job (Pun not intended) took approximately 1.30mins but it is aggravation that should not need to be faced,
Once again Mercedes so called designers have cocked it up. No thought. Holes for no good reason. Or is a built in defect which will make work for MB workshops in the Future?
I could have forgiven them for one well fitted and sealed grommet BUT 5? unforgivable.
I have now removed cleaned, sealed and replaced the grommets, I used a clear silicone. I have yet to see it that has cured the problem.
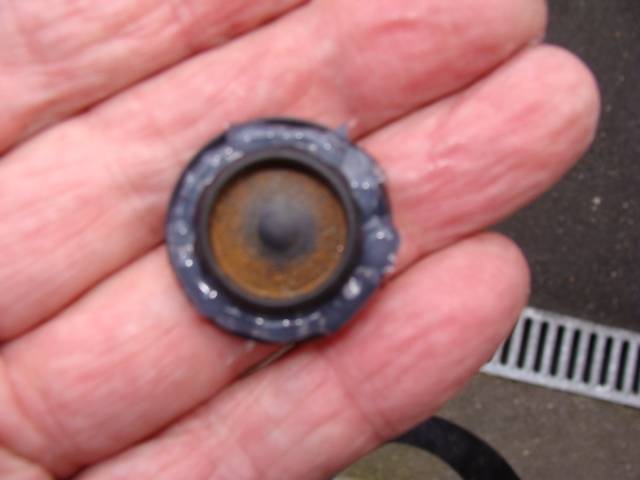
One can see from the rust deposits in the un-cleaned area of this grommet that a serious situation could develop if the problem is not found and cured.
Apart from the tube of silicone which was already part used there are no cost implication if you catch this problem early, leave it and you may have a major job on your hands, repairing or even replacing the boot floor which would not be easy or cheap.
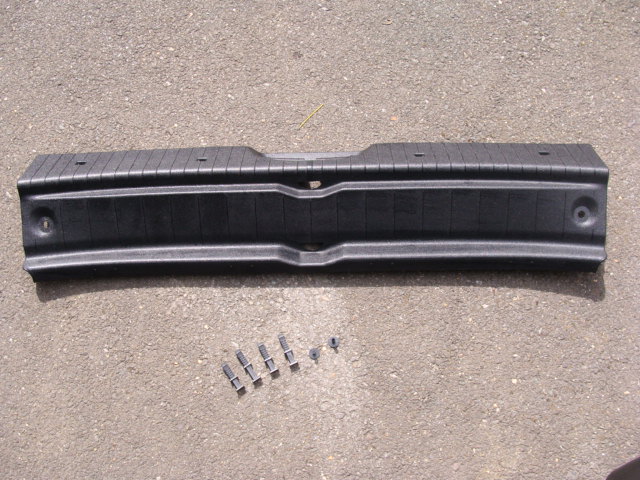
If you do decide to check you boot then the task is easy and few tools are required , You will need a small screwdriver, such as an electrical screwdriver to remove the 4 clips and two studs the re-secure the rear plastic cross member
The four clips are on the top edge to two studs at either end inside the boot, if like me you do find water small sockets for loosening the under body floor panel and exhaust hanger.
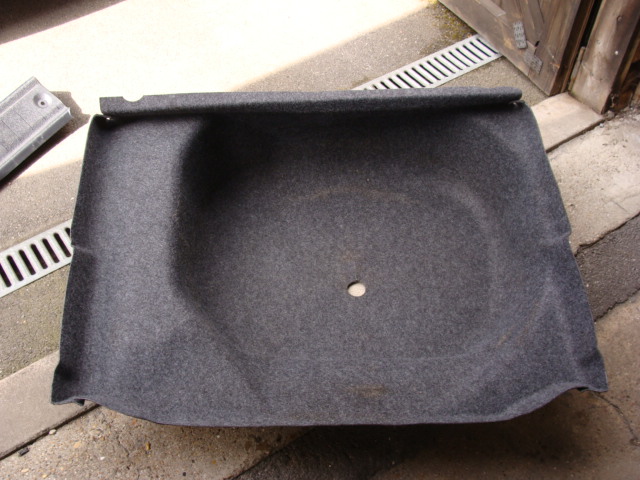
Having removed the fixings the boot lining can be removed, take your time removing and replacing to avoid damage.
Although very wet my lining was undamaged, the metal floor was discoloured with rust partials in the water but this wiped off three very small rust spots were treated with rust kill and sprayed with protective paint.
Having seen the amount a water in my boot I feel this is a job well worth doing or at the very least checking.
This problem my not be present on earlier W1689 model, I would appreciate any feed back which will help other owners in respect of this matter. Preferably before their spare wheel drops onto the road!!!
These two photos are of the underside of the boot floor area , look closely and you can see evidence of rust on one of the grommets. the question is:- Has this been letting water in or screen wash fluid out?
However take a closer look and the lower photo and it looks suspiciously like screen wash fluid dried on the top side of the under floor cover, but the washers are working and if the tube had separated they However take a closer look and the lower photo and it looks suspiciously like screen wash fluid dried on the top side of the under floor cover, but the washers are working and if the tube had separated they would not be working ,simply pushing water/fluid into the boot lid. I will keep you informed . would not be working ,simply pushing water/fluid into the boot lid which will find its way into the lower boot area. I will keep you informed .
Well 12 months since purchasing the car and despite my efforts I have failed to cure the problem.
I'm confident the water is not coming from the rear screen washer that works without problems.
I appreciate we have had excessive rain with loads of flooding some of which one has no option but to drive through, but the car's bodywork should not leak in this way.
Only by removing the spare wheel and feeling the boot liner, which is formed from a carpet like material will you determine if you have the same problem, left long term without being spotted and cured and your spare wheel will drop through the floor!
Later when the weather improves I will have another go at curing the problem.
What I know propose doing is under-sealing the whole area with a good quality under-seal, it is now possible to purchase aerosol cans of sealant and so I may give that a try.
If you discover the cause before I do please let me know and I will post it on this page. Thanks
Lofty
28/12/13
Having seen how quickly the rust has formed in the lower boot area as a result of water getting into that area I have today had another go at sealing the grommets which is where I think the water is getting in?
Getting at the grommets from the underside of the car is not difficult second time around, as long as you can raise the car sufficiently to work from below.
I used the ramps I made up for the W168 and I know the car is safe, when in this case backed onto the ramp; the front wheels chocked as well as the car left in reverse gear.
The only tools you need are small sockets 10mm and 8mm I used a quarter drive ratchet, take care not to over tighten the plastic securing nuts when replacing.
You will also need to remove the rear exhaust fixing, using the 8mm socket.
Having lowered the rear plastic under-pan I then used sealing tape, the type used to seal roof leaks, lead faced pre-coated with bitumen, which I heated up to make sure it was sticky I then placed a square over each of the grommets and sealed round using a wall paper seam roller.
If the boot still leaks now then it is not coming from the grommets and I will need to look for another area to seal.
Also until I find the cause I am not going to pressure wash this area as water may be forced through the seam where the spare wheel boot housing joins the car.
I will look in a couple of days to see if I have cured the problem, I will keep you informed. One thing is for sure there is no shortage of wet weather at present to check if it still leaks.
29.12 13
Well the answer is yes it does still leak .
All I have done since drying the boot area out is wash the car with a garden hose following a fishing trip, minimum pressure. The roads were wet but not enough to make the boot interior wet
Test show that it is not coming from the rear screen washer and the washer works ok which it would not if the hose had detached from the nozzle
However there are signs that it might be getting into the boot where the spare wheel metal housing is joined to the bodywork.
I have therefore today gone all round the inside of the boot where the two parts join with bathroom sealant.
If this stops the leak then I will need to under-seal around this area on the outside as well, which means taking the rear wheels off and removing the inner wings, I will then have access to the seam both sides front and rear.
This is necessary because if water in laying in that seam the body work will soon rust away and will not be repairable. even more important because our roads are currently being treated with salt which will exasperate the situation even more.
01.01.14
Initial indications are that the water was coming in around the seam where the lower boot section joins the box section of the rear body work.
Having sealed this seam on the inside, with as stated above flexible bathroom sealant, applied with a sealant/filler gun, and have now been out in some of the worst rain seen here for some time; although the paper put beneath the boot liner feels damp it is not soaking wet as was experienced previously.
It is interesting to not that i9n the top corner of the photo there appears top be a hole which is now sealed , this was not visible with the naked eye when inspecting the boot.
When the weather improves I will be looking at the outside seam seal to see if there are any sections are left unsealed by Mercedes Benz.
As it takes only a few minutes to remove the boot liner having first removed the rear plastic cross section I would advise all W169 owners to check for this problem as it will cause serious damage if rusting is allowed to occur in this unventilated area.
When replacing the boot liner take care not to damage by placing the left hand side in first.
01.01.14 PM
I'm now able to confirm that the leak in my case was from the joint mentioned above, having just been out in torrential rain with many roads flooded and inspection on my return no water has entered to boot at all.
So if your boot is leaking resulting in puddles of water in the spare wheel section of the boot then seal that joint to prevent water entering the boot. lower Boot checked on the 10.01.14 now completely dry although I have now put a container of molecular sieve in the lower boot area to detect any signs of dampness.
8.2.14 after incessant rain for well over a month and having been forced to drive through water several inches deep I have again inspected the lower boot area and am able to confirm that it is bone dry.
I will therefore as soon as weather permits check and under-seal where necessary the area where the boot moulding joins the main body work on the outside of that section of the car, prevention has got to be better than rust which will quickly damage the car if left unattended and permanently wet.
Furthe3r inspection 4/11/2014 time taken to check approx 10 minutes.
remolve all items fromthe boot inclding spare wheel. if the grey carpet moulded boot inning is wet you have the problem , it it's dry you can be assured that your boot is sealed.
However having highlighted this problem
I have been contacted by a number of owners who have found their boots flooded and wet this e-mail was received from Chris who highlights ananother possible cause for the water in the boot:-
Lofty,
I have used your website and CD for many years when maintaining my car – it has been absolutely brilliant and saved me a fortune.
I also had a water leak problem with my W169. Like you, I lifted out the carpet and initially thought it was the wheel well grommets. However, when I sprinkled it with talcum powder I traced to the seam you mentioned between the wheel well and main body. However, when I removed the wheel arch liner to check the seam out, it was fully sealed on my car, so I continued looking
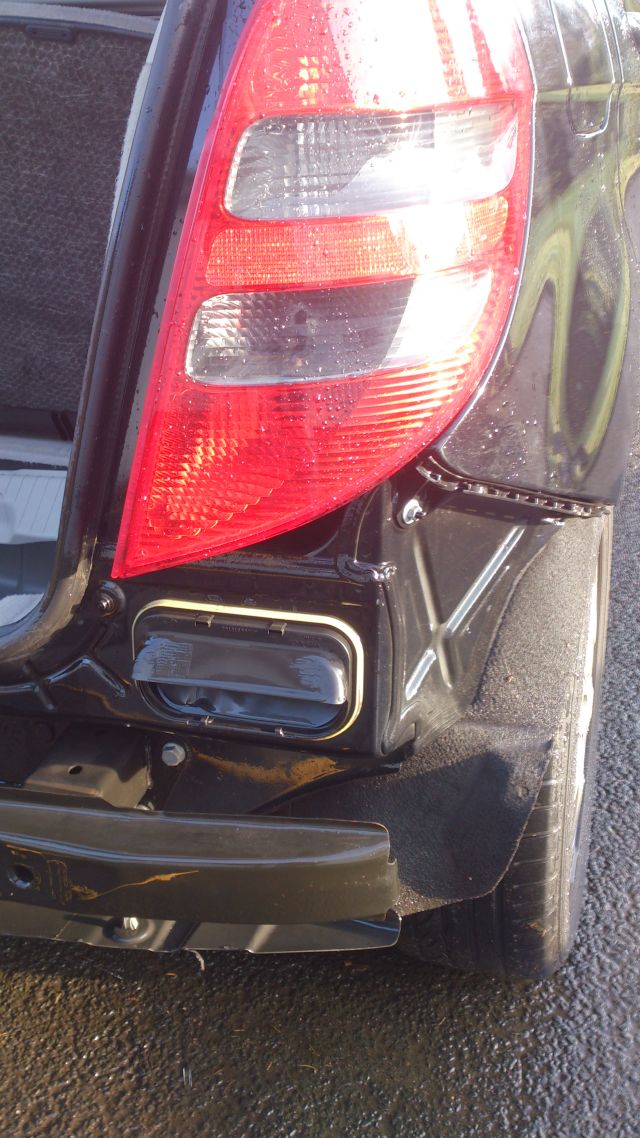
Instead I did some searching of internet forums and came across a discussion of the problem by a German MB engineer. He reckoned it was the seals on the rear air vents failing.
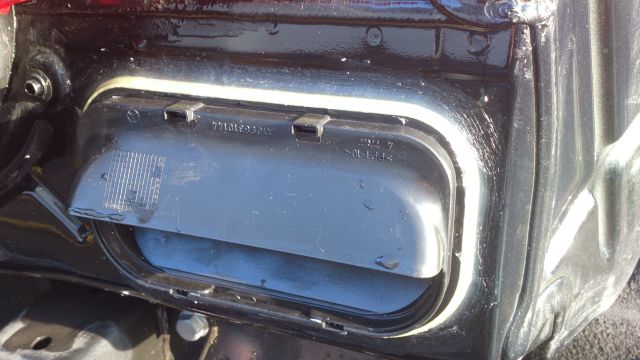
These are plastic units fitted into the body behind the rear bumper. I removed the bumper and sure enough the vents were loose due to the seal having hardened with age. They were also very wet as it seems the water from the outside edge of the tailgate tracks down past them. The vents sit just above the joint between the wheel well and main body so are ideally placed for leaking water onto the joint at the rear of the car that then makes it’s way around the seam to the sides of the wheel well.
I pulled the vents out, filled the seal with non setting gutter sealant and refitted them. Since then the car has been bone dry in the boot.
So either I had a different source of leakage, or you by sealing the inside of the seam have just stopped the water from the rear of the car making it to the sides – in which case it must be going somewhere!
Regards
Chris
Dear Chris
Thanks for you ,mail, I think this is a built in problem because my car was only three years old when I purchased it and the problem was present.
Sealing the seam in my instance has stopped the leakage and I now have a pot of moly-seiv in the boot and that has remained dry so obviously my seals rear of bumper are still ok.
However should the problem rear it head again i will certainly check those out.
I think the main thing is we are now alerted to a possible problem which could cause havoc to the metalwork of the car, far better to be aware than having to get rid of the car due to rusting .
I will, add you mail to http://www.aclassinfo.co.uk/page.8.169.htm and It will at least give other owners an alternative to check if they have problems.
Best wishes
lofty
Subject: Re: Thank you (again!) - and a tip for your W169 section
Lofty
It been a very long time since we last chatted (Johnny_E on the baby benz forum). My wife's 2002 W168 LWB has left us after 9 years of flawless service. It was STILL looking like new, but has horrific chassis leg rust. Drivers side only - and my mechanic saw another 2002 it... but it wasnt economically viable to repair.
So... I bought a 2008 A150 Avantgarde which led me again to your great website. A heavy night of rain led to a steamed up windows and a battery but, as with the W168, these things eat batteries when not driven
regularly, so I'm fitting my Optimate lead today! I don't think the 2 incidents are related.
Anyway... my reason for emailing you. As you know, the cabin filter drain blocks up, but the main source of the silt/dirt was the main windscreen edge drains. They were bunged up.
Many owners use trombone cleaners to keep these drains clear and it was excellent for the job on the W169.
Just remove the torx bolts that retain the windscreen scuttle cover, use one hand slipped into the gap to direct the end of your flexi brush and then work from above. It did the trick and these are readily available on eBay. Just search for "trombone brush" (do an e-bay search for a trombone cleaning brush)
Lofty
Yet more flooding problems with our w169, after the flooded battery box incident a few weeks ago!
My wife reported hearing water "sloshing" when reversing. We'd had really, really heavy rain last week and on inspecting under our boot floor... it was FULL of water. The spare wheel was completely submersed!
Thanks again to your website, I soon got the bungs out to drain it but could see no sign of bad seams inside the boot. So, off with the back bumper and I tested the various potential leak entry points with a hose.
As soon as I poured water over the RH boot vent, it flooded straight through to the inside. These vents are really loosely fitted! They can jiggle 3-4mm left and right easily, with a poor amount of tension to
create a seal.
So for me, I seem to have the same issue as Chris states on your page:
And yet another mail with a large donation in gratitude from Peter, Peter Millard,
Message: Hi there. Just wanted to say thanks very much for the site - the information you provided saved me a lot of head-scratching re. a condensation issue in our '06 A170, and also saved me a lot of grief down the line WRT water ingress into the spare wheel well; I hoovered out around 15 litres of water from mine yesterday, but thankfully it doesn't appear to have done any long-term damage (!) though it's something I'll be keeping an eye on in future, obviously! Thanks again, and best wishes. Peter
http://www.aclassinfo.co.uk/page.8.169.htm
A liberal coating of clear silicone has solved this one for me. Another small design flaw with big consequences in the long term for owners.
I've attached a couple of pictures in case you wish to add them (some time!) to your page. The first shows the location of the vent and the close up shows it repaired with silicone sealant.
Regards,
John
Flooding of these two area's of the car should not be treated lightly, they will cause rusting in a short space of time and in the case of the battery box could cause severe damage to the fuse and relay board, the cure is easy, just keep drains clear and if you car is getting on in years check that the boot vents are in good sound condition and are well fitted or sealed against the body work to prevent water entering the boot area. an inspection of these two area's takes only minutes and is time well spent.
Thank you to both Chris and John for the information and John for the photo's
Lofty
And yet another owner with problems,who sent a donation in appreciation of the information.
Peter Millard
Hi there. Just wanted to say thanks very much for the site - the information you provided saved me a lot of head-scratching re. a condensation issue in our '06 A170, and also saved me a lot of grief down the line WRT water ingress into the spare wheel well; I hoovered out around 15 litres of water from mine yesterday, but thankfully it doesn't appear to have done any long-term damage (!) though it's something I'll be keeping an eye on in future, obviously! Thanks again, and best wishes. Peter
Do also remember to check the Air conditioning ativated carbon filter housing, (below the windscreen )ensuring the well below the filter is dry and free of debris which may be blocking the drain hole.
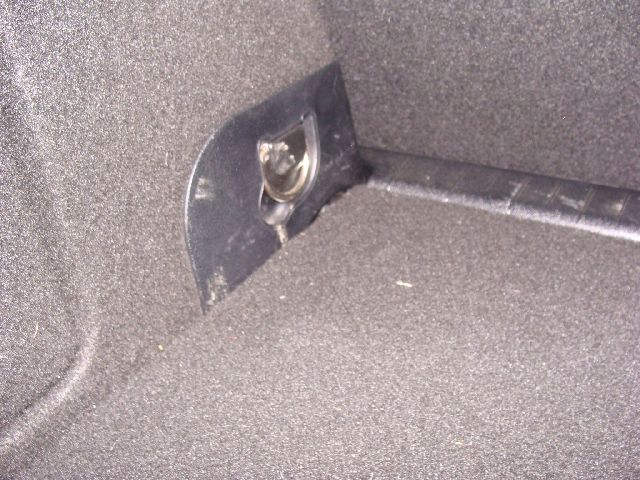
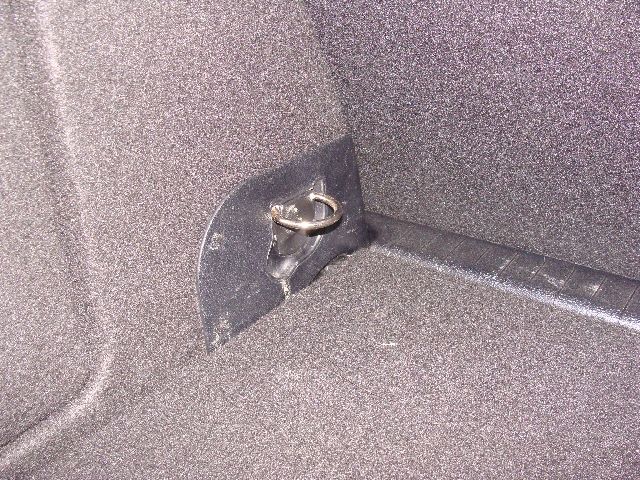 You will see in the photo that integral of the fitting is a D ring for attaching securing straps. there are four situated in the c corners of the rear compartment only. The two further securing rings fitted for when the seats are folded forward as fitted to the W168 appear to have been deleted on this model.
 I have now removed cleaned, sealed and replaced the grommets, I used a clear silicone. I have yet to see it that has cured the problem.
 Having removed the fixings the boot lining can be removed, take your time removing and replacing to avoid damage.
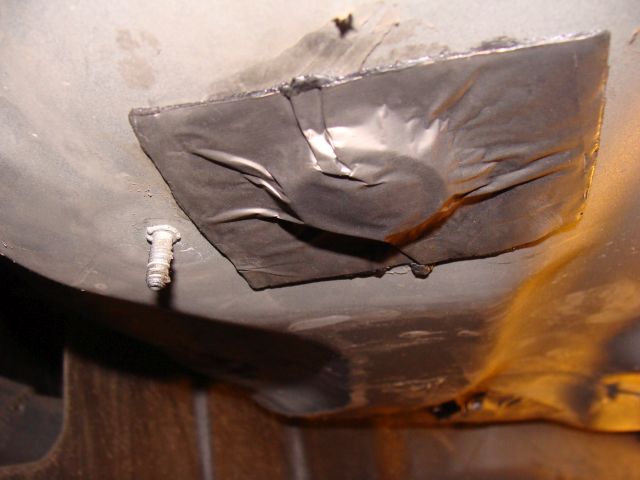 Having lowered the rear plastic under-pan I then used sealing tape, the type used to seal roof leaks, lead faced pre-coated with bitumen, which I heated up to make sure it was sticky I then placed a square over each of the grommets and sealed round using a wall paper seam roller.
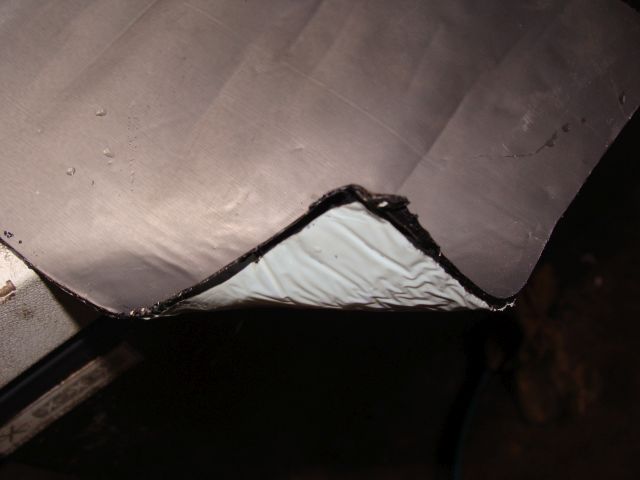 If the boot still leaks now then it is not coming from the grommets and I will need to look for another area to seal.