Back in 2004 when I first looked around the W169 'A' Class I convinced myself that replacing the light bulbs in the front headlamp's of this model would be easier than on its predecessor the W168.
However having now purchased a W169 I have changed my mind, in fact it appears the job is even more involved in that there is even less room than on the W168 and the headlamp's cannot easily be eased forward to access the bulbs holders unlike the W168
But at least your W169 will indicate in the instrument cluster when a bulb has blown and indicate its location.
Yes if you follow the guidance in your Handbook Edition RE2008/09a Pages, 245,247,248,249,250, you may be able to remove the headlight bulbs BUT trying to replace them is very difficult indeed due in the main to the limited space, so my advise is do not remove the defective bulb until you know you have time to spare in replacing it, and I would not now tackle this job while away from my tool box.
I have not got a quote from Mercedes-Benz but I suspect the bill with the cost of the replacement bulb plus labour and VAT will cost the best part of £80-£100.
If you have small hands to may be able to replace the bulb with my large hands No chance.
Note. When driving outside the UK you are required to carry spare bulbs.
Note
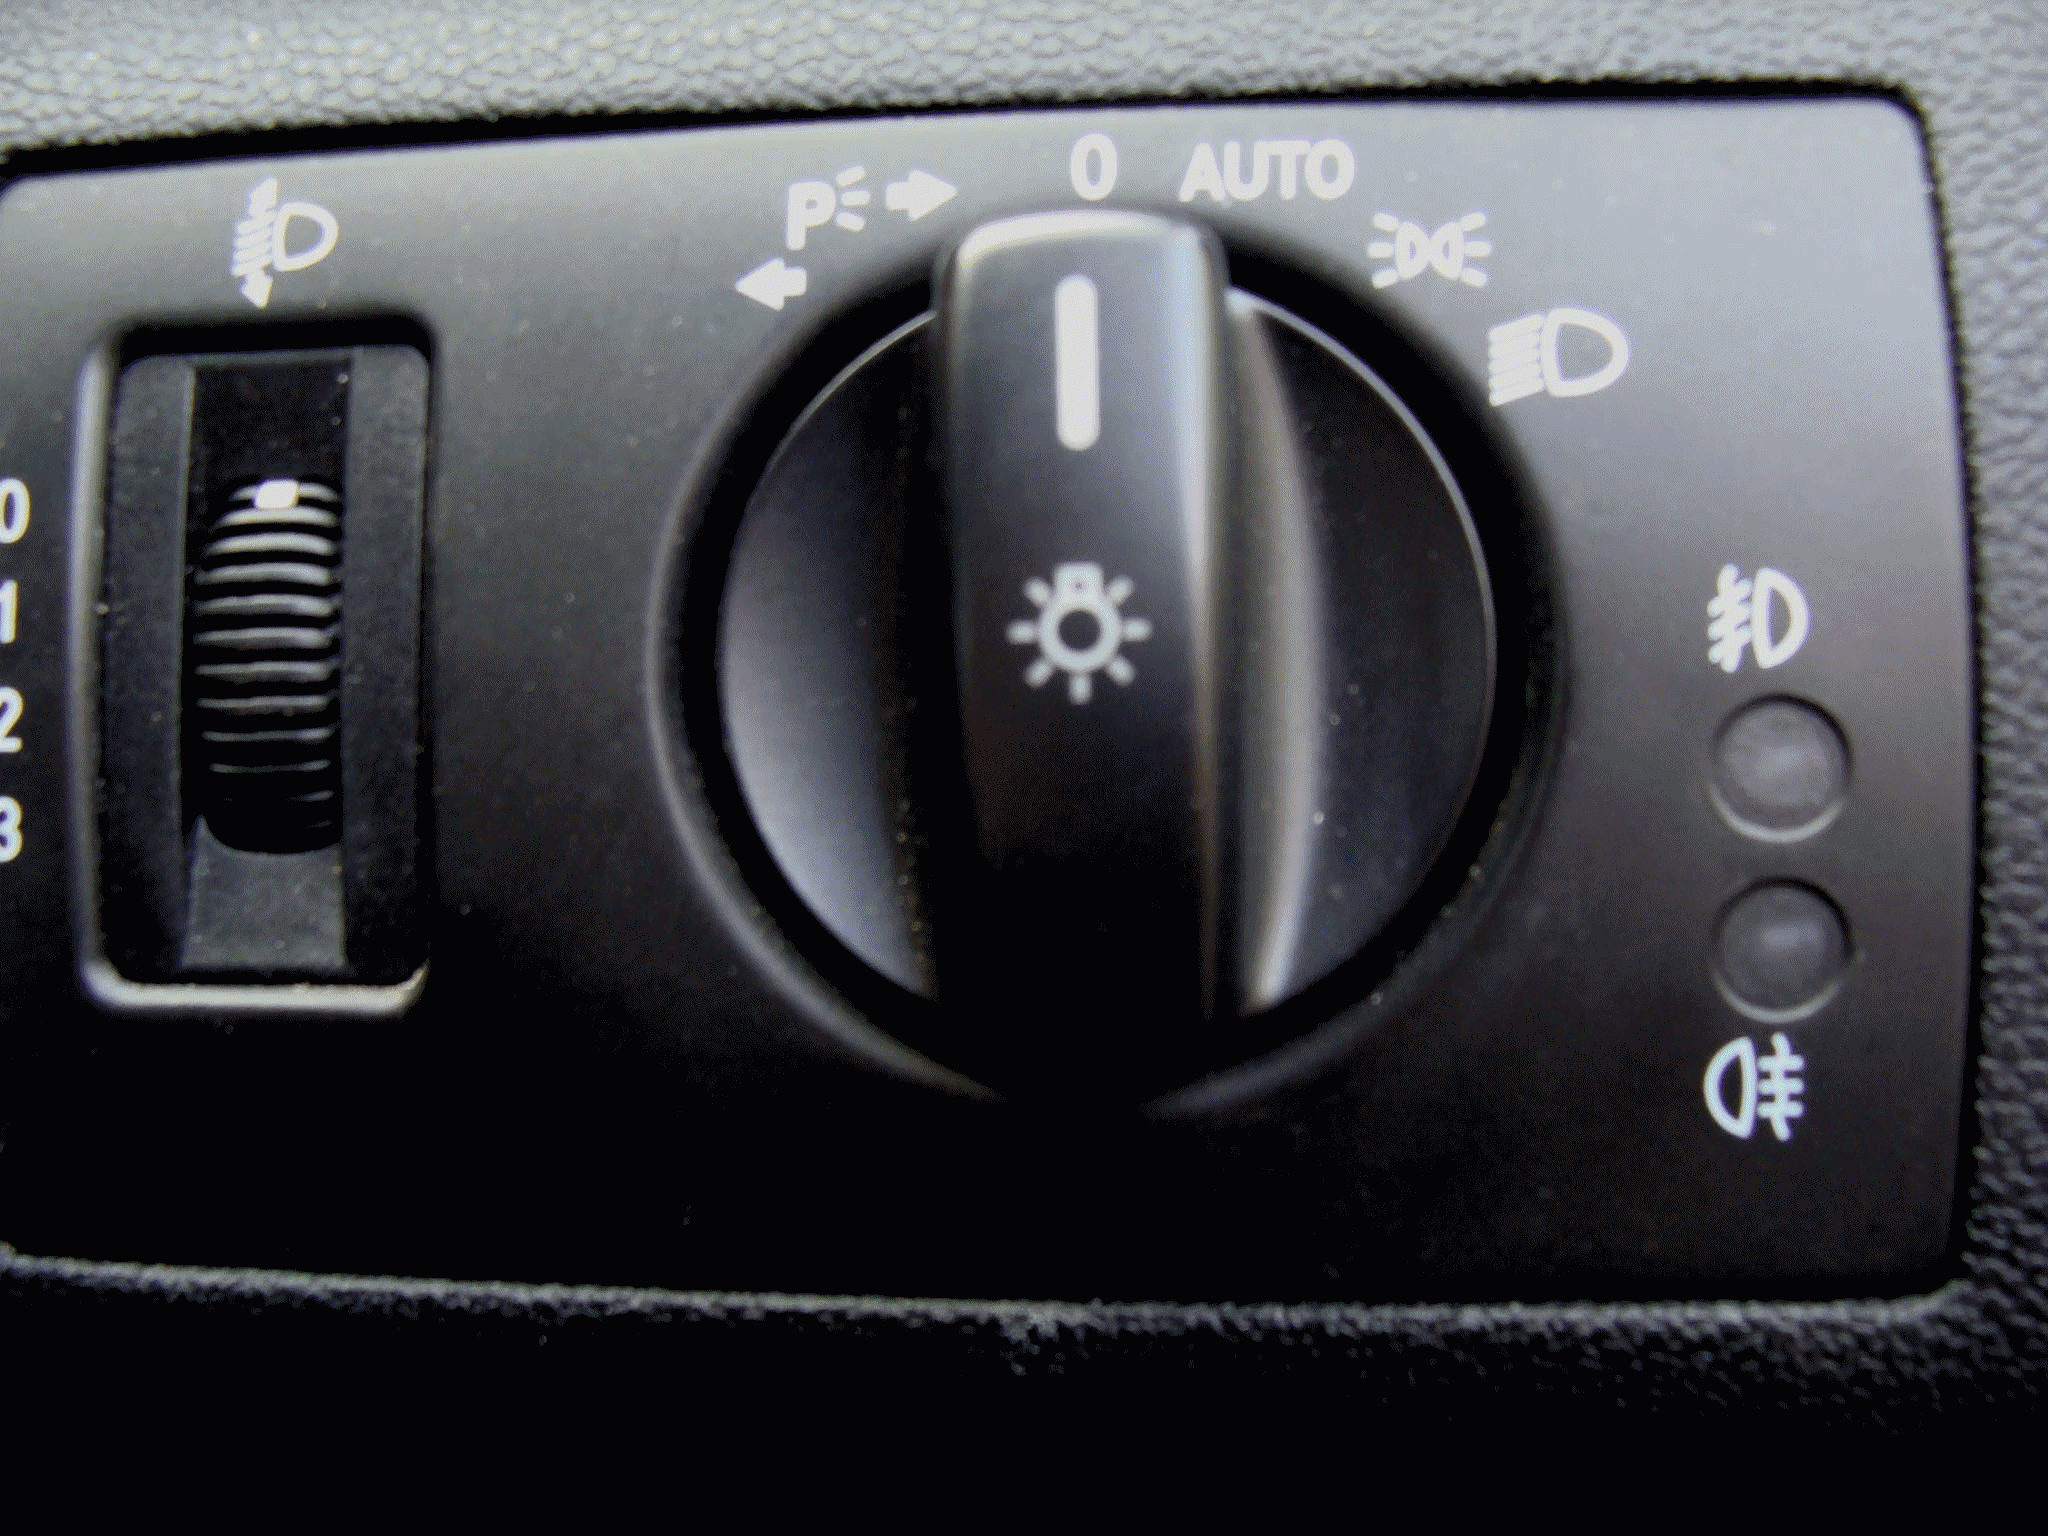
2009 Classic SE. The main lighting switch will only activate the headlight's when the engine is running. the headlights will turn off when the ignition is turned off. The dedicated parking lights, both off-side and near-side can be operated without the key in the ignition.
Main Light switch operating positions. See Animation switch sequence. . The main lighting switch has a number of positions:- 1. Off 2. Parking light Off side (RHD) 3. Parking Near side Note. Only the bottom bulb of the rear light cluster lights when parking lights are selected.
4.. Off
5. Auto, Light will come on if for any reason normal daylight is reduced. ie. Dusk to dawn , tunnels, darkened areas on Country roads etc.
6.Side/Parking lights
7. Headlights. The beam set is selected on the
combination switch. Forward for Main headlight beam. towards you for Dipped Headlights The setting selected will be indicated in the instrument cluster by a Blue and Green dipped beam icon. The Green icon will show when the headlights are on in the dipped position.
Both the green and the blue headlight icon will show when the main beam is ON. Both dipped and main beam light (Blue and Green) when the
Combination switch is in the main beam position. 8. Front Fog lamps selected by pulling the switch out one stop
9. Front and rear fog lamps are selected by pulling the switch out two stops
When fog lights are on and indicator will light by the main lighting switch. Green for front fog Yellow for Rear fog lamp.
10. The facility on the left of the switch is the main beam level setting, this should be in the '0' Zero Position for normal load, Where you are carrying a Maximum load or weight in the rear of the Vehicle there may be a need to alter setting 1,2,3,to lower the beam and thereby prevent blinding oncoming drivers with your headlights even though they are in the dipped position.
Ref 5.above The Automatic lighting is activated by a light sensor in the centre/top of the front windscreen if for any reason this is covered the lights remain on all the time the ignition in on.
Replacing front Indicator bulbs
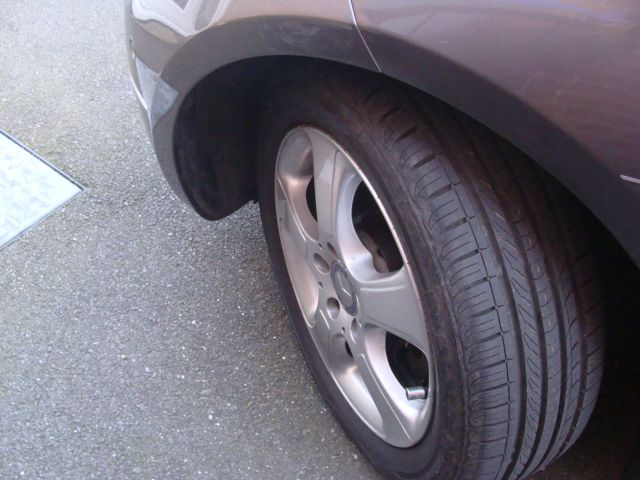
1. On the effected side turn the front wheels so as to afford yourself maximum space in the front wing, ie if replacing a bulb on the near side/right (as you look at the car from the front) turn the steering wheel fully to the right.
2. Now open the small hatch in the front of the wing, located towards the top.
3. Fully open the hatch and lodge on the tyre.
4. Place your hand through the hole.
5. Using the front indicator bulb location as a guide, feel for and turn the bulb holder anti-clockwise.
6. This can be withdrawn complete with bulb.
7. Replace the defective bulb in the bulb holder .
8. Replace the bulb holder and secure by turning clockwise
9. Close the hatch in the wing and test indicators by operation.
the ignition need to be turned on to test the indicators , Hazard warning operates without the ignition ON
Basic procedure, Main Headlamp Bulbs:-
I found that replacing the bulbs using this procedure in the owners handbook was impossible due to a lack of space, having removed one headlamp bulb I was unable to replace it. I therefore looked for an alternative method which although involved loosening the front spoiler /bumper was much quicker and easier. See below
However if you can afford to have Mercedes-Benz change your defective bulbs I'm sure they will use the method in the handbook but be prepared to pay for the bulb, labour and VAT @ 20% which I estimate minimum 1/2 hours work £80-£100
1. Identify the defective bulbs location by operating the main lighting switch. Do remember that you are dealing with a Glass lens not like so many other manufactures who have opted for plastic lenses. Handle with care these lamps will cost a lot to replace albeit I think the lens only is available.
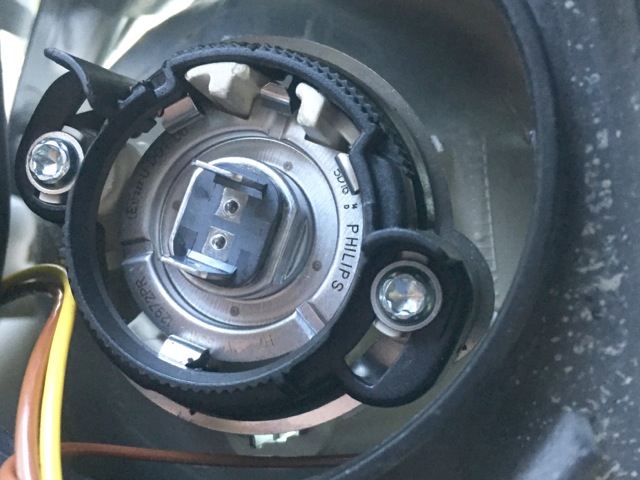
2. Remove the black plastic cup/cover on the affected headlamp This cap is shown as fitted with the two lugs in each case being at the bottom which locate in to holes, the cap snap closes when fully closed.
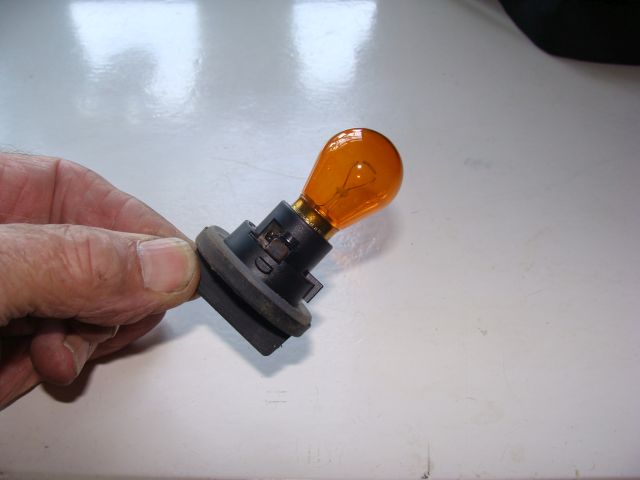
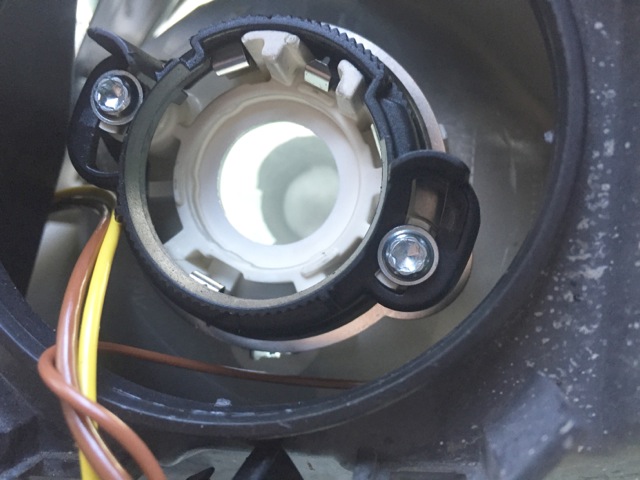
3. Remove the defective bulb by turning the bulb holder anti-clockwise.
4. Remove the electrical connector from the bulb.(I had to use an electrical screw driver to ease the old bulb from the holder).
5. Replace the new bulb in the bulb holder
6. Replace the bulb holder complete with bulb in the headlamp housing.
7. Replace the plastic cup/cover ensuring it is fully housed
8. Test by operating the main lighting switch.
Alternative method for replacing head light bulbs
I found my/this method to be easier than the procedure in the hand book, and in my case it was the only way I could replace the bulb myself. However you do need a few tools.
Tools required
1. 1 X 10mm spanner or sock with appropriate drive
2. 1 X 8mm socket and ratchet (I used a 1/4 drive long reach socket)
3. 2 X Electrical type flat blade screw driver (fine blade ) for removing the centre pin of the two securing clips inner wing and One clip centre of the upper grill.
Alternative procedure.
1. I released the front spoiler /bumper by:-
2. Removing the 10mm bolts securing the spoiler
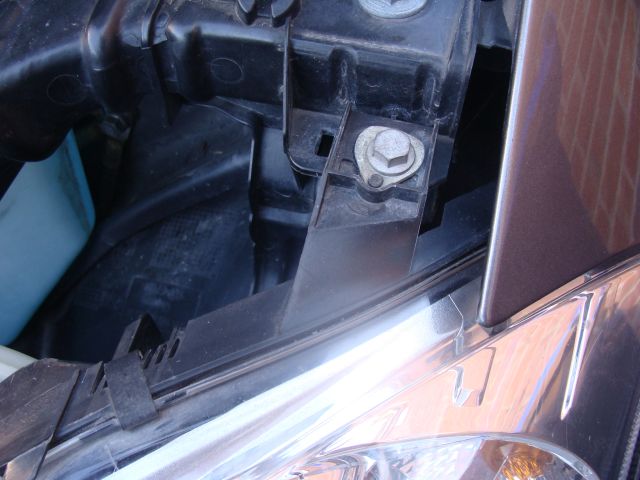
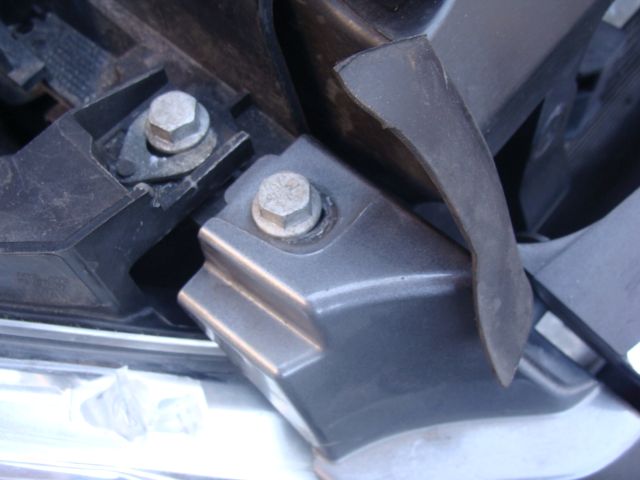
3. On the effected headlamp I also removed the two visible 10mm bolts
4. Now remove the 8mm bolt securing the spoiler to the front wing quarter panel forward of the front door, affected side .
5. Remove the two clips holding the plastic inner wing in place.
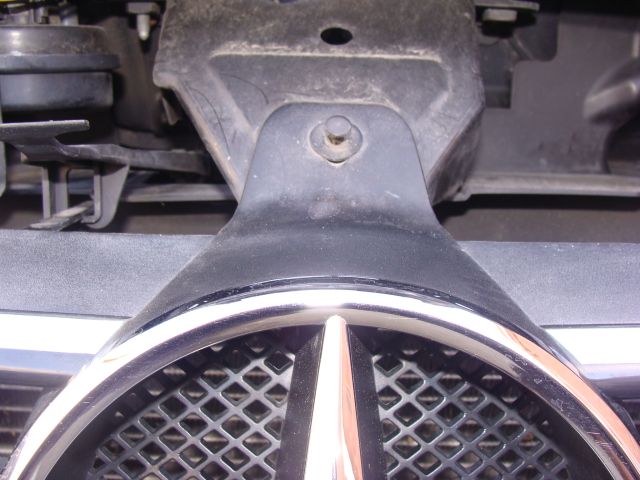
followed by the clip in the centre of the grill above the Mercedes Badge.
These clips are removed by withdrawing the centre plastic pin, I use a small screw driver to ease the pin out of the fixing clip. The body of the fixing clip can then be eased from its housing. New clips can be purchased from Mercedes parts @ £2.54 each 2/9/15 Part No MA 124 990 04 92/P601252
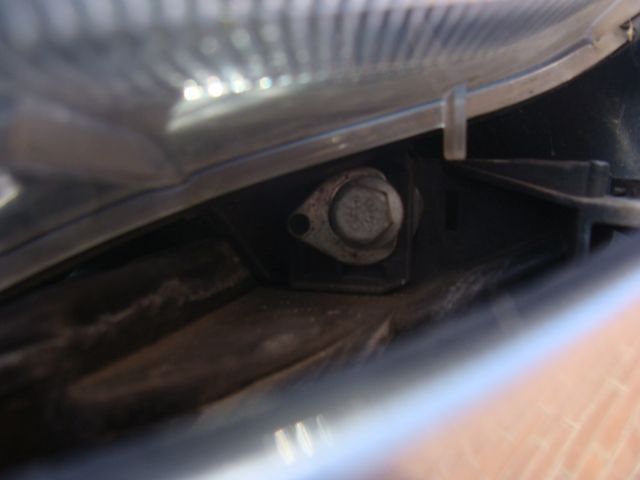
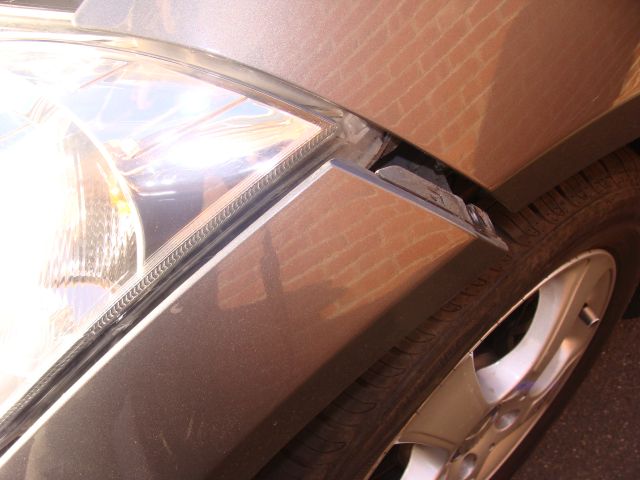
6. You should now be able to ease the front spoiler /bumper away slightly and down allowing you to see the 10mm bolt securing the bottom of the effected headlamp
Remove that bolt.
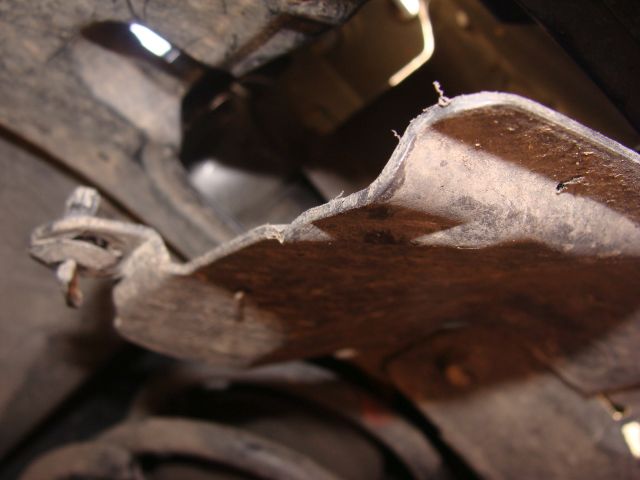
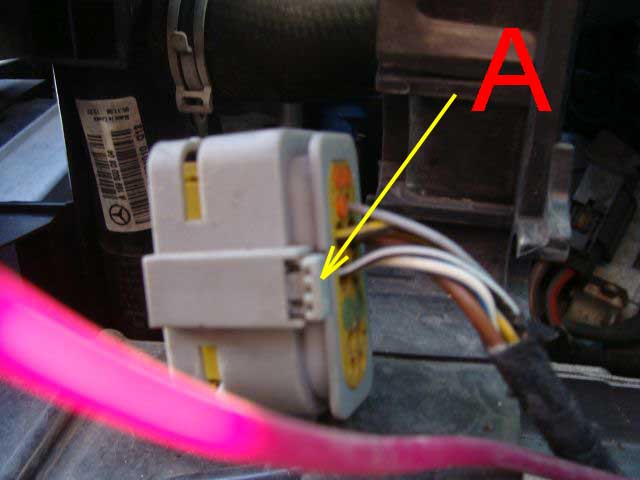
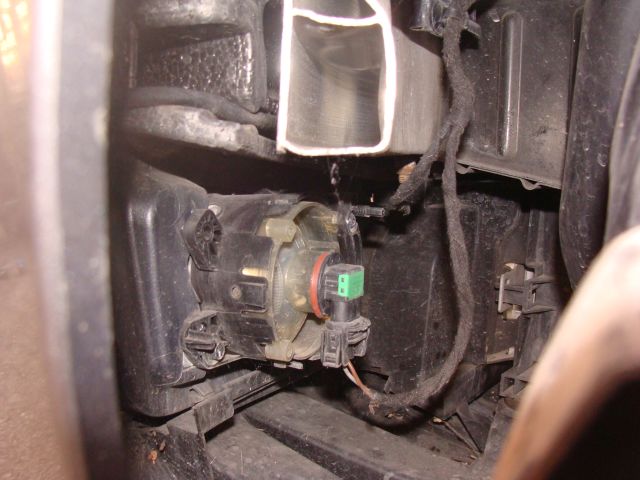
7. With the spoiler/bumper loose, you should now be able to move the headlamp away from its housed position sufficiently to remove the electrical contact block from the headlight unit.
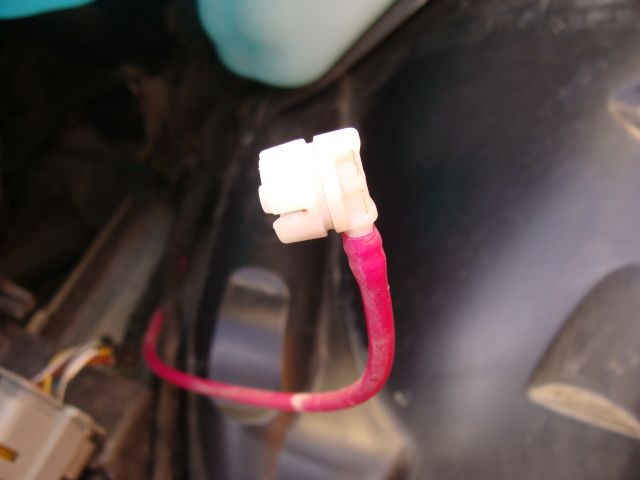
8. Remove the electrical connector from the headlamp unit, Flick out the small tab A on the side of the connector block to remove
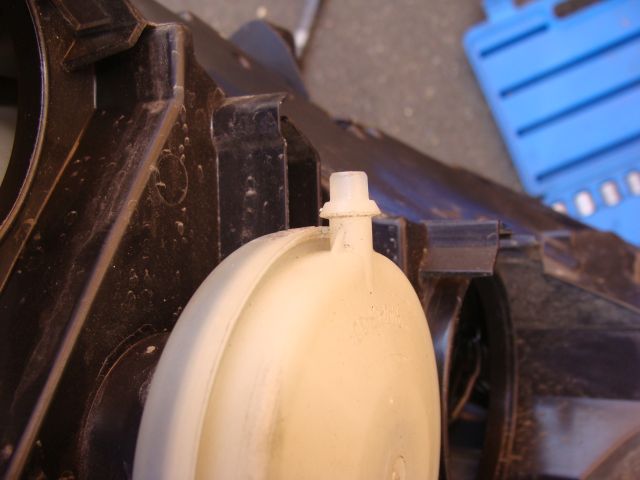
9. Carefully remove the automatic head light adjusting feature, mauve tube from the white circular diaphragm.
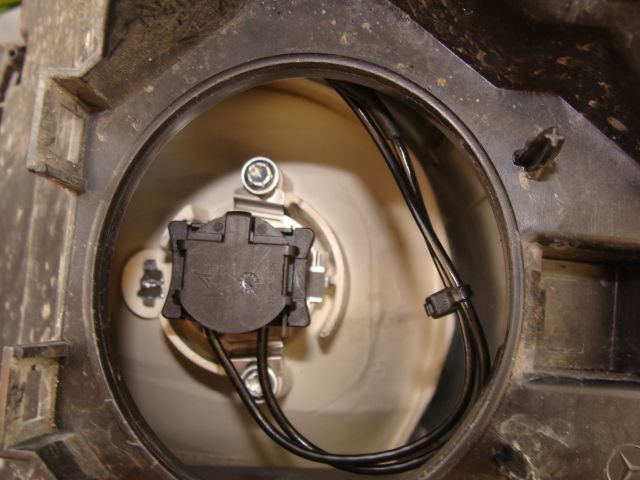
10. With the headlamp removed, remove the plastic cup/cover, replace the defective bulb's and secure, replace the plastic cup/cover
11.Note that the bulb is secure when the two lugs (see small arrow)on the bulb holder lock behind the two Torz screws in the bulb housing.
The Torz screws are not touched or adjusted during the changing of bulbs
12. Carefully replace headlamp unit in reverse order ensuring you replace and secure the three securing bolts
Where the bolt has been housed for a long period of time it is easy to see the precise location when removed re tighten to the original setting. On replacement the adjustment of the headlamp beam will not have been altered by removal and replacement.
13. You may wish to check the bulb by operation at this stage.
Variations in design of fittings
I received an e-mail from Warick in NZ, he like me was not me was not able to release the bulb from its location while the head lamp was fitted. his e-male and finding and a couple of photos are below
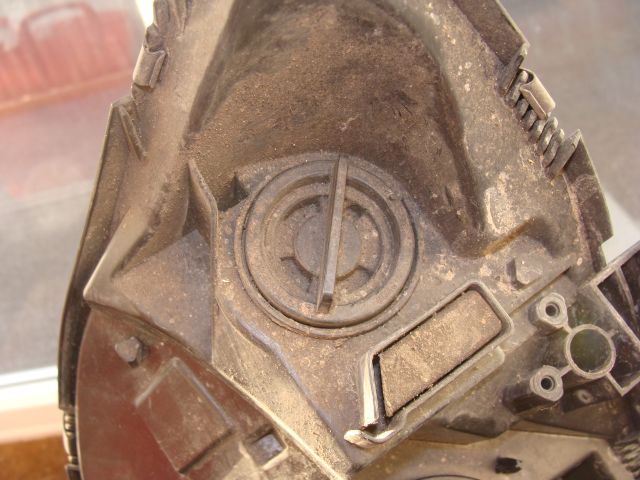
Good day again Lofty, Well, I could not rotate the lamp using its electrical connector, or just the pins. So I followed your counsel and loosened off the bumper and wing, allowing me to remove the headlamp. Now I do not know whether in Oz the arrangement is different, but this is what I found.
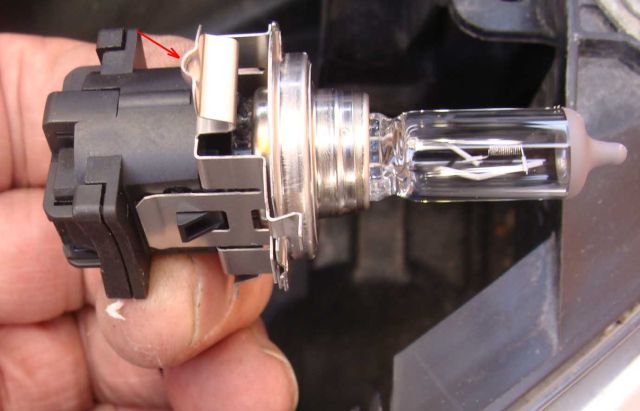
Here are two pictures, one with the lamp removed and one with the replacement fitted. On our vehicle the bulb securing mechanism has to be roatated anticlockwise and is a knurled black plastic ring, that rides in two slots round the torx screws on either side and retains the lamp in the assembly. One simply needs to rotate the ring anticlockwise, with very little force required and the lamp slips out. Putting the new one in is only tricky because there is a flat that needs to fit exactly into the housing before the plastic ring can be rotated clockwise in its slots to lock the lamp in position.
I think next time I could perform the changeover while the headlamp remains in position but my wife's make-up mirror would be needed to allow proper alignment of the flat. Best Regards Warwick Many thanks Warick, this will undoubtably help and owner somewhere in the World.
So if you have a pre 2009 W169 (A Class)be prepared to come up against slight changes in the way bulbs are secured in the headlamps of you vehicle
14. When repositioning the spoiler/bumper take you time as there are a number of flanges that engage in slots on the front of the car.
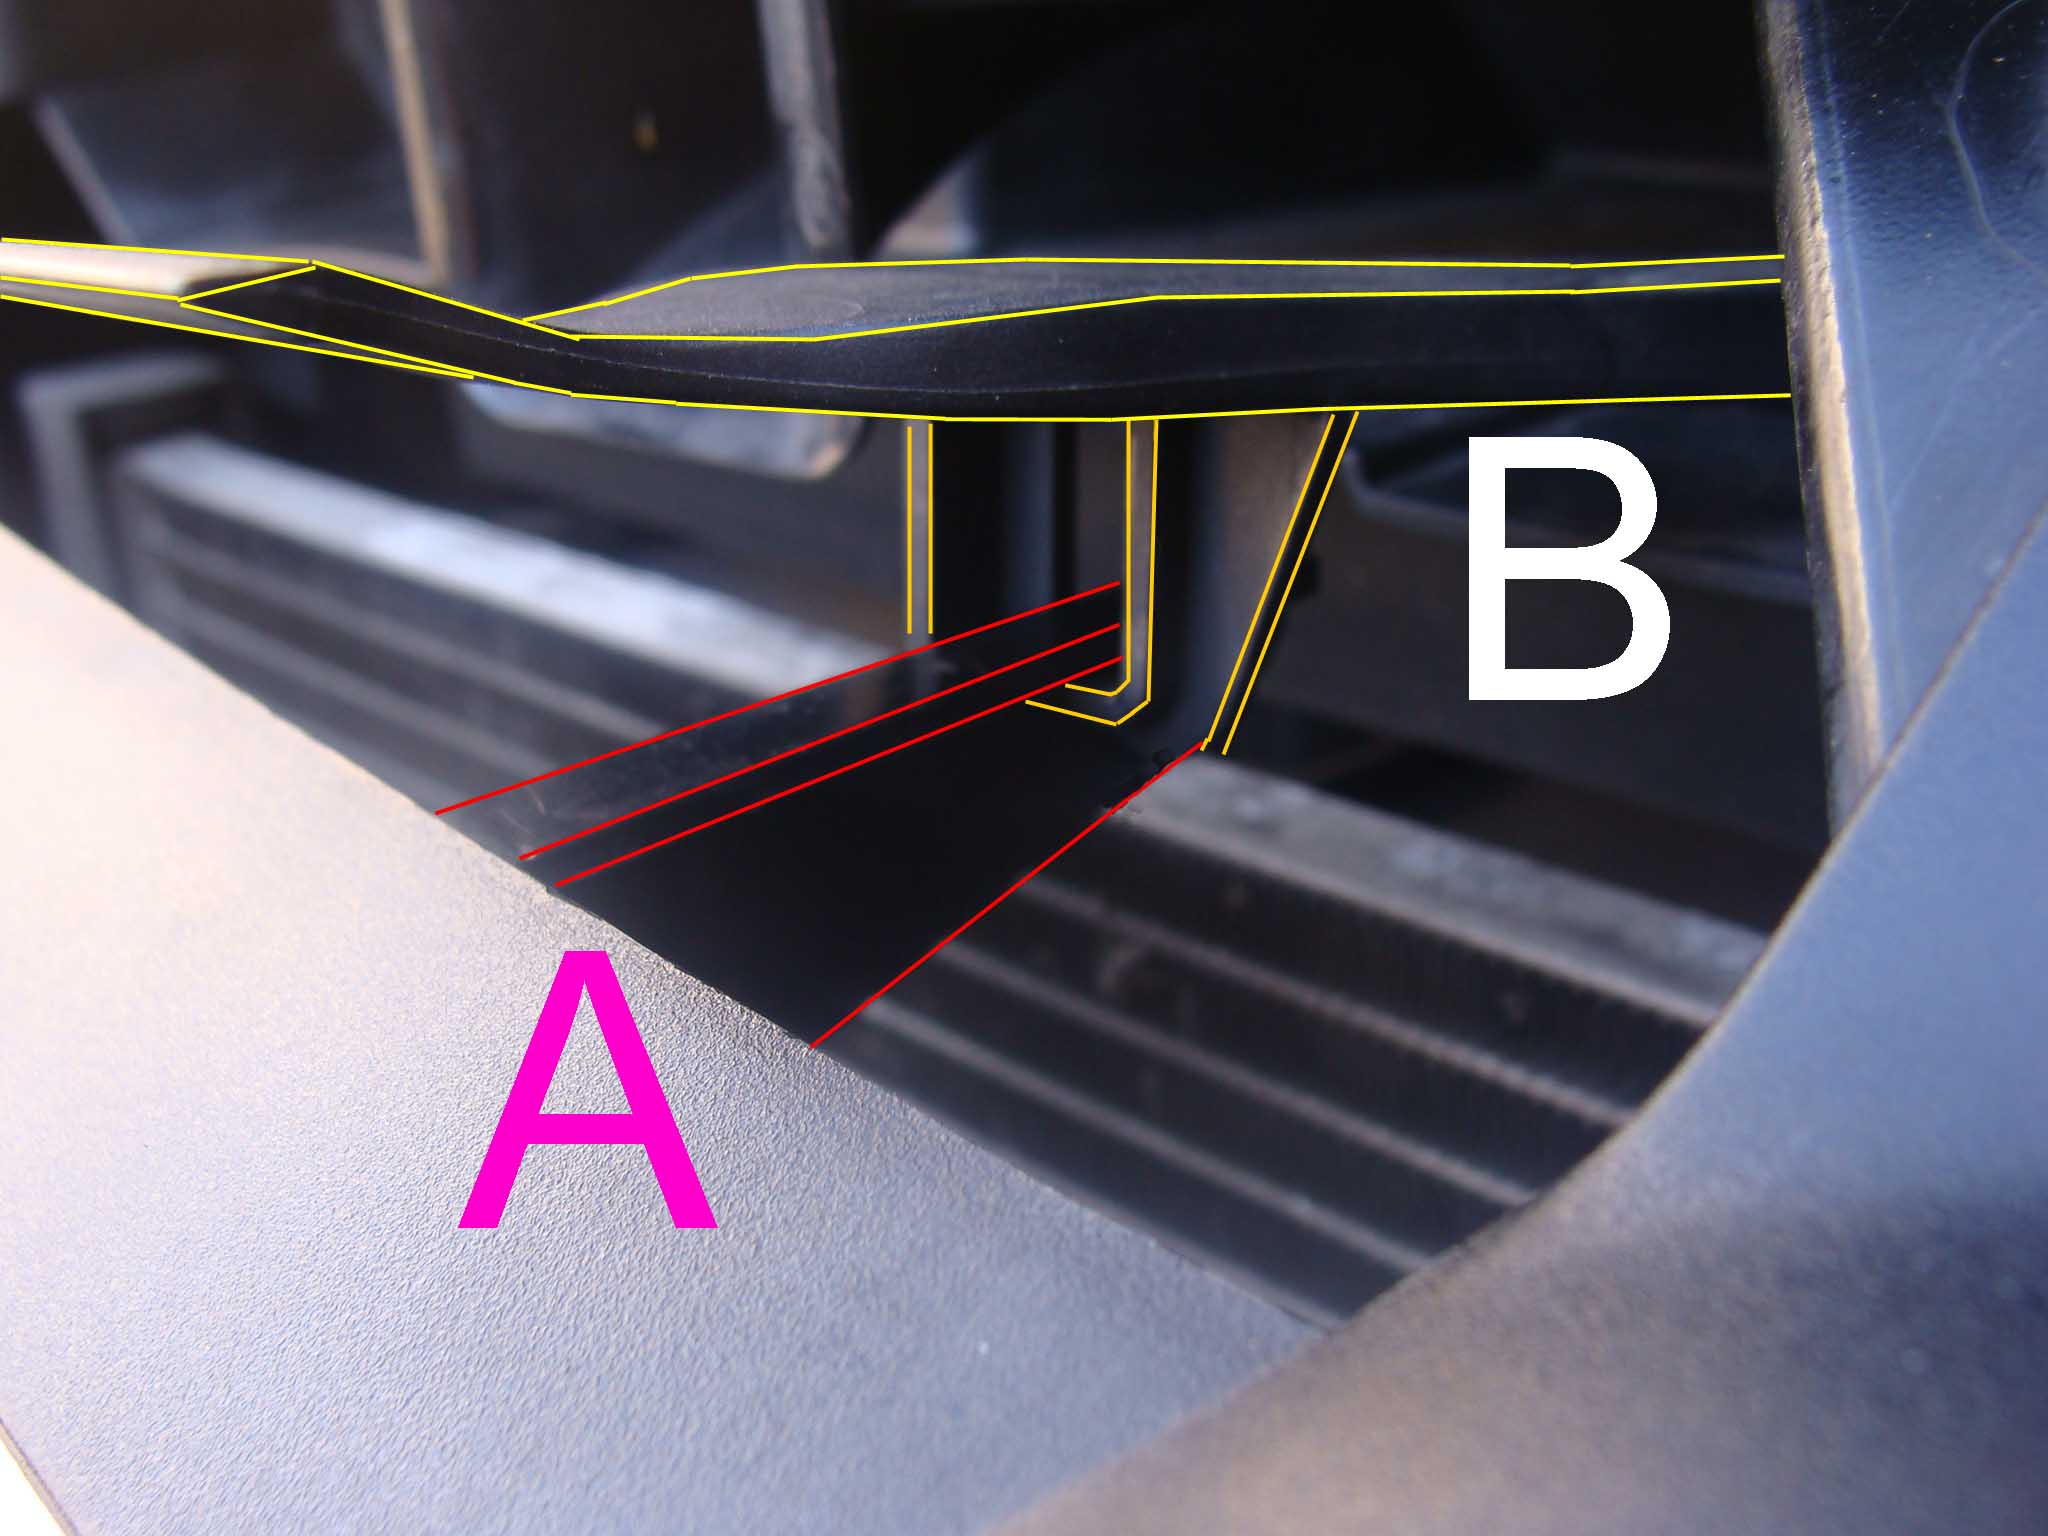
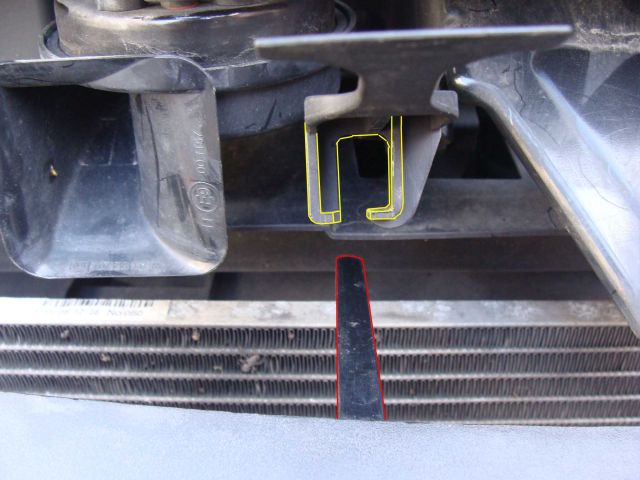
WARNING
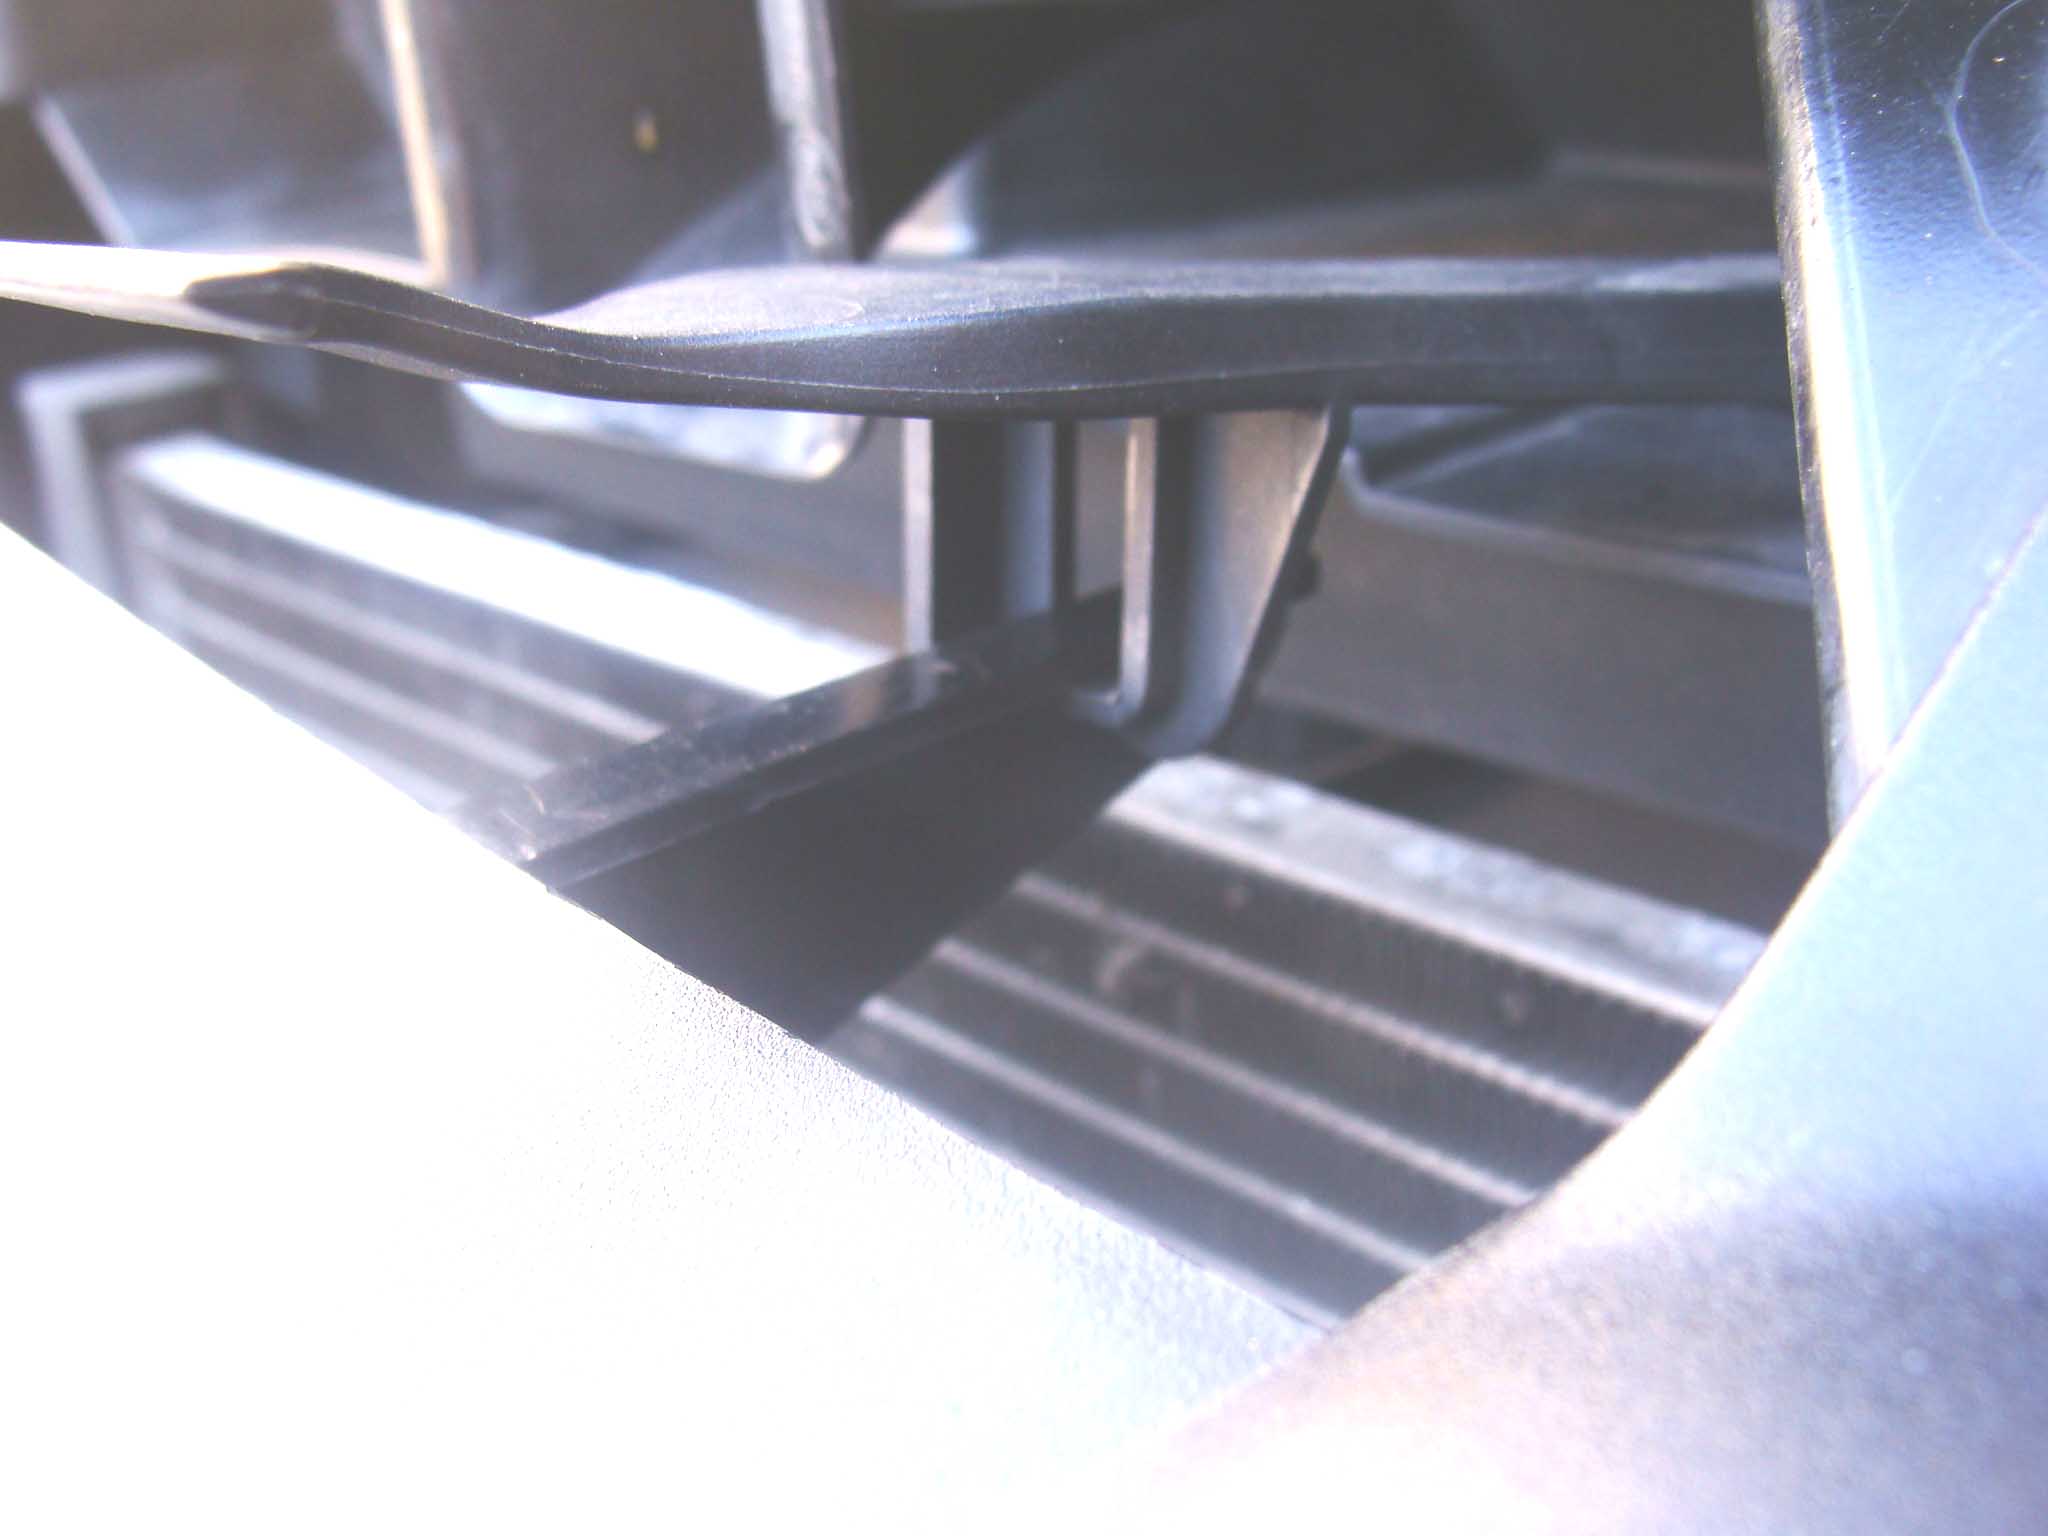
When you ease the spoiler/bumper back into position it is vital that you ensure the plastic spoke A situated central to the grill goes through the square section B of the bonnet release lever. IF YOU FAIL TO FOLLOW THIS GUIDANCE YOU WILL NOT BE ABLE TO RELEASE THE BONNET AS THE LEVER WILL JAM UNDER THE FRONT EDGE OF THE BONNET AS YOU ATTEMPT TO CLOSE.
15. loosely fit retaining bolts in the spoiler, either side of the grill.
16 Refit the clip and insert pin above the Mercedes badge.
16 Replace the 8mm bolt in the upper internal wing (secures spoiler/bumper to quarter panel
Do not fully tighten Note that there are holes and projecting pegs that need to be aligned and engaged when bringing the two parts together.
Ensure the spoiler/bumper is housed correctly, fully tighten the bolts either side of the front grill
18. Compare the two sides of the car to ensure you have installed the spoiler/bumper to quarter panel correctly all the gaps should be the same.
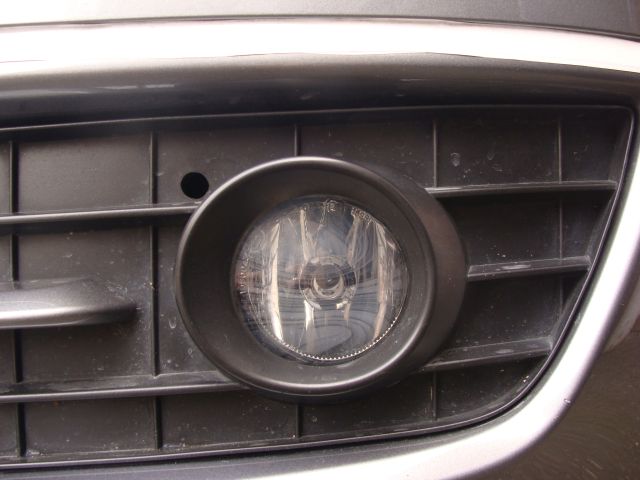
Front Fog Lamp Bulb
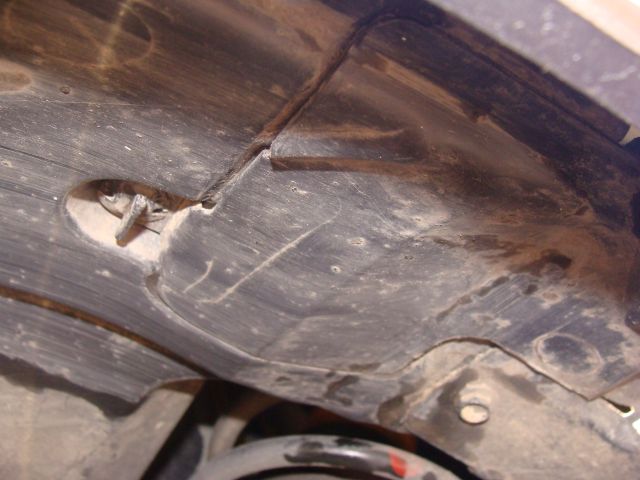
1. Remove the two clips from the inner plastic wing (see above for details)
2. Remove the 8mm bolt which hold the spoiler /bumper the to the quarter panel (as above)
3.That action will allow you to ease the inner wing lining from the front of the wing. Hold the plastic inner wing back and you can now get at the fog lamp bulb holder.
4.There may be a need to remove one screw from the bulb holder to replace the bulb. (See photo )
Spare Bulb's
My advise in respect of spare bulbs would be not to purchase until you have confirmed what bulbs your vehicle is fitted with, different headlamp styles may require different bulbs. Mercedes Benz Main dealers and independent Mercedes-Benz garages should be able to supply the correct bulbs using you Vin number. Other outlets may not have the correct information available.
The Mercedes Benz Bulbs in the bulb kit Part Number B6 681 0021 are:-
I have yet to confirm the bulbs in the kit are the same as fitted to the headlamp's.
2 x PY21W For use in Front indicators ( coloured orange)
2 x WY5W Font Indicators
1 x P21/4W Twin Element, Clear
2 X 12V 21W E4 H4 single Element, Clear
1 X W5W
2 X Festoon Clear (Interior light)
1 x N072601 012803 Headlamp bulb location Not defined.
1 X N400809 000007 Headlamp bulb. Location Not defined
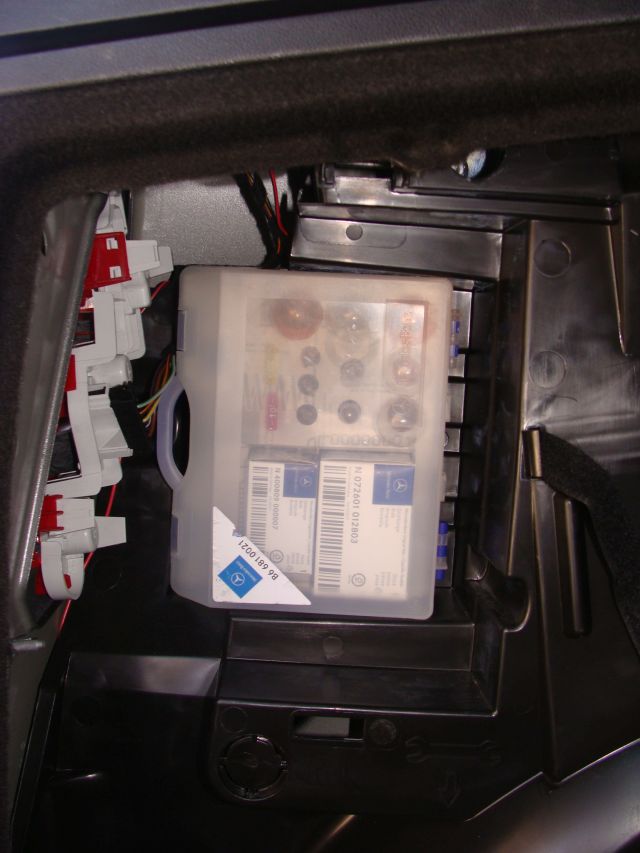
3 X Standard spade fuses, 1x 10amp Red, 1 x 20amp Yellow, 1 X 15amp Light Blue.
Bulbs specified in owners handbook issued with my vehicle:- W169/A150/2009 Front
Lights in Outside Mirrors LED/29 Note (LED's must not be replaced as they are designed to have an unlimited life)
Parking lights(Side lights) W5W
Main beam Headlamp /30 H7 55W
Dipped beam Headlamp H7 55 W/30 Halogen or D1S 35W *32 bi-xenon
Indicators Front PY21W
Front Fog Lamps H11 55W/33
Rear Third brake light in 5th door LED (see note above re LED)
Licence Plate C5W
Rear Fog lamp P21W
Rear light(Tail) P4W
Rear indicators PY21W
Reversing light P21W
Brakes light P21W
It is worth noting that in the event of a rear/tail light bulb failing that the reversing light bulb can be used , being replaced as soon as possible.
Note Front lights allow you to see where you are going and your speed can be adjusted accordingly if a bulb fails .
Rear lights enable other drivers to see YOU. Replace failed light bulbs in the rear of your vehicle as a matter of priority It may save you being involved in an incident(accident) with serious consequences.
There is reference in the handbook to vehicles fitted with Bi-Xenon, headlights which states that vehicles with Xenon headlamp's should always these changed by a Mercedes-Benz workshop. That applies if you have the D1S 35 *32 unit fitted.
In my W168 I ran LED bulbs in the rear light cluster and front parking/side lights. However when I tried them in the W169 they would not function, So I now observe the MB guidance of only fitting the bulbs specified.
Be Seen at Night
The need for your vehicle to be seen at night whilst driving and being parked cannot be over stressed.
The UK highway Code extract Parking at night (rules 248 to 252)
Rule 248
You MUST NOT park on a road at night facing against the direction of the traffic flow unless in a recognised parking space.
Laws CUR reg 101 & RVLR reg 24
Rule 249
All vehicles MUST display parking lights when parked on a road or a lay-by on a road with a speed limit greater than 30 mph (48 km/h)
Law RVLR reg 24
The above Requires vehicles to be parked in the direction of travel which ensures vehicles approaching the parked vehicle will see red reflectors to the rear. However the trend today is to have clear lens on rear light clusters with coloured bulbs which display red when operating. This trend does not afford the occupants of the car or the vehicle any protection if broken down with battery failure or defective bulbs.
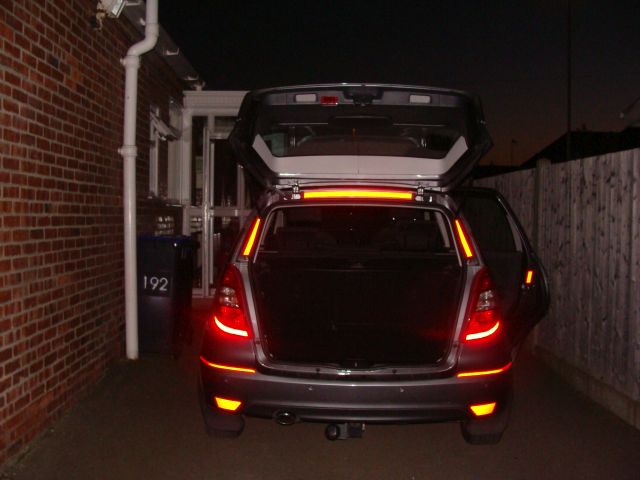
I mentioned earlier that 'Advantgarde' and 'Elegance' models have red warning lights in the doors which are lit when the door is opened BUT the Classic SE has not, apart from the 5th door.
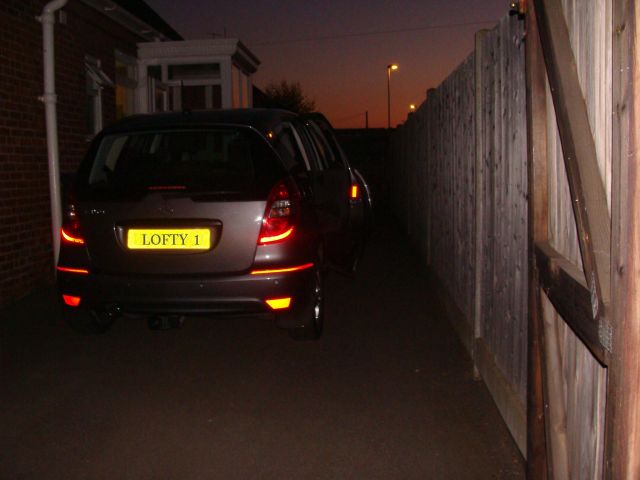
On my own Classic SE I have ensured that my occupants and I have at least the same protection as the other models by using reflective tape which lights/reflects as vehicles approach the rear car at night. If the battery has failed or you are changing a wheel having suffered a puncture, good warning is given to the drivers approaching you vehicle even in the darkest of condition but I hear you say I have a warning triangle!
When did you last try to erect it? And will you drive off without it like many drivers do?
Being a Classic SE model , it comes without the chrome strip let into the rear and front spoilers although the recess is still present, this has allowed me to insert red reflective tape at the rear and white at the front, as well as a panel where the additional reflectors would be on the 'B' Class models.
I have also put approx two inches of tape on each door which displays when the door is opened but unlike the powered lamps on the other models it is visible without battery power.
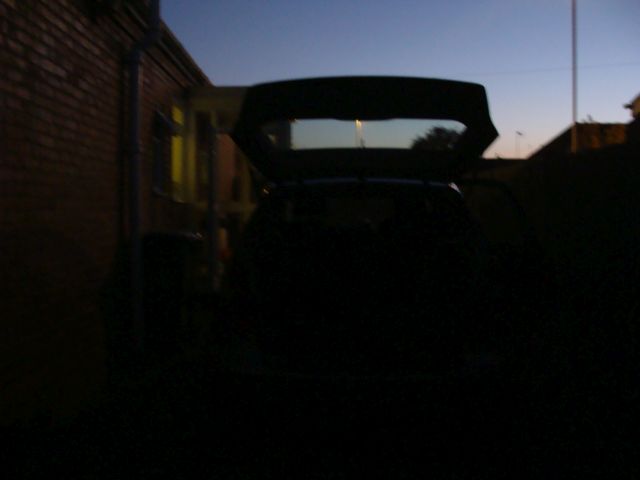
The light reflection in the two bottom photos is as a result of a camera flash only but would be as seen by vehicle approaching the parked vehicle. The intense area of reflection is the rear lamp cluster reflectors.
There are no lights switched on in this photo although the warning light at the top of the 5th door is lit.
With and without the 5th door open the reflective tape clearly warns approaching drivers of its presence, giving other drivers adequate warning of the vehicles presence and affording more protection for the cars occupants. It is interesting to note that there is a powered light which is ON in the photo of the boot open BUT it is not as visible as the reflective red tape.
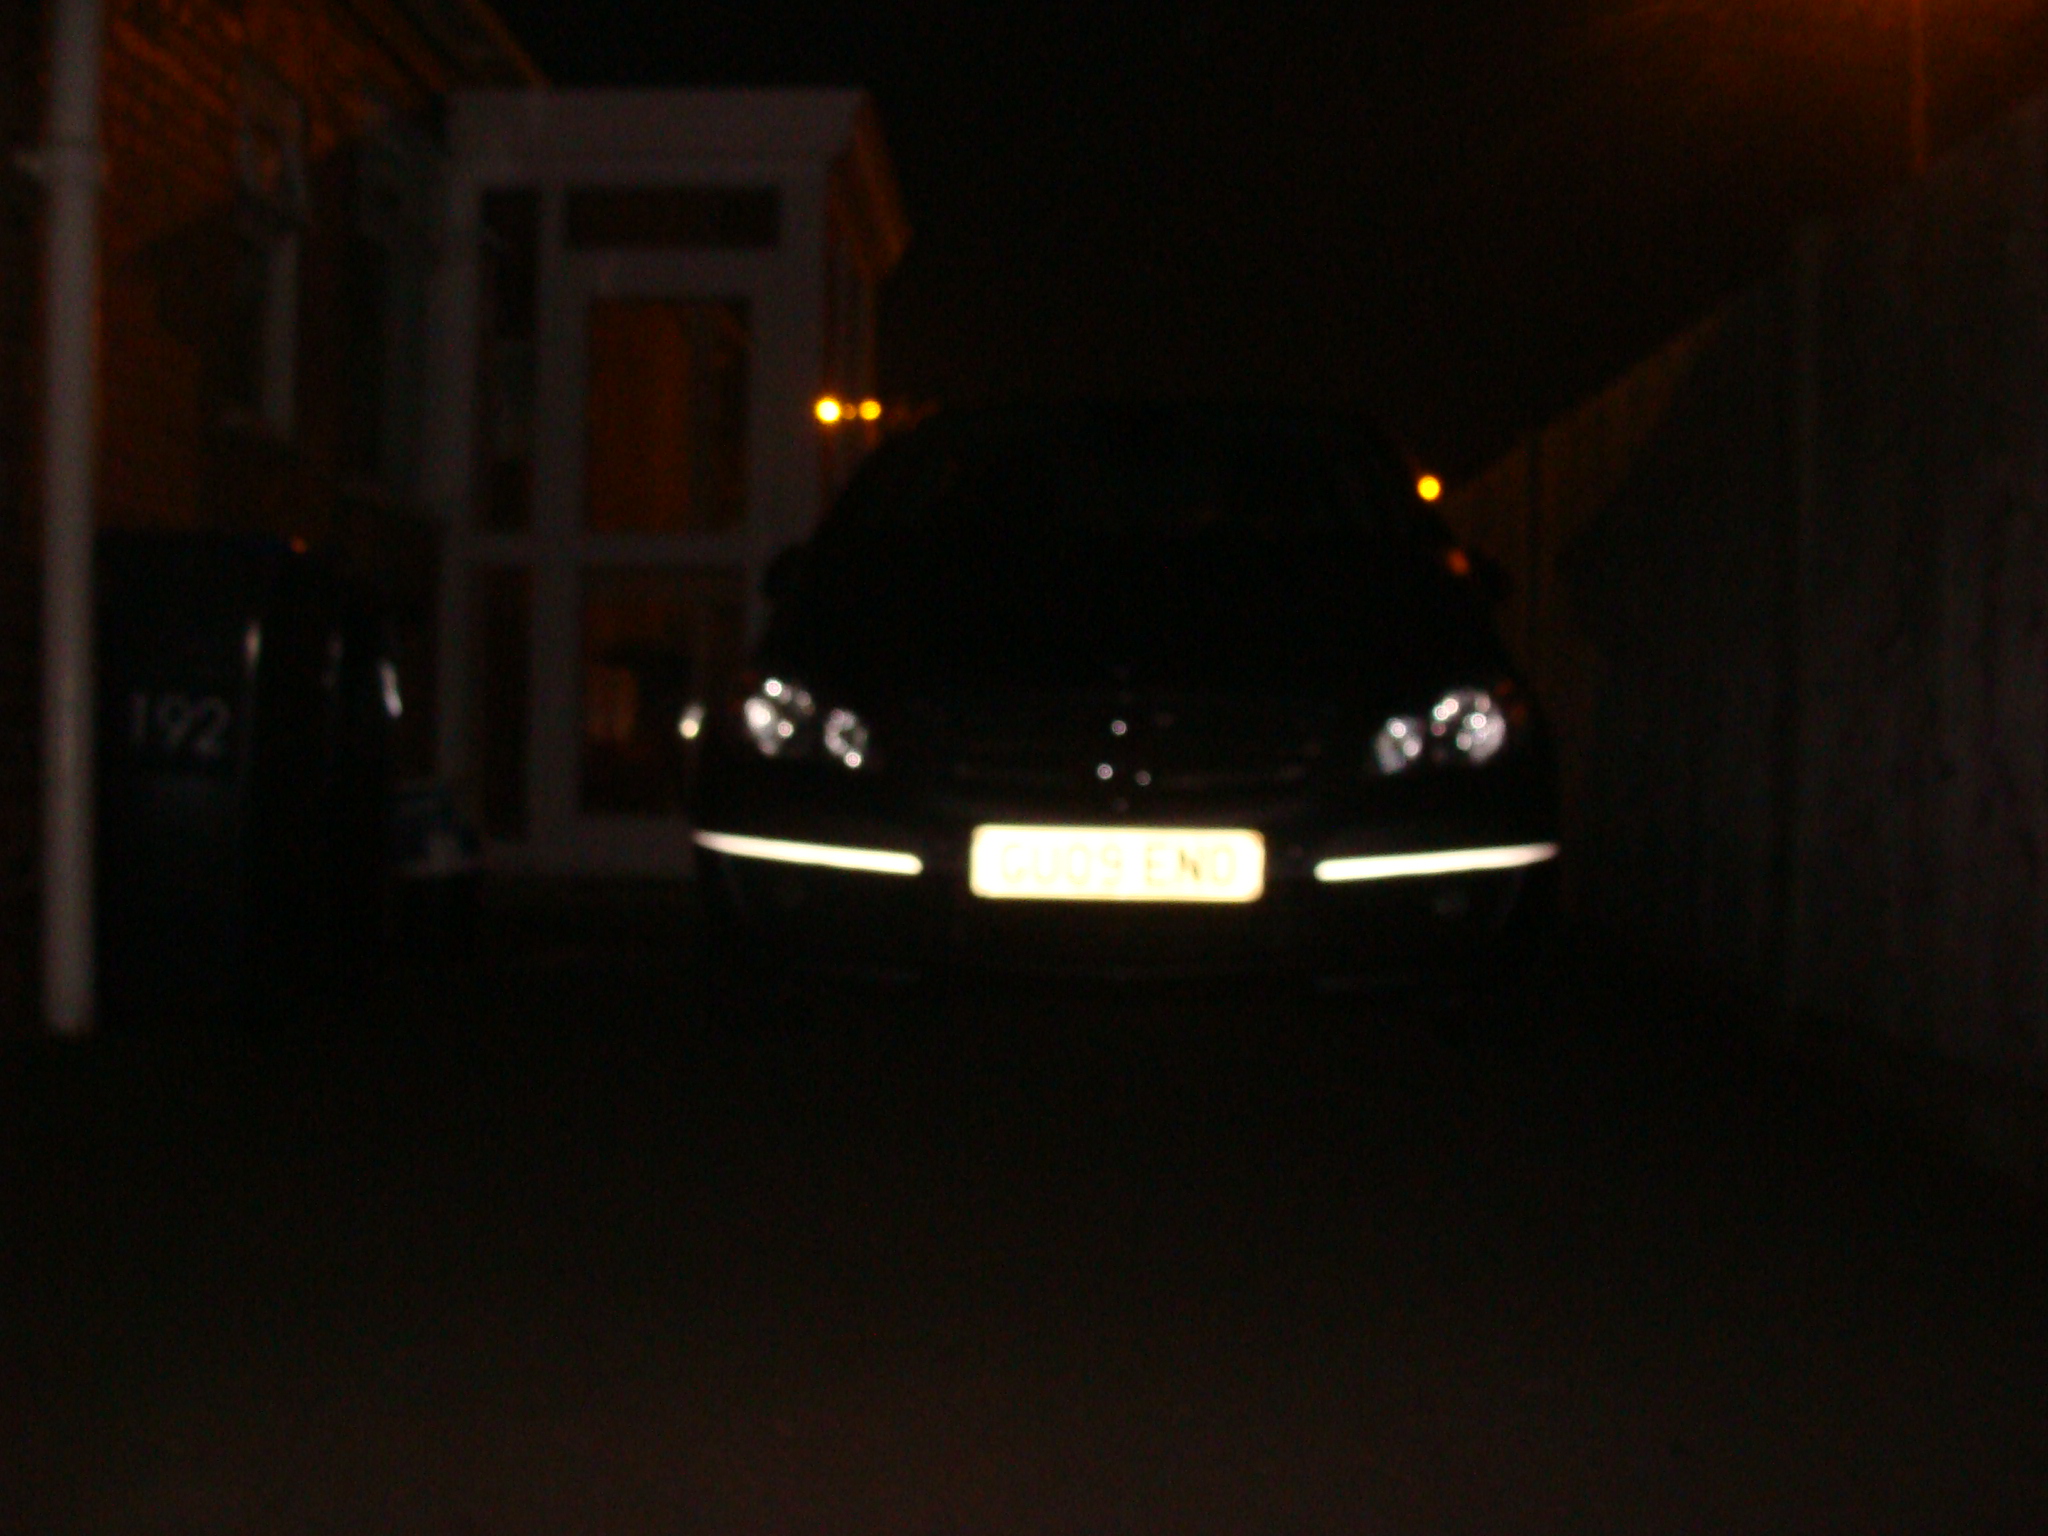
Fitting the white reflective tape in the recesses in the front spoiler also has a use, lit up by oncoming vehilces the full width of the parked vehicle can be seen, making use of recesses in the front and rear bumpers left blank by Mercedes-Benz rather than fit the chrome strip as with other models of 'A' Class, on a classic SE model /2009 but they can be used for a practical purpose.
Supplied by:- Affixit.co.uk Reference Red- AFIRT25X10-R and White-AFIRT25X10-W I purchased a roll of white and red reflective tape quite cheaply off e-bay UK and have masses left to replace that fitted should it be necessary.
I also carry reflective tabards for driver and passenger, reflective tabards are now very reasonably price
Lofty
 The main lighting switch has a number of positions:-
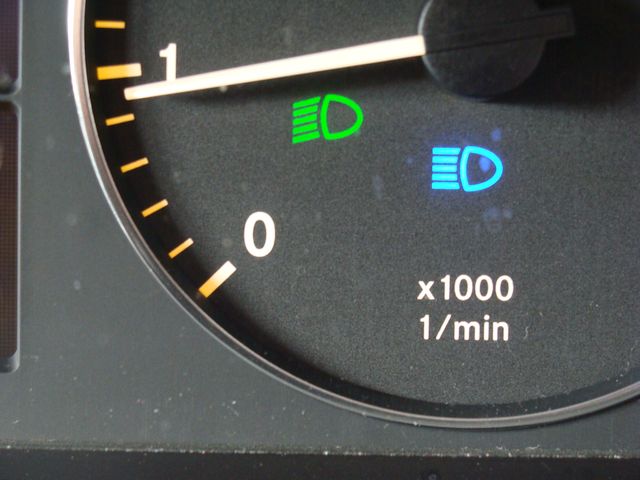 Both the green and the blue headlight icon will show when the main beam is ON.
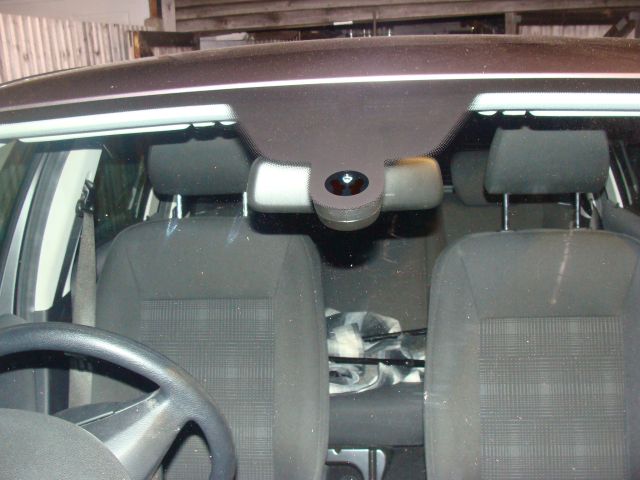
 7. Replace the defective bulb in the bulb holder .
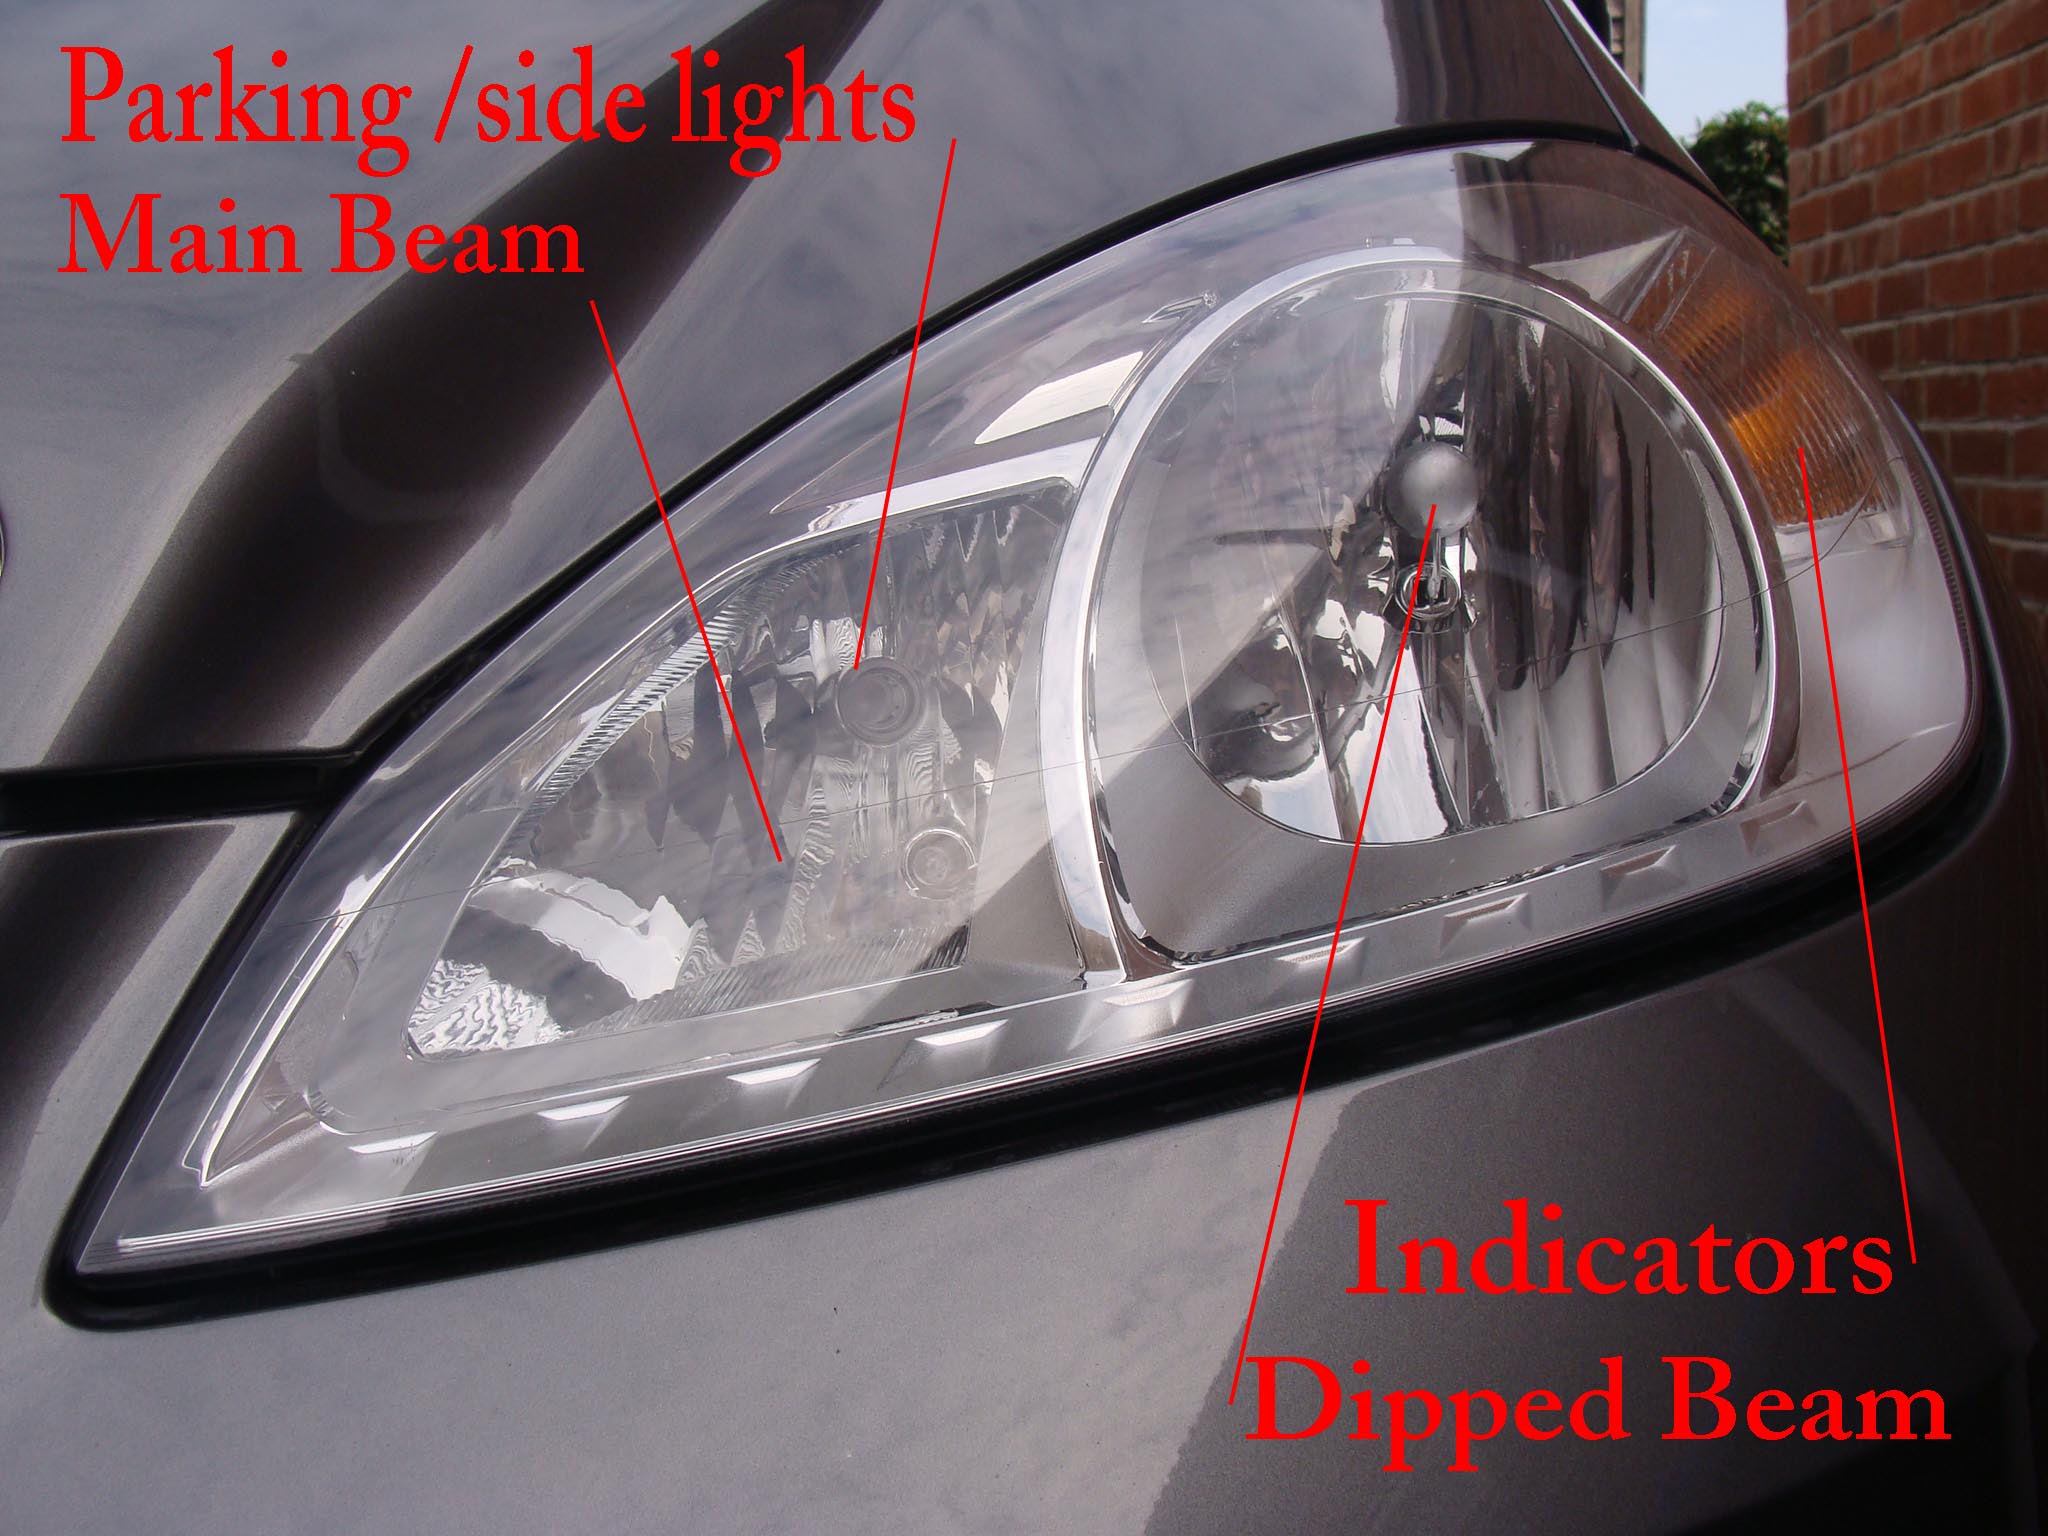 1. Identify the defective bulbs location by operating the main lighting switch.
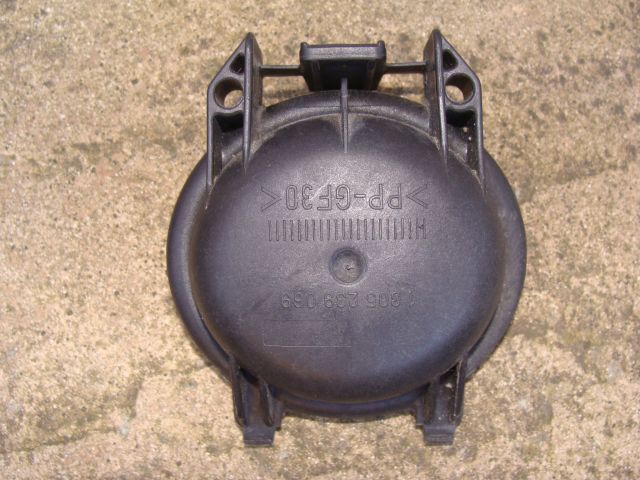

 2. Removing the 10mm bolts securing the spoiler
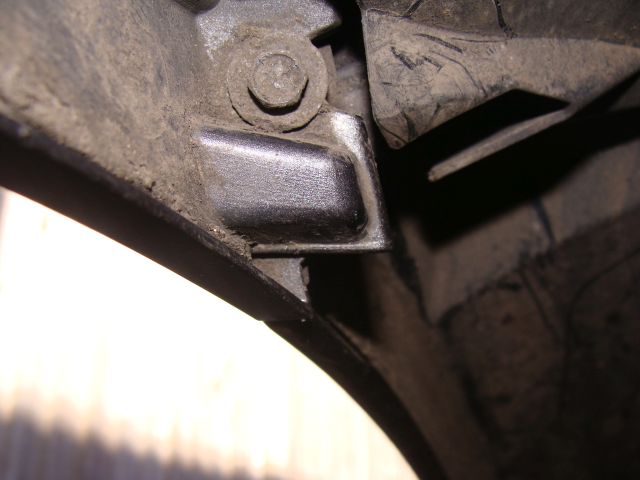
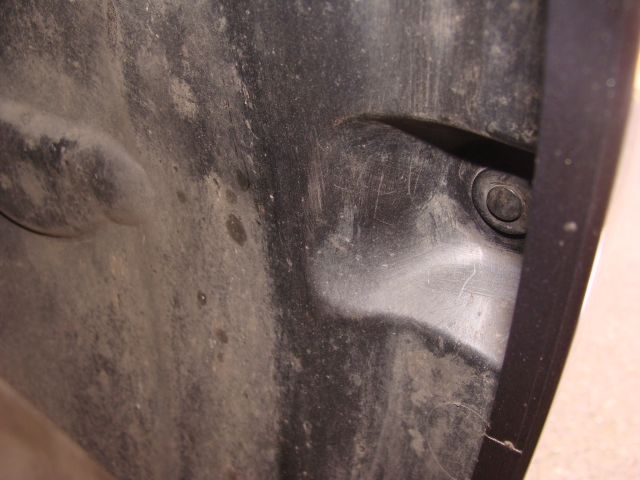
 5. Remove the two clips holding the plastic inner wing in place.
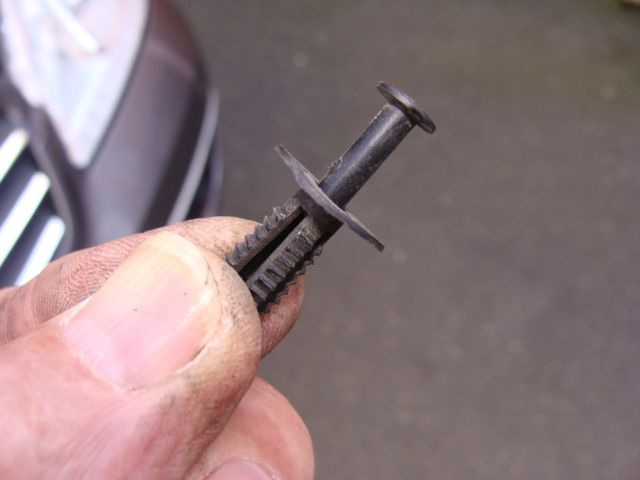
 16 Replace the 8mm bolt in the upper internal wing (secures spoiler/bumper to quarter panel
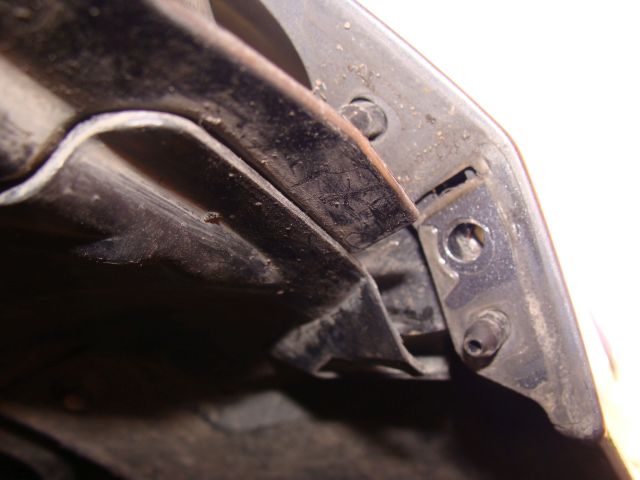
 My advise in respect of spare bulbs would be not to purchase until you have confirmed what bulbs your vehicle is fitted with, different headlamp styles may require different bulbs.