It is very interesting to note that my 2009 A class W169 is fitted with steel spring cup and not aluminium as fitted to the W168 and other models. I cannot verify that earlier W169 or 'B' Class had the same components fitted. Certainly there was an instance a couple of years back where the spring tail which had broken caused the spring cup to fail which allowed a broken spring tail to cut the entire inside of the Tyre wall leading to an immediate flat, the occupants where not harmed but were very shaken. This may to my mind point to the 'B' Class at that time being fitted with the same as the W168 A class, suspension struts with a aluminium cups. If that is the case then there is every reason to believe that earlier W169 were the same. If you have such a vehicle then you might like to check that there has been a recall to change was was known to be a problem by owners of these cars although Mercedes denied that there was ever a problem .
This incident was reported to Mercedes Benz by the owner and also VOSA in the UK. As had other instances of spring breakage and spring cups failing.
As far as I'm aware Mercedes-Benz have never had a recall on earlier W169 or 'B' Class. If you know better I'd appreciate any information so that other owners can follow up on what can be a real problem and costs many £££ to correct. You may have had occasion to replace your struts on the W169 recently. Were the Mercedes Benz replacement struts different from the ones removed ? i.e. made of steel?
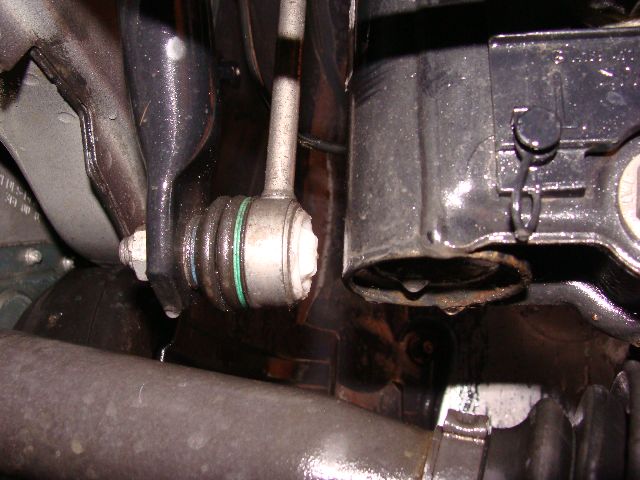
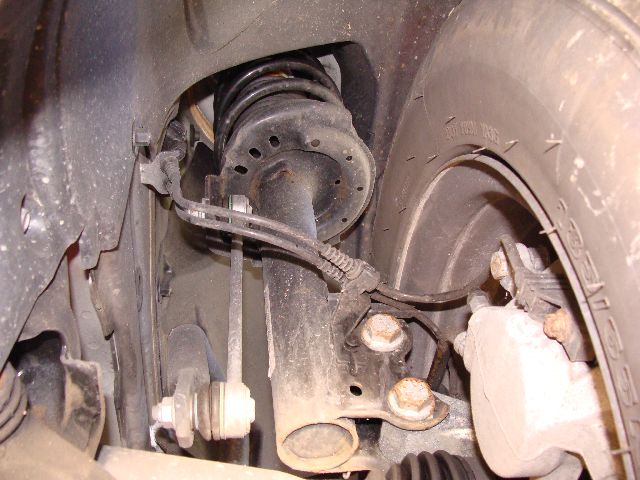
AS can be seen in this photograph on the 2009 model W169 the spring cup is longer aluminium which has caused so many problems on the W168 And some 'B' Class. It is also noted that this steel cup has holes provided for water drainage, these were not present on the aluminium cups, this modification can only extend the life of the suspension struts. , Albeit I did not have problems with mine on the W168 which were the original units when I sold it this year 2012
The condition of the components after only three + years of service life is not helped by the road grim which has built up, keeping these parts clean and sprayed with duck oil will protect them from rusting, which can be seen already forming on the bolt heads, a job I will do as soon as possible.
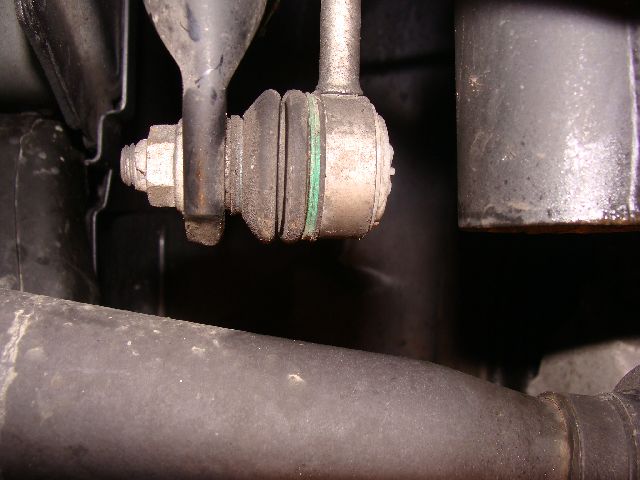
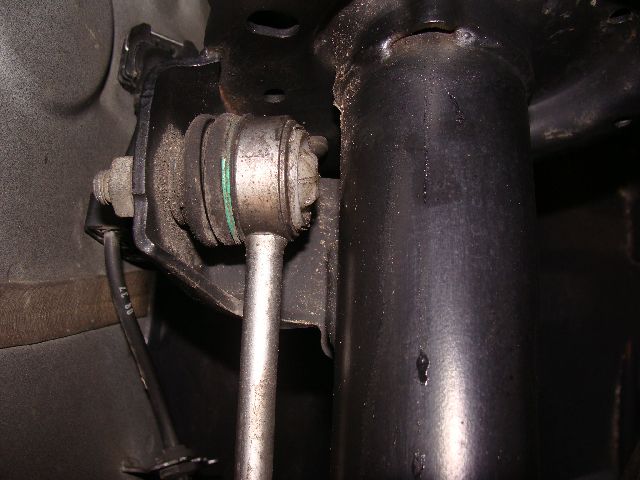
This photo shows the spring cup more clearly and just a good wash with a pressure washer of the parts has improved their appearance.
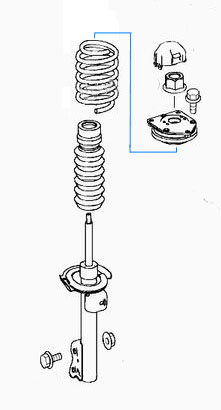
If for any reason you have to remove the suspension struts the top securing fixings are easily accessed. The fixings in this case are 'Torx' bolts size E12 as well as the strut retaining lugs being built into the black cap on the head of the strut, once the securing bolts are removed along with the bolts removed from the wheel hub assembly depressing the two black tabs will allow the strut to be withdrawn through the vehicle body work. when returning the units these clips will automatically snap through the bodywork and support the strut while the securing fixings are re-fitted.
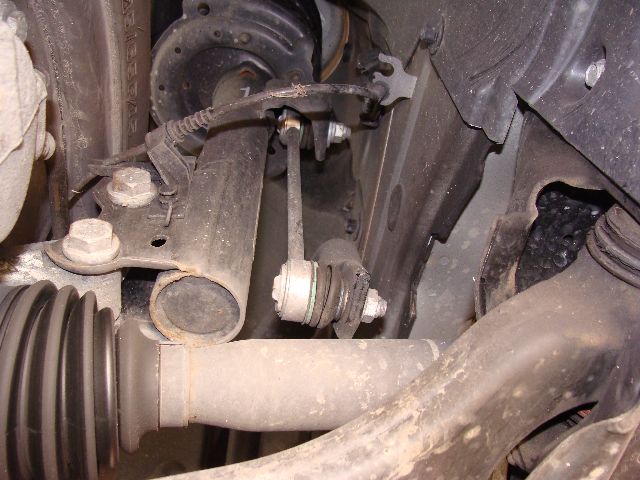
The drop links are longer than on the previous model , with the bottom end being fitted to the enlarged torsion bar. It will be in interesting to see if these last longer than on the W168 model, albeit I only replaced mine twice in ten years of ownership.
If working on the front suspension ensure the various cables are secured by the clips provided as seen in the above photographs, this will prevent them from becoming damaged. These are easily dislodged, new clips can be purchased from Mercedes-Benz Parts departments. Use your VIN number to ensure you obtain the correct parts.
If we can apply logic then the drop links should be easy to remove and replace:-
1. To maintain overall balance of the car change drop links in pairs.
2. Ensure hand brake is applied, Chock rear wheels
3. Slacken wheel bolts on front wheel.
4. Jack up front wheel and remove
5. Slacken the drop link securing bolts top and bottom (DO NOT REMOVE)
6. Using a second Jack, place jack under torsion bar. Raise the jack sufficiently to take the tension off the drop link swivel joints.
7. Remove the securing nuts on the drop link, top and bottom. If the swivel joint bolt revolves with the nut , use a suitable 'Allen key' or 'Torx bit' in the end of the bolt section to hold secure while the nut is being undone.
Note because of the close proximity of the body work to the top nut, it may not be possible to secure in this way, if this is found to be the case undo the top nut, until it reaches the end of the thread, replace nut giving one full turn , this will retain the drop link in place when the load is removed. Now raise the second jack under the torsion bar, protect as necessary from damage to paintwork/protection as mentioned in 6. above .
8. Remove the defective drop link, Normally one end wears more than the other, if removing for inspection ensure both swivel joints attached to the drop link are firm and stiff when moved, any play in these joints can cause a rumbling noise when driving over uneven surfaces.
9. Replace and re-tighten the securing nuts, 'Lock-Tite' is not required if new 'Nyloc' nuts are being used. You may need to secure the end of the bolt to stop it turning within the swivel joint.
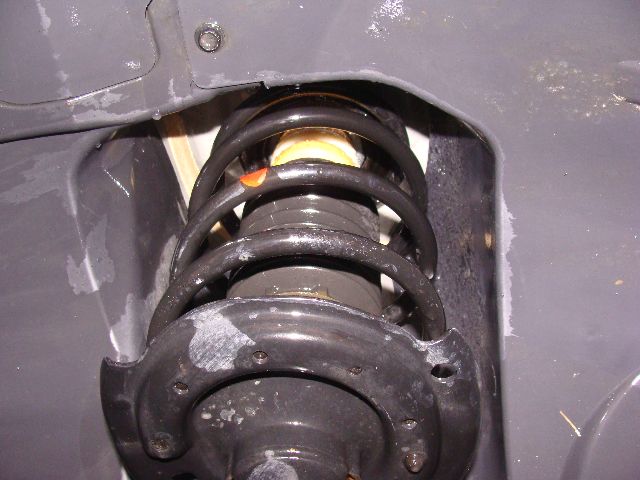
 This photo shows the spring cup more clearly and just a good wash with a pressure washer of the parts has improved their appearance.